Making screenshots is helpful for both your professional work and personal use. If you need to know how to SS on Mac, this article is exactly what you seek. We'll give you thorough guidance on how to do it quickly and efficiently. Whatever you need to save – a whole screen, a specific window, or a proportional part of your screen, we've got you covered. It is perfect for creating tutorials, saving the necessary information, and sharing moments with your PC's screen. The article will make making screenshots on your Mac easy and fast. With our easy guidance, you'll quickly turn into a screenshot guru.
Part 1: The Best Way to Take a Screenshot on Mac
AVAide Screen Recorder is a powerful tool for taking screenshots on a Mac. It offers a full suite of services that increase productivity and output quality. Using AVAide Screen Recorder, users can efficiently record the information they want to visualize, reduce the procedures in their workflow, and develop more efficient communication by using visual aids that are easy to interpret.
Customizing hotkeys and real-time editing capabilities make this screen grabber highly efficient for capturing. The streamlined process of the application guarantees that users will capture screens without any problem. The blend of functionality and intuitive design sets this application apart and makes it an application for professional and academic purposes. Follow the steps below to learn how to take a screenshot on a Mac:
Step 1Downloading and Open the AVAide Screen Recorder
First, download and install the AVAide Screen Recorder software using the download buttons below. Once the software is installed, run the software. An amicable user interface will welcome you through the software, and navigation along the software will be a piece of cake.
Step 2Choose the Screenshot Options
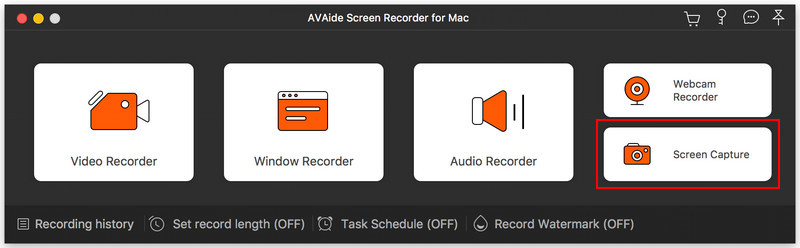
Click from the program's main interface and select the Screen Capture button. This will put you into screenshot mode, where you select an area from the computer screen you want to capture.
Step 3Select the Area that Needs to be Captured
You can screenshot an entire screen, a window on the screen, or an area of your choice. For an entire screen, you click anywhere on the screen. If you opt to screenshot a specific window, you can hover your cursor on it and click to select it. To screenshot a particular area of your choice, you click and drag to define the specific area you wish to screenshot. The program provides clear instructions and options for correctness in the selection.
Step 4Edit and Save the Screenshot
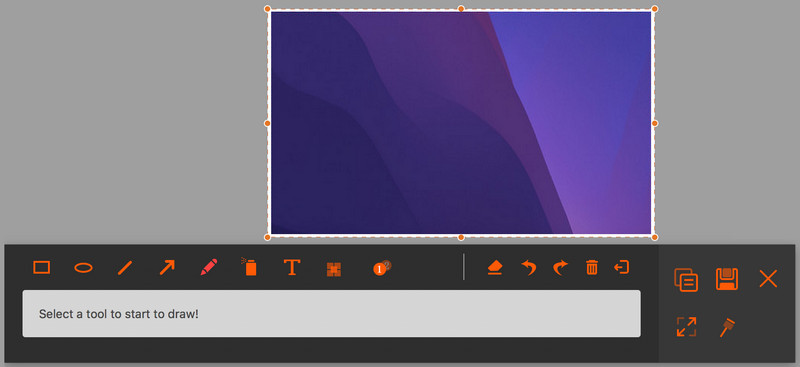
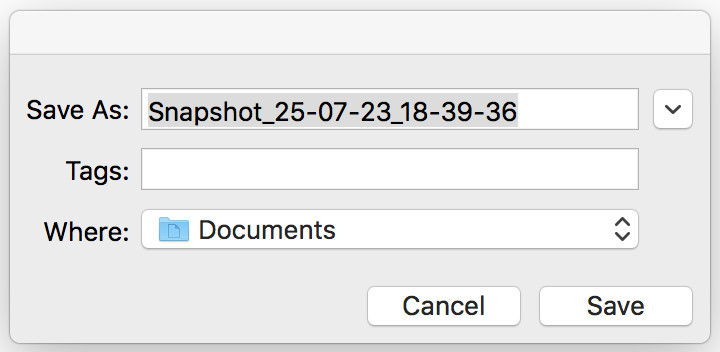
After you have captured the screenshot, the AVAide Screen Recorder offers built-in editing options in real time. You can highlight, annotate, or add text to the screenshot. Once the edits are complete, click on the Save option. The screenshot will be saved in the place that you find suitable.
In addition to learning how to SS on Mac Air or Pro, you can share directly via email or other available sharing options. The AVAide Screen Recorder tool makes recording and managing screenshots on your Mac easy.
Part 2: How to Screenshot on Mac with Hotkeys in Default Ways
You can easily take a screenshot on your Mac using hotkey combinations. A few built-in hotkeys help capture the whole screen, its partial area, or even a single window. But what if you want to save these screenshots on the desktop or clipboard? Well, default methods make it more straightforward to take screenshots and manage them on your MacBook or Pro. With that, here are some ways to help you get started.
1. Entire Screen
Press Shift, Command (⌘), and 3 to print your Mac's whole screen. It would be best if you had it perfect whenever you ask how to ss on a MacBook or a Mac Pro. The screenshot of the picture will immediately be saved on the desktop.

2. Selected Portion
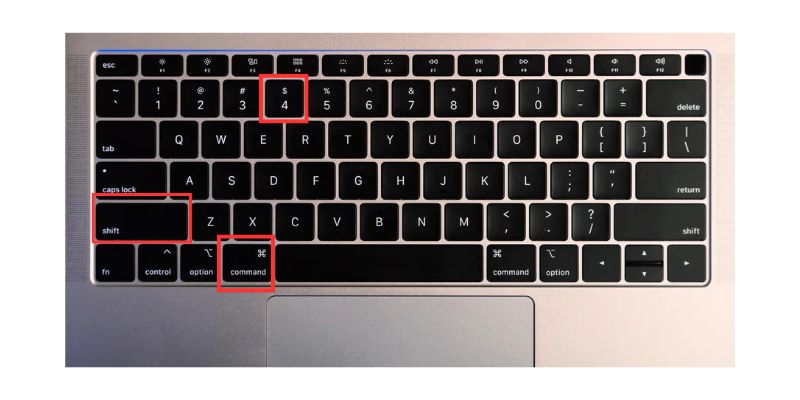
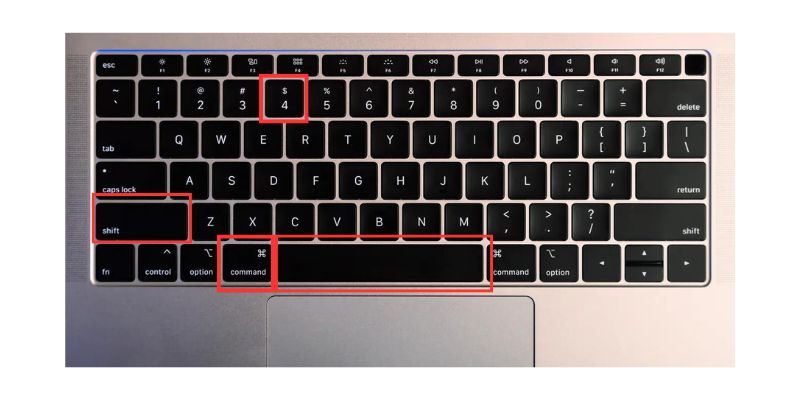
To capture a screenshot for a region that you specify on the screen, you can use Shift + Command (⌘) + 4. The pointer will change to a crosshair. You can then click, hold it down, and drag it to specify the region you want to capture. After that, release the mouse button to grab the screenshot. This is particularly useful if you would like to crop a screenshot on your Mac as you take it.
3. Particular Menu or Window
To capture the screenshot of an actual menu or window, one should press the buttons Shift + Command (⌘) + 4 and then tap the Spacebar. Your mouse cursor will convert into a camera. Click on your desired menu or window to capture a screenshot. This is the ideal process that users needing to understand how to use the Mac grab screenshot feature effectively must adopt.
4. Touch Bar (MacBook Pro)
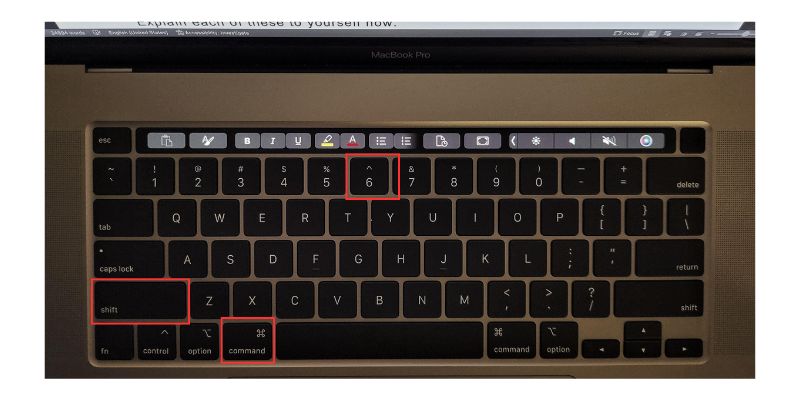
You can also take a screenshot of the Touch Bar when using a MacBook Pro with a Touch Bar feature by pressing Shift + Command (⌘) + 6. This is a unique feature that can be availed only by MacBook Pro users; it will take a screenshot of the complete Touch Bar screen. That is how to SS on a Mac Pro.
5. Grabbing from Clipboard
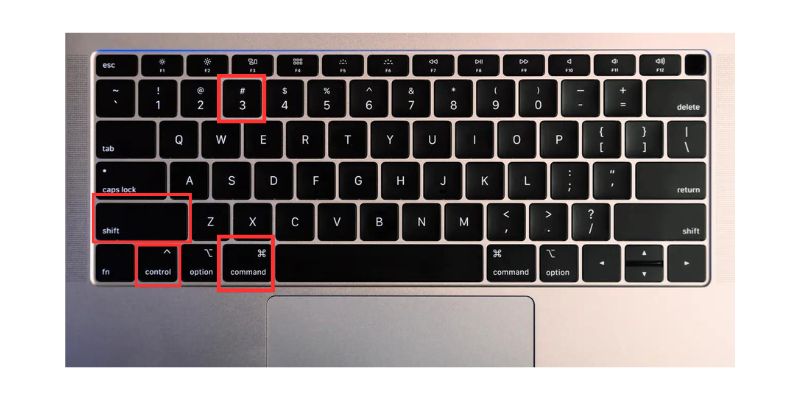
If you would rather the screenshot be copied instead of saved on the desktop, you need to add Control to the other hotkey combinations. For instance, Shift + Command (⌘) + Control + 3 will copy the screen with a Mac clipboard screenshot. The screenshot that you copied can be pasted onto a document or image editor by pressing Command (⌘) + V. That is how to paste a screenshot on a Mac.
6. Capture a Selected Portion and Save to Clipboard
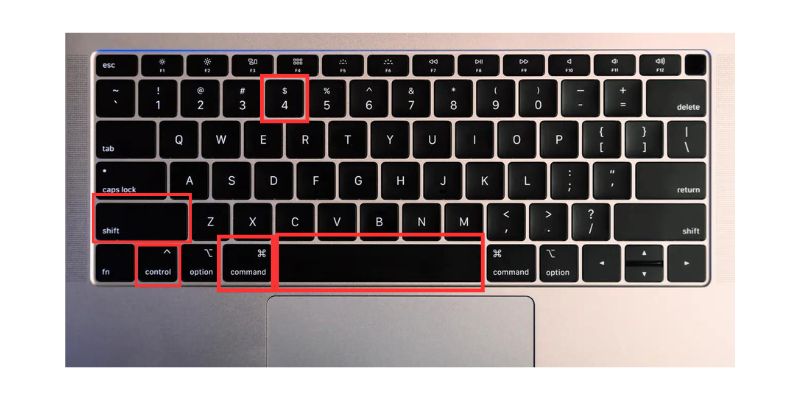
To take a selected area screenshot and save it to the clipboard, press Shift + Command (⌘) + Control + 4. The pointer will change to crosshair mode, where you can let go of a click, drag, and select the area. Once you have chosen your area, let go of your click, and the screenshot will be saved to your clipboard.

7. Capture a Specific Window and Save to Clipboard
To screenshot the active window and copy it to the clipboard, use this combination to screenshot it and send it to the clipboard. To make this happen, hit Shift + Command (⌘) + Control + 4 and then space. This changes the cursor to a camera cursor; click a window to capture a screenshot and copy it to the clipboard.
Part 3: 7 Other Programs to Take a Screenshot on Mac
Mac computers have decent screenshot utilities, but you can stick with them. Many third-party apps have more features to get the most out of your Mac when taking a screenshot. These are strong integration with cloud services, powerful controls, and customization. Endowed with these, here are eight alternatives to turbocharge what you can do with a screenshot on your Mac.
1. Snagit
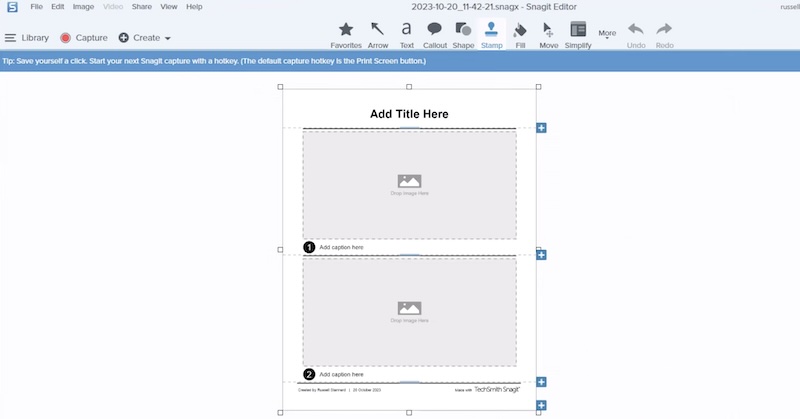
Snagit is a fantastic choice if you're looking for a powerful and versatile tool to capture screenshots on your Mac. It has features like capturing scrolling screens, annotating images, and even recording videos. Snagit makes it easy with its user-friendly interface if you're trying to figure out how to take screenshots on a MacBook. You can customize the screenshot shortcut to fit your workflow, ensuring a seamless experience. Plus, Snagit's quick key functionality allows immediate access to various capture options, making it a must-have for professionals and casual users. Its robust editing tools let you enhance your screenshots with effects, callouts, and stamps, making your visuals informative and appealing.
- Pros
- Extensive features, including video recording
- Customizable screenshot shortcuts
- Powerful annotation and editing tools
- Ideal for professional use
- Cons
- It's paid software with a higher price tag
- It might be too advanced for casual users
- It takes some time to learn all its features
2. Lightshot
Lightshot is a straightforward and lightweight app for taking screenshots on your Mac. It's easy to use, making it perfect if you're learning how to take screenshots on a MacBook. One of its best features is its simplicity; you can capture your screen quickly with a straightforward screenshot shortcut. The quick key is easily accessible, letting you take snapshots in just a few clicks. Lightshot also offers essential editing tools like adding text and arrows, which are great for quick annotations. You can also upload screenshots to the cloud for easy sharing. Its ease of use and practical features make Lightshot an excellent choice for anyone needing a reliable screenshot tool.
- Pros
- Free to use
- Simple and intuitive interface
- Quick access with the screenshot shortcut
- Essential but effective editing tools
- Cloud upload option for easy sharing
- Cons
- Limited editing features compared to other tools
- No advanced capture options like scrolling capture
3. Greenshot
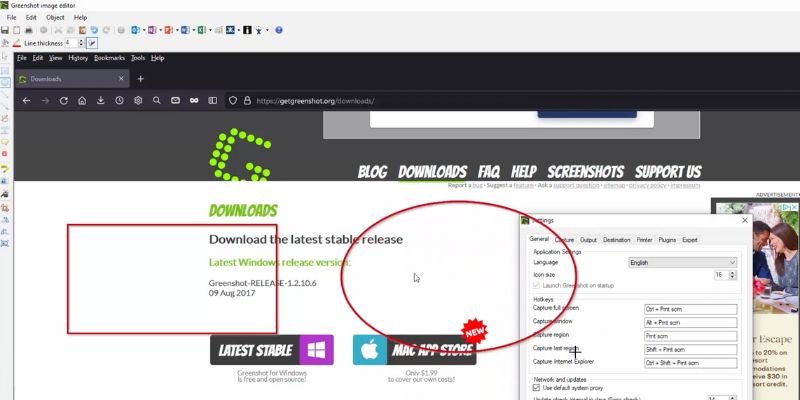
Greenshot makes it an excellent tool for learning how to take screenshots on a MacBook. Customize the screenshot shortcut to tailor it to your style of use, again fostering fast and effectual screenshots. Undoubtedly, the highlight of Greenshot is its quick key, which opens up instant access to it all. Some advanced features like annotating, highlighting, and obfuscation would put Greenshot at the top. Collaborating HTML and JavaScript coding integrated list of applications along with online marking makes this a versatile tool, which can be used for professional work or writing as personal work.
- Pros
- Open-source and free-to-use
- Screenshot shortcuts can be customized
- It offers advanced annotation tools
- Integration with external programs and services is offered
- Efficient and lightweight app
- Cons
- The user interface can feel outdated
- Limited customer support
- Occasional compatibility issues with macOS updates
4. Skitch
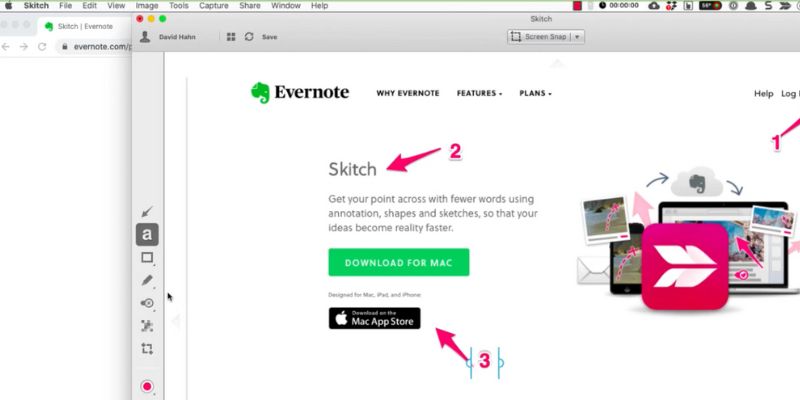
Skitch is an approachable app from Evernote that helps you take screenshots on your Mac. It focuses on more effortless, less keystroke-intensive screenshot taking, including annotating and sharing. If you want to learn how to take screenshots on a MacBook, Skitch is the one for you. The screenshot shortcut is fantastic, making it super easy to snap your screen as the quick key ensures you can get into its features quickly. This work also makes Skitch stand out with its annotation options, adding text and shapes to your screen captures. It even plays nicely with Evernote, which allows you to save your screenshots in an organized manner within your Evernote account. Skitch is an easy-to-use and available tool that can help you easily capture and share screen content.
- Pros
- Free to use
- Beautiful Evernote Integration
- Effective annotation tools
- Accessible via the screenshot key press shortcut
- Cons
- Only simple tools for screenshots and annotation
- Full functionality might need an Evernote account
- Development updates are a little more scattered
5. Monosnap
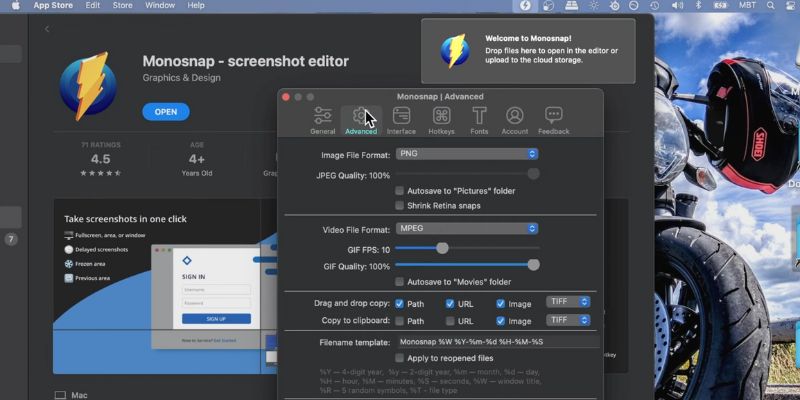
Monosnap is a fantastic utility that takes screenshots on a Mac computer. It has loads of features that help you take and annotate screenshots beautifully. Monosnap is the most user-friendly experience you will ever get if you are looking to take SS on a Macbook. The good news is that because the Mac screenshot hotkey is customizable, you can change it to fit your workflow best and quickly take screen captures on a Mac. Moreover, taking screenshots on a Mac occurs instantly with the quick key. Monosnap also allows you to record videos, store them in the cloud, and annotate screenshots quite effectively, a choice for all ranks of regular to pro users.
- Pros
- Free version available with premium features
- Customizable Mac screenshot shortcut
- Excellent video recording and cloud storage integration
- Advanced annotation & editing tools
- Cons
- Few functions need a premium subscription
- Time to get familiar
- May occasionally lag when dealing with larger files
6. Droplr
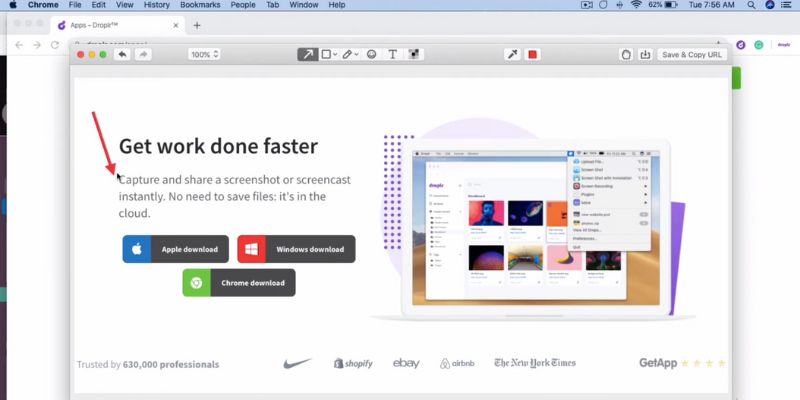
Droplr is an excellent pick for Mac users who need to take a lot of screenshots and share them. The app is designed to provide a streamlined experience for capturing, annotating, and sharing content on the screen. If you are getting to grips with how to screen capture on a Macbook, then Droplr provides an easily matched experience. The Mac screenshot shortcut to capture and edit your screen in a click is easy to create and operate. Droplr excels in its cloud storage and sharing features, allowing you to upload your screenshots & recordings easily to share with your team.
- Pros
- Top-tier cloud storage and sharing
- Some features make taking a screenshot on Mac quick
- Excellent for collaborating with teams
- Simple to use and navigate
- Good, fast Mac screenshots
- Cons
- Requires subscription
- Features are limited offline
- Only basic annotation tools
7. Capto
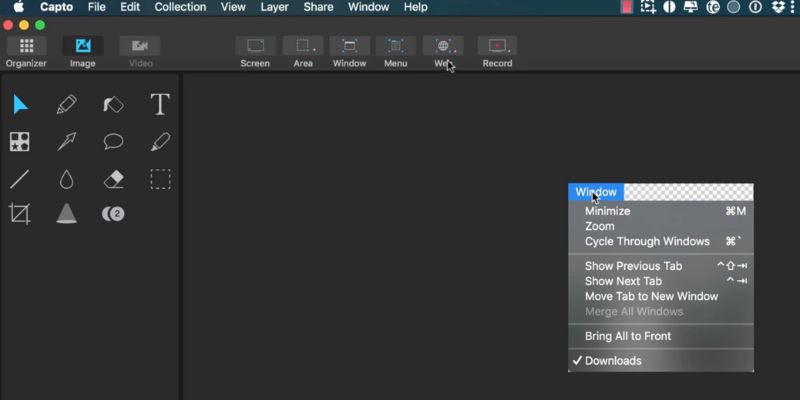
Capto is a one-stop solution tool that provides casual and professional user service. It features three major functions: screen recording, more advanced annotation tools, and intelligent file management. Moreover, Capto has a simple interface that makes it extremely easy to take SS on a Mac. Personalize the Mac screenshot shortcut for rapid captures, and Capto's swift photo key is just a snap of your fingers away. Capto has some powerful editing tools — it can make annotations, enabling users to blur images and making it a more robust choice of editors to do this.
- Pros
- Include a screen recording and a Mac screenshot shortcut.
- It comes with advanced editing and annotating.
- Good file management
- Cons
- Paid at a substantially higher price
- Resource greedy
- It may be overkill for casual users.
8. Shottr
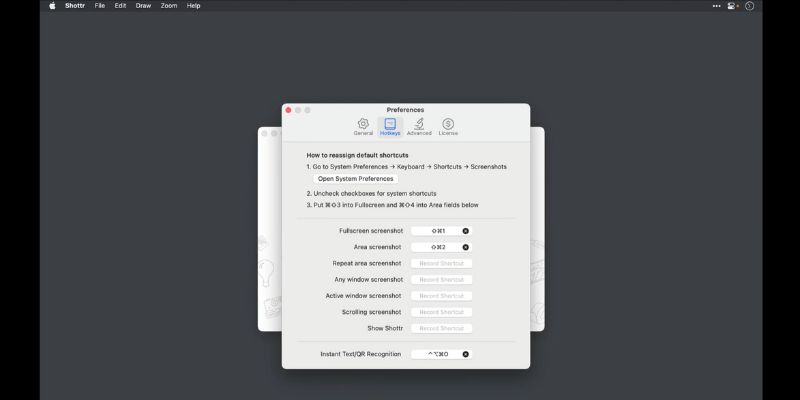
Shottr is lightweight and blazing-fast software for taking screenshots on your Mac. It is clean and to the point, ideal for anyone who likes simple stuff. For those looking to take SS on a MacBook, using Shottr provides the easiest overall experience. The Mac screenshot shortcut is a power-user wonder in that all screenshots are easy to take. Basic annotations can also be done within Shottr before sharing your screenshots.
- Pros
- Simple and intuitive UI
- Lightweight
- Quick Mac screenshot shortcuts
- Basic annotation tools
- Cons
- Lack of features compared to other apps
- No advanced capture or editing options
- Occasional bugs
Part 4: FAQs about Taking a Screenshot on Mac
How do I fix my Mac Screenshot?
Here is how to solve the screenshot issue not working on Macs for newbies: (1) Always use the right keyboard shortcuts to capture the screenshot. (2) Mac has a few minor bugs that can easily be fixed by rebooting the system. (3) Check whether the shortcuts are working: System Preferences > Keyboard > Shortcuts > Screenshots. (4) Finally, ensure there is enough space inside the Mac to hold all these screenshots, or else it is all in vain.
Where does a Mac screenshot go?
On a Mac, screenshots are typically saved to the desktop with the default filename Screen Shot [date] at [time].png. Suppose you are using macOS Mojave or later. In that case, you can edit the default save location by opening a Screenshot app with Command (⌘) + Shift + 5, clicking Options on the toolbar, and then choosing other locations from options such as a specific folder, directory, or document.
How do I take a screenshot of a window or a menu?
Press Command (⌘) + Shift + 4 to screenshot any window or menu. Your cursor will turn into a crosshair, and if you press the Spacebar, this crosshair will change into something like the camera icon. Just click on the window or menu you want to grab, and the screenshot will be saved to your desktop. This method can accurately capture windows or menus without the user having to draw the outline.
Can I edit my screenshots after taking them?
Of course, you can also directly edit your screenshots with the built-in Markup tool. Click the dragging screenshot in the bottom-right corner to open this capture in a window that offers you some editing tools. You can insert text, shapes, drawings, etc., here. Once you have finished editing, click Done to save your edited screenshot. Markup offers a fast and easy method for adding notes, arrows, etc., on your screenshots taken directly on your Mac.
Why are my screenshots so blurry?
Consider how you view your screenshots. They might appear less crisp when you look at them in the app. Make sure you are looking at the screenshot at 100% zoom level. If you are sharing screenshots instead, watch the type of file format and resolution settings. Well, screenshots are usually saved as PNGs to keep their high quality. They might get less crisp if you convert them to other formats or lower their resolution.
What makes taking a screenshot on a Mac easy and flexible is considering a whole array of default hotkeys and the flexibility of the screenshot application. Do you want to learn how to take a screenshot on Mac on the entire screen, some window, or an area you select post-click? Mac has a better way to get things done with total efficiency. But, of course, for the advanced features, the third-party apps will come with tools and customization that don't come by default. With these resources, taking and managing screenshots on your Mac is simple and effective.
Capture the best moment with AVAide Screen Recorder. Screencast, customize, and share in seconds.

 Secure Download