

Have you ever found yourself in a situation where your photo is stunning but too large to share or upload efficiently? Enter the need to resize your pictures. Whether for website sharing, printing, or optimizing various platforms, resizing photos is a common necessity.
This post will teach you two different methods to resize images in Lightroom. Besides that, we will delve into alternative methods beyond Lightroom's capabilities to resize your pictures efficiently. Keep on reading for a more in-depth look!
Part 1. How to Resize Images in Lightroom
Lightroom doesn't change the pixel dimensions of your original file. Rather, it creates a new version at the size you want when you export or crop. That keeps your master file safe. Here are the main ways to resize images in Lightroom Classic and on the web.
1. Set Export Dimensions (Desktop)
The most common way to resize photos in Lightroom Classic is during export. In the top menu, go to File > Export. In the Image Sizing panel, check Resize to Fit, then pick the method that matches what you need. Some options are available only in the desktop version.
Leave Don't Enlarge checked if you only want to shrink images and never upscale them.

Width & Height
This option lets you set maximum values for both width and height. Lightroom fits the photo inside that box while keeping the original aspect ratio. A landscape shot and a portrait shot will both stay within the limits, but their final pixel dimensions will differ. Good when you need images that fit a specific container, for example, a 1920 × 1080 max area.
Dimensions
Similar to Width & Height, but orientation is ignored. Lightroom treats the larger of the two numbers as the limit for the long edge and the smaller number as the limit for the short edge. Useful when you care more about the overall size envelope than which side is which.
Long Edge
You only need to enter one number. Lightroom sets the longest side of the image to that value and scales the other side proportionally. This is the go-to option for most web and client work because it handles mixed landscape and portrait images cleanly. A common starting point for online use is 1920–2400 px on the long edge.
Short Edge
Same idea as Long Edge, but you control the shorter side. Helpful when you need a minimum height or width, like ensuring every image is at least 1200 px on the short side for a gallery.
Megapixels
Instead of pixel dimensions, you set a target total pixel count. Lightroom calculates the dimensions that hit that area while preserving aspect ratio. Handy for stock submissions or contests that specify a minimum or maximum megapixel count rather than exact width/height.
2. Crop the Image (Desktop & Web)
Cropping changes the aspect ratio and can also reduce the final pixel count if you crop tightly. It works in both Lightroom Classic and Lightroom on the web.
Desktop (Lightroom Classic)
Step 1Open the photo in the Develop module.
Step 2Click the Crop Overlay tool.

Step 3Choose an aspect ratio from the dropdown or select Enter Custom to type exact proportions.

Step 4Drag the crop handles or move the image inside the box. Press Enter or click Done to apply.
After cropping, export as usual if you also need a specific pixel size.
Web (lightroom.adobe.com)
Step 1Select your photo from the Photo Grid and click the Crop & Rotate from the right panel.
Step 2In the Crop panel, you can choose a preset aspect ratio, or select Custom and drag the cropping frame to select the area you want to keep.
Step 3Click the Share button in the top-right corner, which appears as an upward arrow in a box. Download the resized photo in JPG or PNG.
3. Change Resolution with Super Resolution (Desktop)
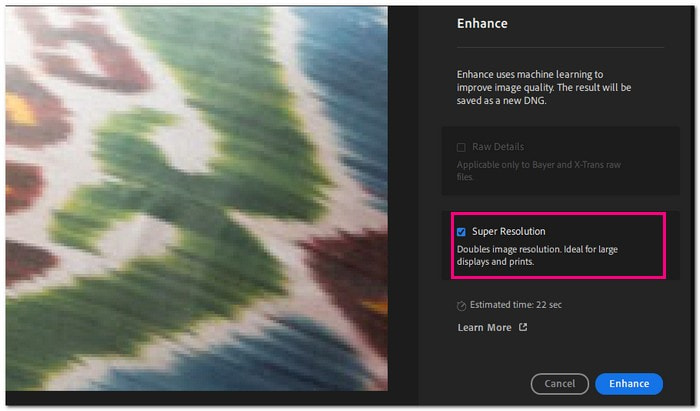
When you need more pixels, Lightroom's Super Resolution feature can roughly double the linear resolution of an image. It works on RAW, JPEG, TIFF, etc., and creates a new DNG file.
Step 1Launch Lightroom and open a raw picture, like JPEG or TIFF.
Step 2Head to the menu and click on Photo, then choose Enhance.
Step 3In the Enhance box that pops up, pick Super Resolution. Click on the preview to compare how the image looked before and after the enhancement. You can also move your cursor across the preview to check different parts of the improved image.
Step 4Click Enhance to create a better DNG version of your selected image.
Part 2. Lightroom Alternative to Resize Images
Lightroom offers flexible resizing options, but might feel like overkill if you only need a quick, foolproof upscale or downscale. These online and mobile tools can handle it easily without noticeable quality loss.
1. AVAide Image Upscaler
AVAide Image Upscaler is an online tool that enlarges and enhances images with AI.. This online-based image upscaler uses innovative artificial intelligence to enhance your pictures automatically. It offers a magnification option to enlarge the image to two, four, six, and even eight times. It is free to use, supports uploading multiple images simultaneously, and does not add watermarks to your photos. In addition, it can handle various image formats, making it versatile for all your resizing needs.
Step 1Navigate to the official website of AVAide Image Upscaler.
Step 2To upload your image, click the Add Your Image button. If you want to upload many images in one go, click the Batch button.

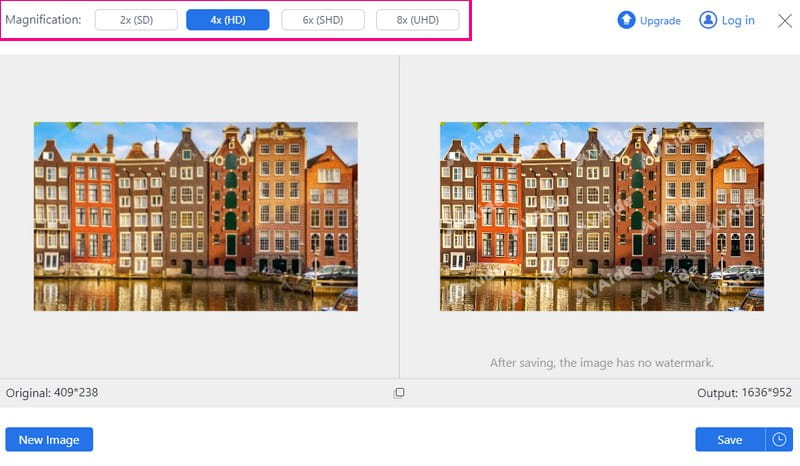
Step 3Once your picture is loaded, you can start resizing your image by enlarging it. Go to the Magnification option and select 2×, 4×, 6×, and 8×, depending on your needs. Your image will be enlarged according to your magnification level choice.
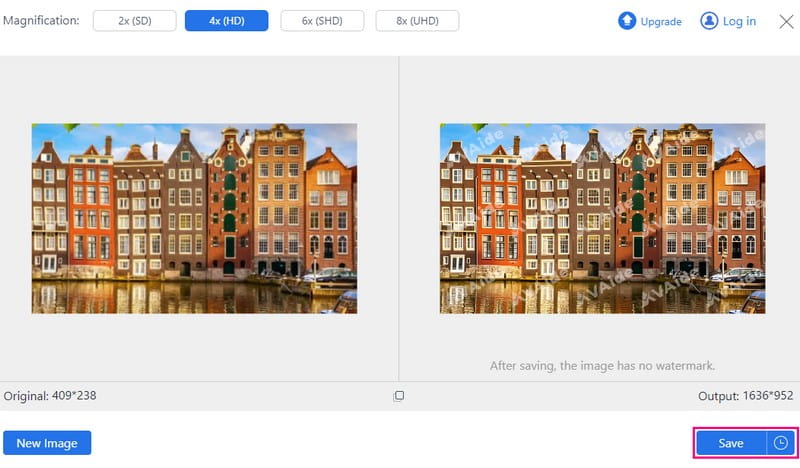
Step 4Once you are happy with the outcome, click the Save button, and your resized image will be automatically downloaded.
2. Resize Me
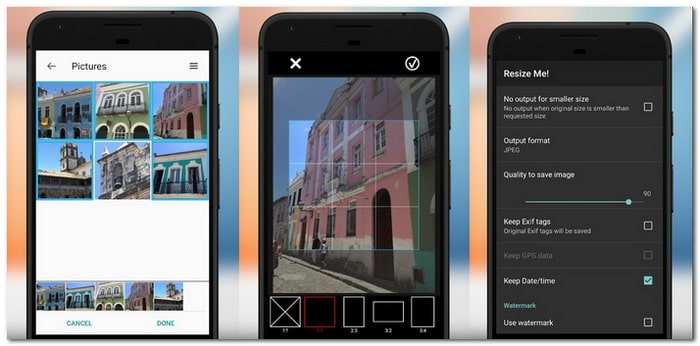
Resize Me, a mobile application accessible for Android, can guide you on resizing images easily. The impressive part? You can also make your resized picture your phone's wallpaper. Besides that, you can crop, rotate, and even add a watermark to your images wherever you want. This application works best if you desire to resize your images before uploading or sending them on various social media platforms.
Step 1Install Resize Me from the Google Play Store.
Step 2Open the application, and choose the image you want to resize from your
Step 3Look for an option labeled Resize in the application and click on it. Please use the tools provided to change the image's size as needed.
Step 4Once you are done resizing, tap Save or Done to save the newly sized image.
3. Image Size
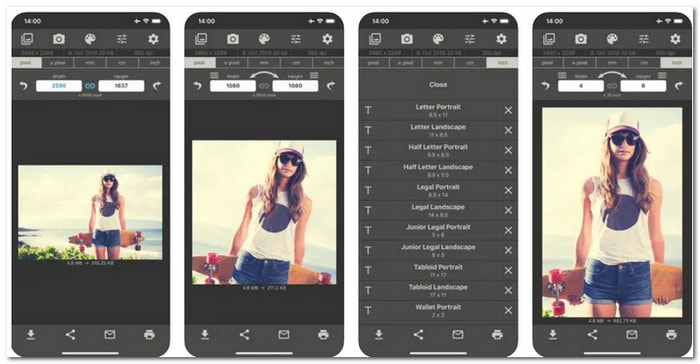
If you are an iPhone user and prefer to do the task on your phone, consider using Image Size. This application can effortlessly help you change the size to your needs with limitations. You can use pixels, millimeters, centimeters, or inches to achieve your desired image size. After resizing, you can save, email, print, or share the image.
Step 1Get the Image Size from the App Store.
Step 2Open the application. Tap the button in the upper left corner; it looks like two photos are stacked. Import the photo you want to resize by clicking the Choose button in the bottom right corner.
Step 3Near the top of the screen are options for different units like Pixels, Millimeters, Centimeters, and Inches. Tap on the one you want to use.
Step 4Press the Chain button between the measurement boxes to maintain the picture's correct shape. Enter new dimensions in the white boxes. Changing the numbers will resize the image. When finished, click the Done button.
Step 5Tick the Save button in the lower left to automatically save the resized image to your phone's gallery.
Part 3. Troubleshooting Lightroom Image Resizing
The Exported Image Doesn't Match the Exact Width and Height
Lightroom preserves the original aspect ratio when exporting a resized image. So if you want it to fit exact dimensions, you need to crop the photo or use an image editor that lets you stretch the image, like Photoshop.
The Resized Image Looks Blurry
This isn't unusual when you enlarge an image. To fix a blurry picture in Lightroom Classic, try enabling Output Sharpening in the Export panel. To avoid quality loss, you can use AI upscaling tools such as Super Resolution in Lightroom, or use AVAide Image Upscaler for free.
Lightroom Mobile Doesn't Have the Resizing Option You Need
Lightroom Mobile has fewer resizing options for export. For JPG and TIF exports, it offers Largest Available Dimensions, Small (2048 px), and Custom dimensions, which let you specify the long edge. If you want options such as Short Edge or Megapixels, you need to use Lightroom Classic instead.
Part 4. FAQs about Resizing an Image in Lightroom
Is Lightroom free?
It varies by the platform. Lightroom mobile has a free version with limited features, but full desktop and cloud features require an Adobe Creative Cloud subscription.
Can you edit RAW photos in Lightroom?
Yes. Lightroom is built for RAW editing and gives you non-destructive control over exposure, color, detail, and more.
How does resizing for print work in Lightroom?
In the Export dialog, set Resize to Fit using inches or centimeters and set Resolution to the value your lab recommends, typically 300 ppi. Lightroom calculates the required pixel dimensions from those settings.
What resolution should I use when exporting from Lightroom?
For web and social media, size by pixels and ignore the ppi field, for example, Long Edge 1920-2400 px. For prints, we recommend 300 ppi as a default unless your print lab specifies otherwise.
You have learned how to resize an image in Lightroom, which gives you precise control over its dimensions and quality. For an effortless and efficient solution to enlarge images while maintaining their quality, consider trying AVAide Image Upscaler. This AI-powered tool ensures impressive results when you need to upscale your images.
ABOUT THE AUTHOR


Our AI technology will automatically enhance the quality of your images, remove noise and fix blurry images online.
PROCESS NOW