Imagine you are working on a project and then realizing that your image doesn't fit the layout. Learning how to resize an image using Photoshop may be game-changing. To adjust pixel dimensions, use the Image Size dialog box; to resize with precision employ Crop Tool; to maintain proportions apply Free Transform Tool, or resize layers and objects for balanced compositions, this guide brings out different skills taking each situation into consideration.
Part 1. How to Resize Image Using the Image Size Dialog Box
This part will show you how to use Photoshop's Image Size dialog box to resize images. You'll also learn how to adjust the document size, resolution, pixel dimensions, and unpixelate images.
Step 1Open Photoshop and go to File > Open. Then click Open.
Step 2With the image open, navigate to Image > Image Size. You can then change the size settings from this dialog box.
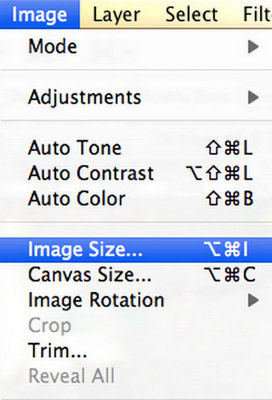
Step 3Here are some of the things you can change in the Image Size dialog box:
• Pixel Dimensions (width and height in pixels).
• Document Size (physical dimensions for print, like inches or centimeters).
• Resolution (pixels per inch, typically 300 ppi for print, 72 ppi for web).
• For example, While maintaining a resolution of 300 ppi, increase the width from 10
Step 4Tick the Resample option so that resizing becomes possible. Select a method from the dropdown:
• Bicubic Smoother (best for enlargements).
• Bicubic Sharper (best for reductions).
• Bicubic (general purpose).
• For instance, Choose Bicubic Smoother during enlarging.
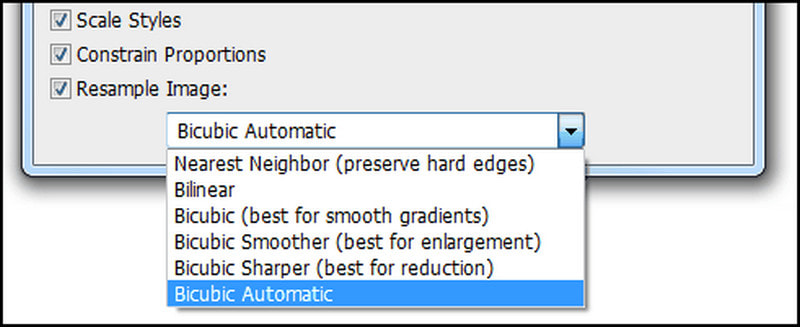
Step 5This dialogue box shows your computer screen's updated pixel dimensions and file size. Click OK when you are done resizing your image.
Step 6Inspect the resized image to ensure the quality meets your expectations. If the image quality has changed after resizing, make any necessary adjustments.
Part 2. How to Resize Images Using the Crop Tool
An image can be resized by cropping it, which effectively shrinks its overall size while concentrating on a particular part. In Photoshop, the Crop Tool provides an easy way to set dimensions and crop images to these ratios.
Step 1Open your photo in Photoshop. You can do this by clicking on the crop tool on the left toolbar or pressing C for the crop.
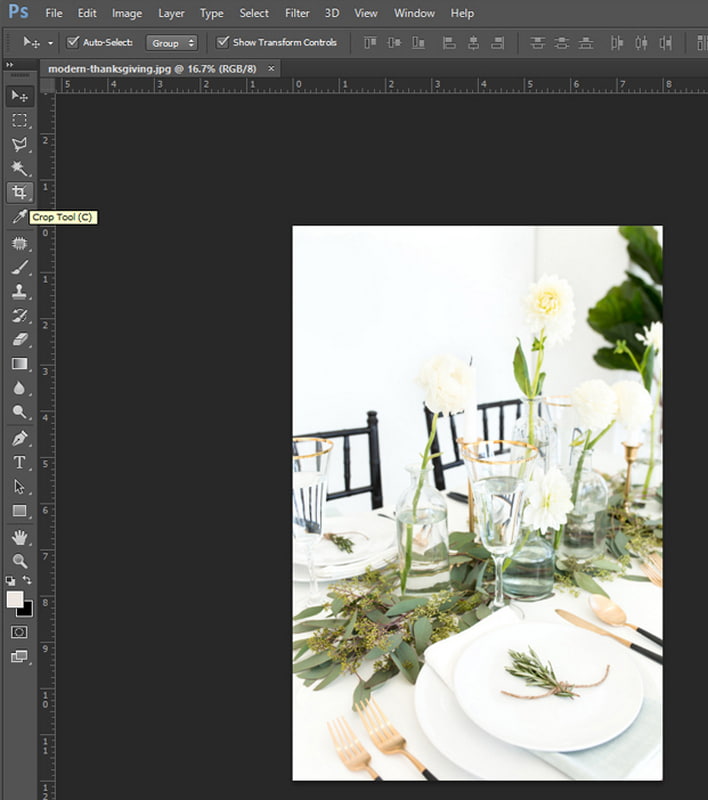
Step 2Once you have selected the Crop Tool, a toolbar will appear under the main menu bar. Go to the toolbar and input your desired width and height.
Step 3Drag your mouse over the image to create a crop box. This box will automatically resize according to its dimensions, which you had earlier specified.
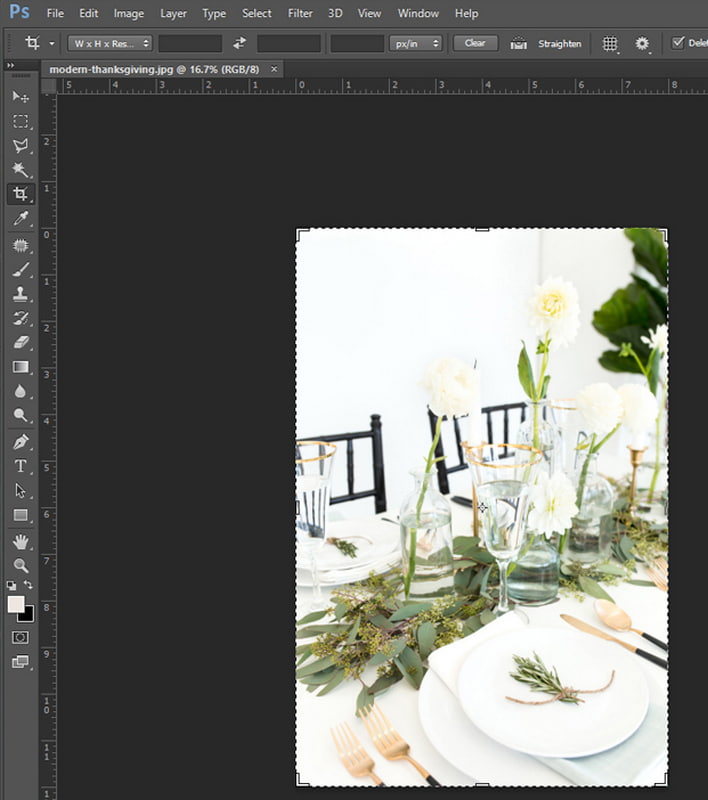
Step 4Examine what is inside that cropping box area. This highlighted portion will remain after cropping; proceed only if you are satisfied with this selection.
Step 5Then, hit the Enter key to apply the crop effect. The image's dimensions will now correspond with those you have given.
Step 6To save your resized image for the web or email, go to File > Save for Web and Devices. Adjust the quality settings and dimensions as needed in the Save for Web window. Click Save to export your resized image.
Part 3. How to Resize Images Using the Free Transform Tool
The Free Transform tool in Photoshop is versatile and robust because it allows you to change the size of images or layers without changing their proportions. This is helpful for changing the layer size without distorting it.
Step 1Open your image in Photoshop. In the Layers Panel, click on the layer that needs resizing.
Step 2Convert the layer into a Smart Object to maintain the most favorable quality during resizing. Find Layer on the Top Menu Bar.
Step 3Hover over Smart Objects and select Convert to Smart Object.
Step 4Then, go to Edit from the Top Menu Bar, choose Free Transform from the dropdown menu and click Scale.
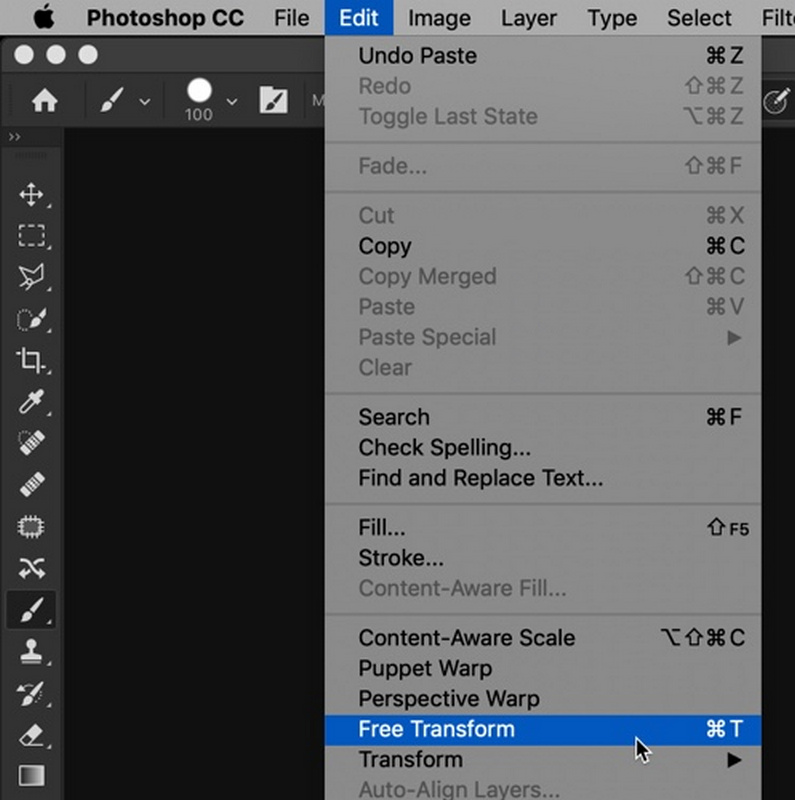
Step 5Press CTRL + T (Windows) or CMD + T (Mac) to quickly enter Free Transform mode.
Step 6Click and drag a corner handle to resize your layer; hold down the Shift key while dragging to keep the original aspect ratio for no distortion effect only.
Step 7Continue dragging the edges or corners until the layer is resized to your desired dimensions.
Step 8Once satisfied with the resizing, press Enter (Windows) or Return (Mac) to apply the changes. Your layer is now resized without any distortion.
Part 4. How to Resize Layers and Objects in Photoshop
Resizing in Photoshop is important; it helps to create well-balanced compositions by adjusting text, images and other elements. You can resize layers without changing them entirely or while keeping their aspect ratios.
Step 1Open your Photoshop project. On the right side of the screen lies the Layers panel, where you can find a layer to resize.
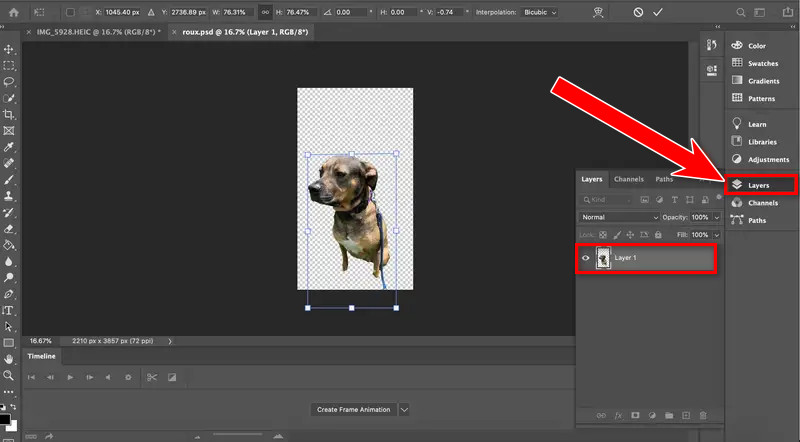
Step 2At the Top Menu Bar, choose Edit. After choosing Free Transform from that dropdown menu, click on it, too. Alternatively, press CTRL + T (Windows) or CMD + T (Mac); This will turn on the Free Transform tool.
Step 3A box with handles will appear around the selected layer. The handles can be clicked and dragged afterward to allow for the layer's resizing.
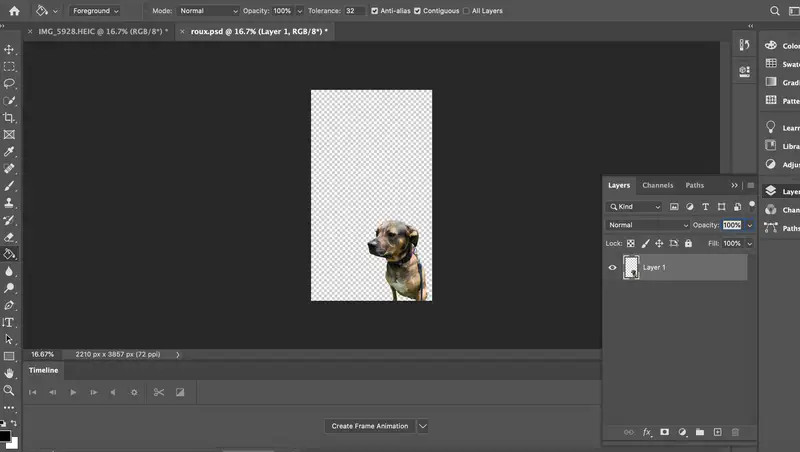
Step 4After manipulating a layer, use Enter (Windows) or Return (Mac) to accept your desired size.
Step 5Otherwise, commit, transform and enter by clicking the Checkmark at the top options bar.
Bonus: Best Image Resizer to Resize Your Photo Easily
One such AI-powered tool is AVAide Image Upscaler, which makes resizing and enhancing images a breeze. This web-based application allows users to effortlessly upscale and enlarge their photographs as it does not require any technical skills. When you want to print a small image or use it for e-commerce or personal purposes, the AVAide Image Upscaler provides an easy-to-use and robust solution.
Key Features:
• AVAide Image Upscaler is entirely free of charge with no hidden fees and can be accessed through your browser anytime.
• Unlike many other online tools, it doesn't watermark your enhanced images, making them available for use freely.
• The program uses cutting-edge AI methods to refocus photographs, enhancing details and erasing blurring while altering objects such as people, pets, and products.
• There are four options of image enlargement by 2×, 4×, 6× or even up to 8× making it the best photo enhancer.
Detailed Steps:
Step 1Go to the AVAide Image Upscaler website. Then click the button Choose a Photo and upload an image from your computer.
Step 2Once you have uploaded your image, it will be automatically enhanced using AI technology.
Step 3Decide which upscaling factor (2×, 4×, 6× or 8×) is most suitable for you depending on how big and detailed you want the final picture to appear.

Step 4Immediately after the upscaling process is completed, click on Save to download this improved photo onto your computer system.

This is all it takes to understand how to become a master of the Photoshop resize image feature. Some of these ways include adjusting pixel dimensions with the Image Size dialog box, cropping for precision, using the Free Transform Tool to keep proportions invariant or resizing layers and objects for balanced designs. There is no easier way than resizing images in Photoshop using these techniques.

Our AI technology will automatically enhance the quality of your images, remove noise and fix blurry images online.
TRY NOW


