How to remove proof from a photo? If you want to achieve aesthetic images by removing annoying watermarks or proof texts, you can do that in several ways. Be it online tools, software for download, or mobile applications. This tutorial highlights the most efficient ways to get rid of master copy watermarks using any platform you prefer.
Part 1. What Are Photo Proofs
Photo proofs in photography processes act as an intermediary between the photographer and the client as they allow for such a review before the final touch of the photographs. Most of these proofs contain all the shots taken during the session with some adjustments, for instance, removing or adding light, but not in much detail. These might come as written documents with images in electronic format or images displayed on the website. There are several types of photo proofs as tools in the course of reviewing the images and making selections:
1. Digital Proofs: Digital proofs are the most popular type of proof. They are provided as low-resolution images and are usually sent through email or an online gallery. They allow only persons who have their personal computers to view and pick their desired images.
2. Printed Proofs: These are hard copies of the photographs, printed mostly in small sizes or as contact sheets. They are used in conventional photography, where the clients have to review the images before making a selection.
3. Watermarked Proofs: These are protections determined to cover the ideas in the photographs. They also ensure that no one uses the pictures in those proofs that are watermarked until after purchase or approval has been made in the final step.
4. Unedited Proofs: These photographs are usually unretouched or only minimally retouched and taken directly from the camera, which gives clients a chance to view the photographs shot prior to any significant post-production.
5. Edited Proofs: Some photographers offer lightly edited proofs that include basic corrections, such as exposure and white balance, to give clients a better sense of the final product.
Part 2. Methods to Remove Proof Watermarks
1. AVAide Watermark Remover (Online)
AVAide Watermark Remover is an efficient online solution for eliminating proof watermarks from images while maintaining high quality. This tool perfectly removes image watermarking through reconstruction and analysis of the surrounding textures of the image. This tool is applicable to JPG, PNG, and even GIF formats, which is helpful for both amateurs and pros.
Key Features:
• AI technology can remove the logo without further trouble with the image.
• It supports other formats such as JPG, PNG, and GIF.
• Has 256-bit SSL Complimentary security.
• Fast in Action employs both AI and hardware to ensure quick results.
Procedure:
Step 1Open a web browser and go to the AVAide Watermark Remover site.
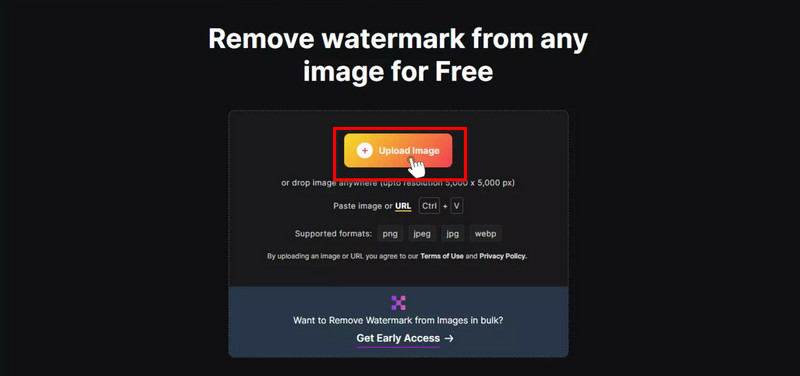
Step 2On the site, you will see a homepage with a button labeled Choose a Photo. You can locate your file from your device memory or click on the upload area and drag it there.
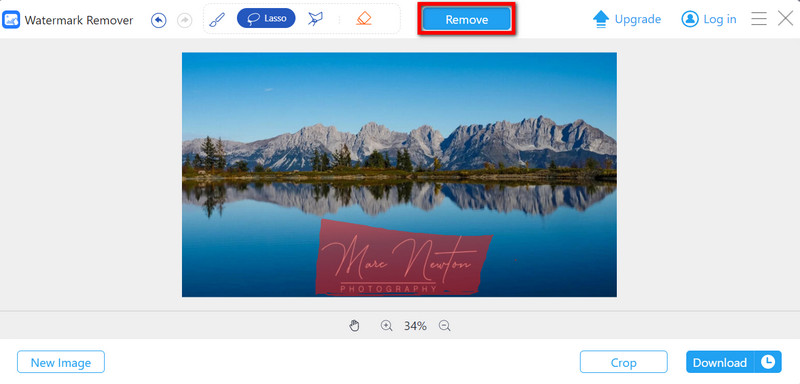
Step 3Once the image is opened, use the cursor to define the watermark. The AI software will highlight an area marked for deletion. However, if you find it unoperated, you can adjust it further using the brush or selection tools in the section.
Step 4Once the watermark is selected, click the Remove button to start the process. The AI will analyze the colors and textures around the proofs to ensure smooth removal.

Step 5Finally, the processed image will be ready for download. Click the Download button to save the watermark-free image to your device.
2. GIMP (Windows/Mac)
GIMP is a free and open-source program that runs on Windows and Mac OS and boasts many watermark removal tools, as well as removing image noise. However, even though this software is not designed for that purpose, its many tools, such as the clone stamp or the healing brush, still allow the user to carry out high-quality edits on images.
Key Features:
• Both are free and available for editing and modification by others.
• Some features include removing watermark images manually using the clone stamp and the healing brush.
• It supports JPG, PNG, GIF and many other file extensions.
• Editing, which involves layering and masking, can be carried out.
Procedure:
Step 1Open your web browser and search for the official GIMP website. Download the installer for Windows or Mac, depending on your machine. Click the Upload Image and follow the instructions on the screen to install the software.

Step 2Run GIMP and choose File > Open to import the picture on which you wish to edit the watermark. As another option, the image can be dragged into the working space of GIMP.
Step 3Choose the Clone Stamp tool from the tools palette or press C. While holding Ctrl, click on the area of the image close to the watermark you want to take as a sample.
Step 4Zoom in to ensure all traces of the watermark are removed. If necessary, use the Clone Stamp and Healing tools to refine the edits.
Step 5Once the watermark is removed, click File > Export As to save your image. Choose your desired format and click Download Image.

3. Snapseed (iOS/Android)
Snapseed is a powerful image editing application that does not require payment approval and can be downloaded on iOS and Android devices. Within the application, it should only take a few taps on the Healing Tool to erase the watermarks in the photos. Its layout has been designed so that even non-technical users can easily handle the tools.
Key Features:
• It is free of charge and can be found on iOS and Android.
• It provides users with a Healing Tool with which they can erase the watermarks in the photos, making it a good photo blemish remover.
• It supports multiple image formats, including but not limited to JPG, PNG, and others.
• It is straightforward to use.
Procedure:
Step 1Open the App Store (iOS) or Google Play Store (Android) and find Snapseed. Install the application to your device.
Step 2Open the application and tap the + button at the top of the home page to upload a photo with a watermark to your gallery.
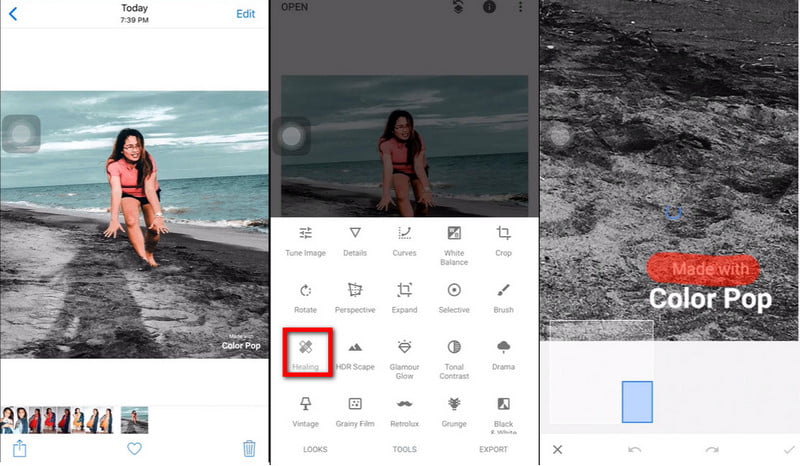
Step 3First, tap the Tools button on the lower part of the screen, and in the list of items, choose the one called Healing. This Healing Tool will assist you in quickly getting rid of those undesired parts of your picture.

Step 4If necessary, magnify the selected area to make a more accurate correction. Use a finger to tap and drag over the area where the watermark was located. Snapseed will employ the neighboring pixels as texture to hide the watermark nicely.
Step 5If the result isn't perfect, you can use the Undo or Redo buttons to adjust your edits. Zoom in and repeat the process if necessary for more accurate removal.
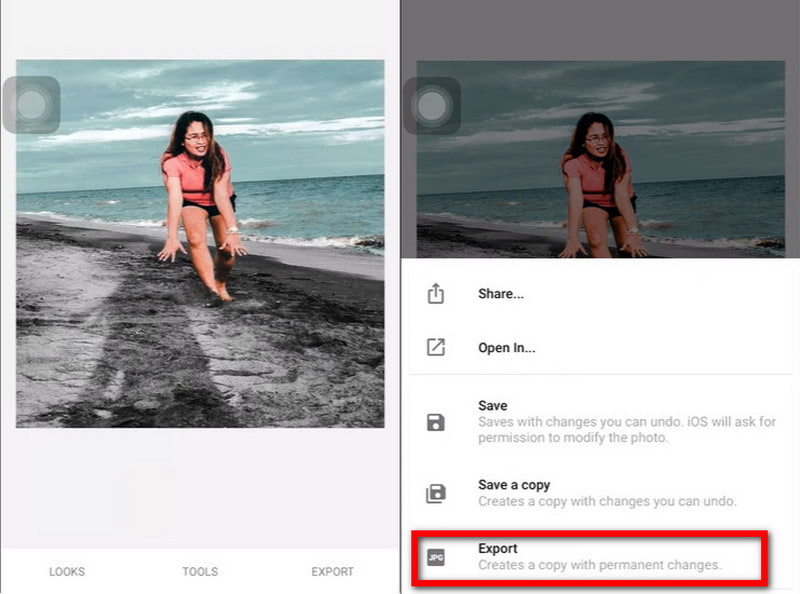
Step 6Once the watermark is removed, tap Export at the bottom-right corner.

In this post, we have reviewed some ways to help you get rid of photo proofs. You can pick up an online tool catering to your requirements AVAide Watermark Remover for fast-working amazing ai or AVAide Watermark Remover or GIMP free software for editing purposes on Windows or Mac or Snapseed to edit images on phones for instant editing; all of these options has its benefits. These tools will also help you avoid unsightly images and ensure that your works look great and professional for any use.

Easily get rid of annoying watermarks and unwanted objects from your photos without quality loss.
TRY NOW


