Are you among the many users who often want to change their background picture to grey? You may be a photographer aiming for a clean, professional look. Or an online seller seeking to make your product images stand out. Whatever your reason, if you are searching for an easy way to achieve this, you have come to the right place!
This post will explore various methods to change the background color to grey online and offline. So, let us dive in and discover how to transform your background to grey in just a few simple steps!
Part 1. Change the Background Color to Grey Online
You have taken a fantastic photo of yourself or someone else. However, the background is cluttered or distracting. You may want to create a professional-looking portrait, but the current background does not fit the vibe. It is where AVAide Background Remover comes in handy! It can help you change the background color to grey online.
Do not worry about image compatibility; it supports various standard image formats. It uses intelligent artificial intelligence to detect and remove the background while preserving the main subject. But here it gets exciting: AVAide Background Remover allows you to replace the background with different colors, including grey. Whether you prefer light grey, dark grey, charcoal gray, or silver grey, the choice is yours.
Step 1Look for AVAide Background Remover's official website using your web browser.
Step 2Press the Choose a Photo button to upload the image you want to turn the background grey.
Step 3AVAide Background Remover will immediately remove the background from your photo. It will leave the main subject highlighted in red.
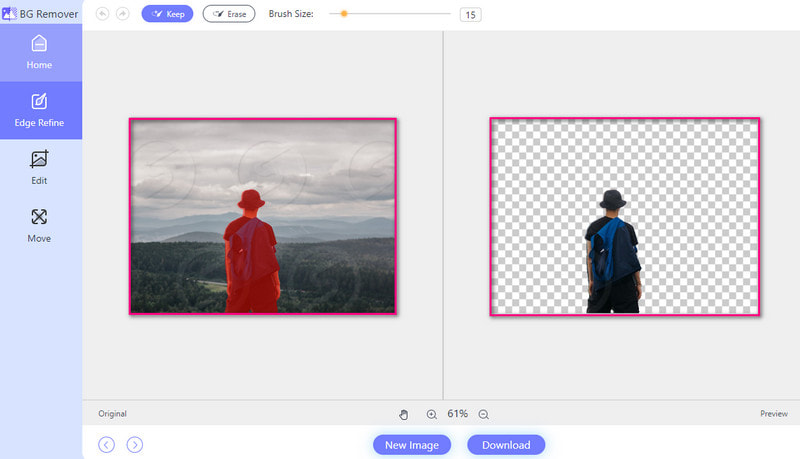
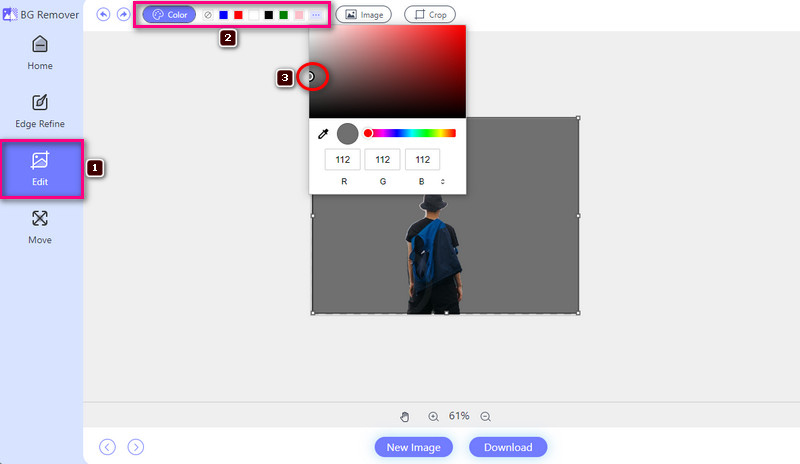
Step 4Go to the Edit tab. Head to the Color option and click the Horizontal Three Dots button to open the color palette. Then, select your desired shade of grey. The grey shades are placed on the left corner of the color palette.
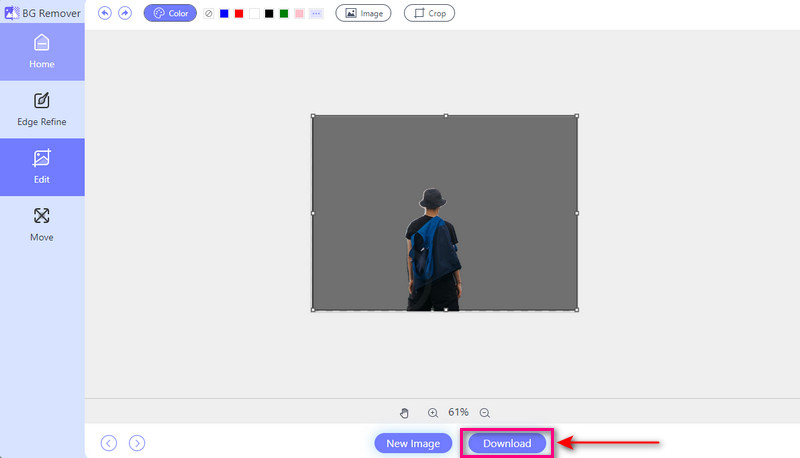
Step 5Once everything is set, press the Download button to save your edited background on your local file.
- Pros
- It offers an easy-to-navigate interface, suitable for beginners.
- It is available for free and accessible on various web browsers.
- It offers an option to add an image and make it a background.
- It enables you to see the output in real time.
- It provides a cropping feature to remove unwanted parts.
- Cons
- A stable or fast internet connection is needed.
Part 2. How to Make a Grey Background in Photoshop
Photoshop is a program known for editing photos. It can make various changes to images, including changing the background color. It allows you to select the photo's background and replace it with a different color, such as grey. This capability is not limited to grey backgrounds; you can change the background to any color you desire. Besides that, it offers options for changing the shade or tone of the selected color. This feature gives you more control over the final output.
Here is how to make a grey background in Photoshop:
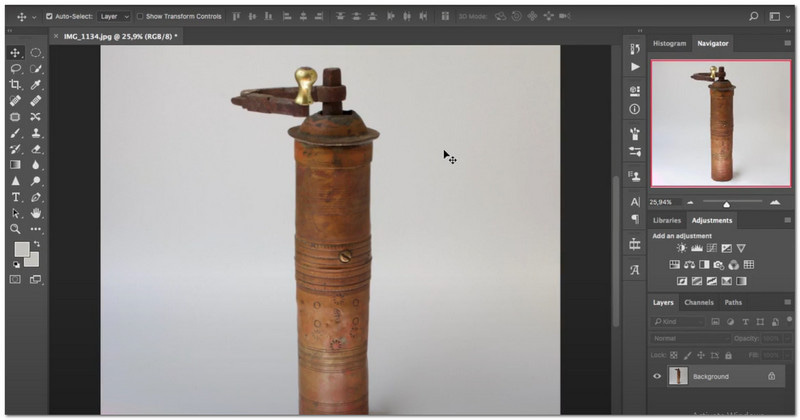
Step 1Start by opening your image on the platform.
Step 2Use the Selection Tool to highlight the area you desire to keep. After selecting the area, navigate to the menu and find Layer mask. Click on it to remove the background from your image.
Step 3A display will pop up where you can choose a fill color. Please pick a shade of grey that suits your image.
Step 4Now, it is time to add the grey background. You will see layers underneath your image. Click on the one that represents the background. Then, choose the grey color you selected earlier. After that, click OK.
Step 5If you are happy with how it looks, it is time to save your work. Go to the File tab and choose the Save As button.
- Pros
- It enables users to tweak the grey color of the background.
- It offers features to add effects, combine many images, etc.
- It allows users to create high-quality images with seamless grey backgrounds.
- Cons
- Users need a strong computer for it to work well.
- It is a paid program, which might only be affordable for some.
- It can be complex for first-time users, requiring time to learn its features.
Part 3. How to Make Background Grey in Lightroom
Lightroom is an excellent program photographers use to edit and enhance their pictures. It provides options to fine-tune brightness, contrast, and color to make your pictures look their best. One impressive thing about it is that it can change the background of a photo to different colors, including gray. If you have a picture with a distracting background, you can replace it with a neutral gray background. That being said, it will make your subject stand out even more.
Here is how to make the background grey in Lightroom:
Step 1Open the Lightroom to get started with changing the background color to grey.
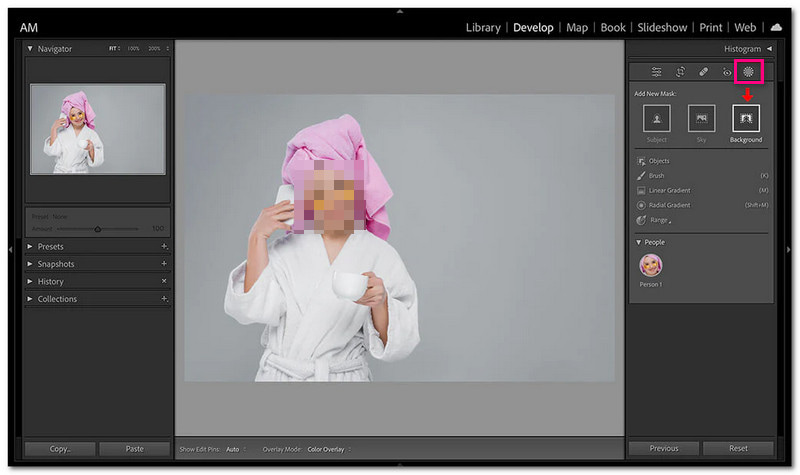
Step 2Head to the Masking tool in the main menu. Then, select the Background to let Lightroom choose the background using its intelligent artificial intelligence.
Step 3Find the Color tool in the Color Panel. Click it to open the Color picker. Choose your desired shade of grey by clicking in the color selection box. After that, your background will change instantly.
Step 4Try different shades if you are unsatisfied with the first grey. To do that, click around the color selection box until you find the one that best fits your image.
Step 5Once satisfied with the grey background, click to confirm your selection. Lightroom will apply the new color immediately.
- Pros
- It boasts a simple interface, making it easy to use for beginners.
- It provides many features for editing photos.
- It can change the background color to gray easily and hassle-free.
- Cons
- It may take time for first-time users to master all the features.
- It requires a subscription or purchase, which might only be affordable for some.
- Some advanced editing functionalities may require additional plugins or programs.
Part 4. FAQs about Changing the Background Color to Grey
Is there an app that makes the background grey?
Yes! Several mobile apps can help you change your photos' background color to grey. Some popular options include Snapseed, Canva, and TouchRetouch.
How can I change the color of my background?
AVAide Background Remover is an online platform that lets you change the color of your photo background. You can remove the original background and pick a new color, like blue, red, white, or pink.
How do I get rid of the white background?
AVAide Background Remover helps you remove white backgrounds from your photos. You can replace the white background with a color or image you like.
Why would I want to change my photo's background color to grey?
Changing the background color to grey can help enhance the focus on the subject of your photo. It can also create a more professional and consistent look.
Does changing the background color affect the quality of my photo?
When done correctly, changing the background color will not affect the overall quality of your photo. However, it is essential to maintain the resolution and clarity of the image throughout the editing process.
Learning how to change the image background to grey is beneficial for many reasons. It adds professionalism, focuses attention on the subject, and eliminates distractions. With just a few clicks, you will have that sleek grey background you desire, leaving more time to focus on your creativity. So, make sure to perfect your photos!

Uses AI and automated background removal technology to capture complex backgrounds from JPG, JPEG, PNG, and GIF.
TRY NOW