Usually, digital creativity or graphic designs force you to resize images quickly to make them fit for posting on social media, for a webpage, or print. Doing so sometimes leads to resampling distortion due to being stretched out. Because of that, we are here to explain how to resize a photo to make it fit the requirement without losing the sharpness of it. We list online upscaling, downscaling, and compressing tools to help you. So, start to change the size of the image using the tutorial we have here.
Part 1. Importance of Changing Image Size - 5 Things You Need to Know
Understanding how to change image size is critical in coming up with highly optimized images that are of the best quality for your audiences on all levels:
1. Optimized Load Times
Most large image files contribute to significantly slower sites. Such things simply take longer to load, which affects the users' experience because most of them will probably hit the back button if a site takes too long to open - what is more, search engines such as Google consider the loading speed while ranking sites. You can also make images of proper dimensions and file size to increase your site's loading speed, making it user-friendly and improving the SEO performance.
2. Specific Requirements Per Platform
Every social media network and website has different dimensions on which images are to be uploaded. For instance, a Facebook cover picture has dimensions other than an Instagram post or a YouTube video's thumbnail. Ensuring proper resizing of images according to the specifications means your images appear appropriately and professionally in every conceivable device. It adds up to a very fine detail regarding improving your online existence and ensuring you avoid inadvertently creating chaos by making parts of your brand look consistent and professional.
3. Preserving Image Quality
Changing picture size can be seen in terms of changing dimensions and achieving quality from the image. The resizing of images poorly leads to low-quality image outputs showing too much pixelation or distortion and loss of details that could be more appealing to the eyes. A resized picture preserves the quality so that visual content will appear clear and sharp no matter the changes in size. It is especially relevant to convey a professional image in marketing communications and other online materials.
4. Storage Space Management
Proper storage space management is always a must, especially when dealing with websites using many images. Resizing and compressing them can run you quite a long way into your gadget or server storage space. This way, you handle storage much more efficiently; hence, it helps with loading time and overall website performance. You preserve quality and use available storage resources efficiently.
5. Brand Consistency
A robust visual identity of your brand is also created when consistency in the size of the images across all your digital platforms is maintained. For creating marketing material, product images, and portfolio pieces, resizing images to the correct dimensions ensures that your visuals will be uniform and coherent, presenting professionalism and coherence in your branding presentation. That is why an image size resizer is much needed.
Part 2. Factors to Assess When Changing the Size of the Image
1. Aspect Ratio
The aspect ratio is the relative proportion between the width and height of an image. When it is necessary to resize an image, the aspect ratio should not change. Otherwise, your resized image could become stretched or squashed. Most image editing tools offer an option to lock the aspect ratio to retain the proportions, irrespective of your size adjustments. That is also particularly important to an image's visual integrity and balance because distorted proportions can make even the best visuals look unprofessional.
2. Resolution [DPI/PPI]
The resolution of an image, measured in DPI, known as dots per inch or PPI pixels per inch, determines the clarity and detail of an image. A higher DPI, usually 300 DPI or more, is critical for print material to keep sharpness and detail. The standard resolution for web usage is 72 PPI, though the image must be guaranteed to be sharp and not lose detail as it is resized. High resolution is important in delivering high-quality images, especially when scaling up the images into large prints or high-definition displays.
3. Image Format
Different formats of images have different amounts of compression and quality. JPEGs are great for photos because you can have quite a small file size without losing much resolution. PNGs are more for graphics with alpha and pretty detailed illustrations. Size images, considering the formats, because the format can degrade quickly after resizing many times. Proper format selection leads to preserving the quality of the image while still controlling the file size. So, before you increase the image size, you need to research the format first.
4. Purpose and Platform
The resized image and file sizes must be determined based on the function for which they will be used. Relative to web use, smaller file sizes cannot be overstated because this means a quicker page load time, improved user experience, and overall rankings for SEO. For print use, a high resolution is required to determine that the image should be sharp and of good print quality. Each platform, a social media channel, an e-commerce website, or even a blog often has some range of specific size requirements. Adherence to these will mean that your visuals will display correctly and professionally and are all the more effective.
5. Quality and Compression
The balance of quality to compression is key for resizing images to put them on the web. Overcompressing an image may lead to strong and obvious artifacts, pixelation, and loss of details, making it less pleasing. Adobe Photoshop, GIMP, and even online tools like TinyPNG can be adjusted so the quality settings are optimized without severely impacting file size. If you hit the mark, your images load well without compromising visual integrity.
6. Scaling vs. Cropping
You can scale the entire picture proportionally, resizing the whole image or cropping parts out of it. Scaling is great if you want to preserve the whole visual, but it may only sometimes meet the requirements of the new context where an image will be used. On the other hand, cropping allows you to put an accent on certain areas within the image that better serve your purpose. Adjusting the size of your image will help it maintain some of its visual effectiveness.
7. Retaining Sharpness
Reduced images appear very fuzzy or grainy if the original images are much larger. Sharpening tools are available in some image editing packages to sharpen the image when it is reduced. Avoid over-sharpening the picture so as not to turn the edges unnatural and potentially inject noise into the picture. If handled correctly, though, sharpening preserves the aesthetic appeal of the photo and ensures that it still shows clearly and sharply, even at smaller sizes.
Part 3. How to Change Image Size via Upscalling, Downscaling & Reducing Size
1. Increase Image Size by Upscaling
AVAide Image Upscaler is an outstanding tool because it changes the size of an image online without losing quality. AI technology can enlarge an image up to 8 times its normal size without loss or pixelation, making it perfect for printing high-quality prints or improving general digital images.
Step 1Open a new tab and go to the official website of the image upscaler. Then, tick the Choose a Photo to upload the image you want to upscale.
Step 2Here, select the magnification you want to choose from up to 4×. If you want to access the 6× and 8×, you will need to purchase a credit, which this web tool has to offer.
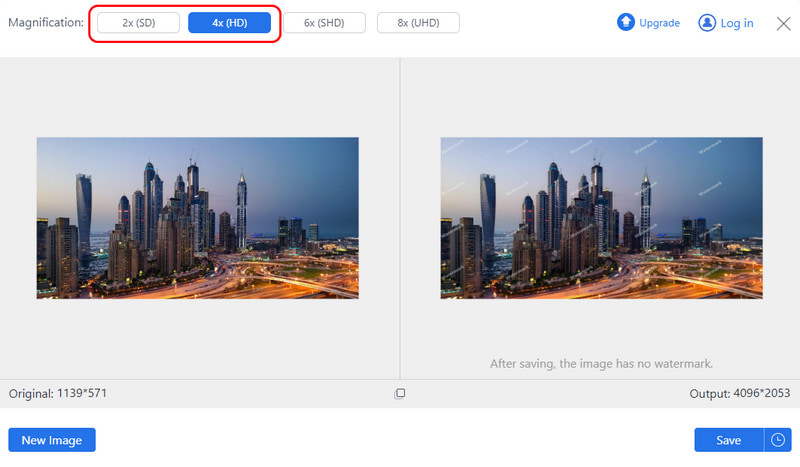
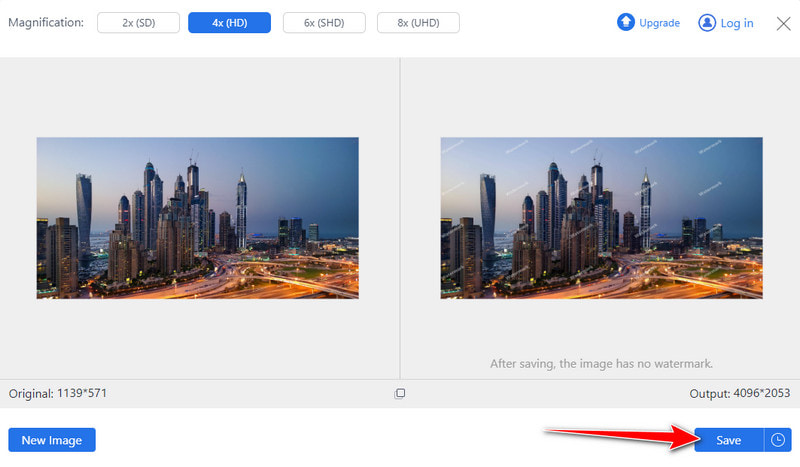
Step 3After the processing, tick the Save button to initiate the upscaling process. There is no need to worry since the app will not have a logo watermark.
2. Decrease Image Size by Downscaling
The ResizePixel.com website offers a simple-to-use interface to resize images. It uses the downscaling feature with the pixels for width and height adjustments, which can help downscale the chosen images without altering their aspect ratio or quality. It is useful for web optimization or fitting specific size requirements, and even processing 4K to 1080p can be done here.
Step 1Open the ResizePixel web tool on any browser and click Upload Image to add the photo you want to downscale.
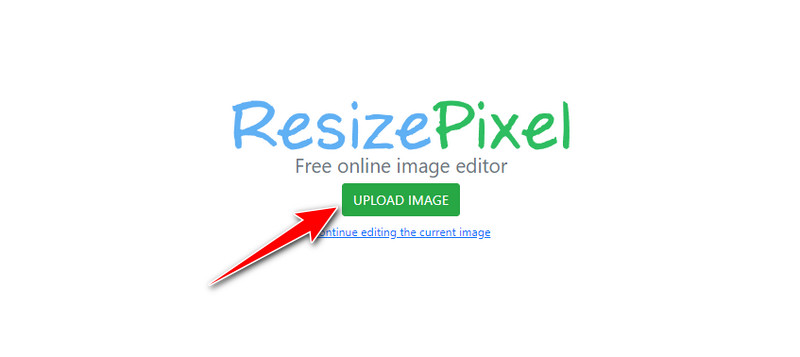
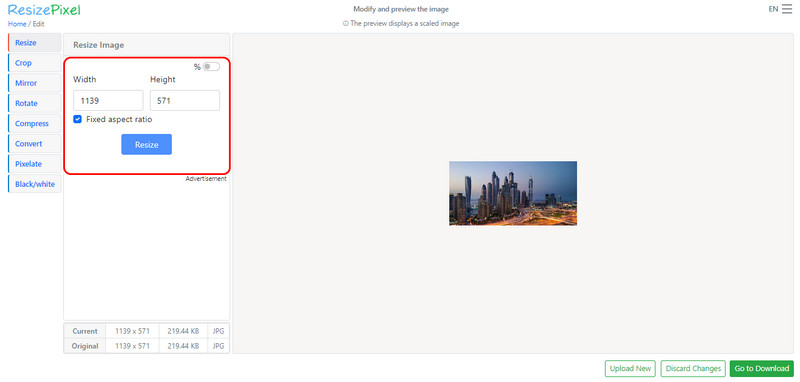
Step 2Change the value of the Width and Height of the image based on your needs and click Resize to apply the changes.
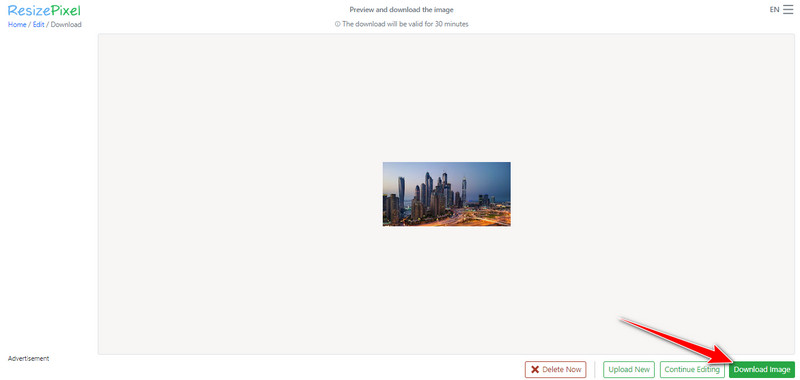
Step 3Tick the Go to Download button to process it, and click the Download Image button to save it.
3. Reduce Image to Size in KB or MB
With AVAide Image Compressor, you can shrink image files to smaller sizes that do not compromise quality. Upload an image, automatically compress it to a certain degree, and you are done and get to download your optimized file. It makes them load faster on web pages and even meet other demands by compressing files to KB or MB. Modifying image size does not take a lot of trouble, especially if you have this tutorial.
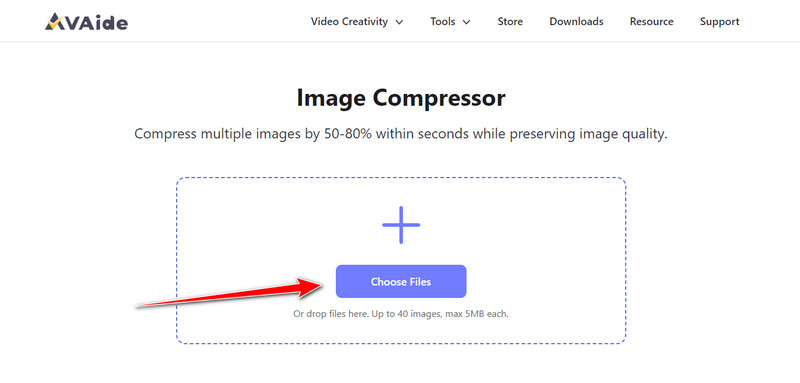
Step 1Go to the browser to access this image compressor and click the Choose File to upload the image you want to downsize you have into a smaller one.
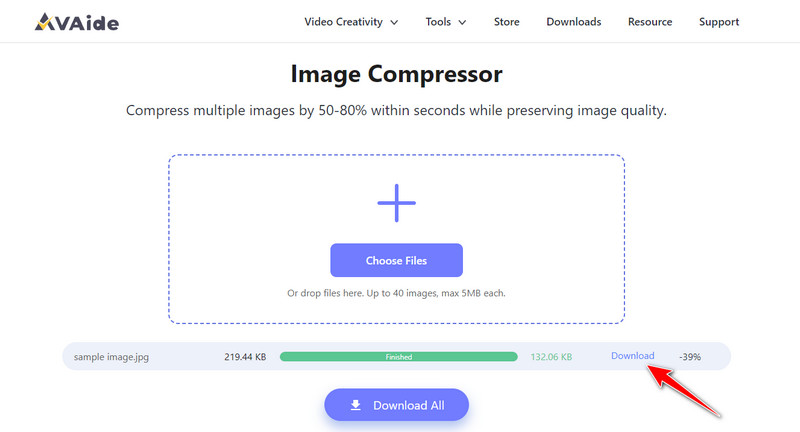
Step 2After uploading, the compression will start. Tick the Download button to get the compressed photo. Easy right? Well, this is considered one of the top image compressors online.
Bonus: Great Image Sizes for Popular Social Platforms You Usually Use
| Platform | Profile Picture | Cover/Banner | Post Image for Square | Post Image for Other | Other Key Images Sizes |
| 180 × 180 pixels | 820 × 312 pixels (Cover) | 1200 × 630 pixels (Shared) | N/A | 1920 × 1005 pixels (Event Cover) | |
| 320 × 320 pixels | N/A | 1080 × 1080 pixels | 1080 × 566 pixels (Landscape), 1080 x 1350 pixels (Portrait) | 1080 × 1920 pixels (Story) | |
| 400 × 400 pixels | 1500 × 500 pixels (Header) | N/A | 1200 × 675 pixels (In-Stream Image) | N/A | |
| 400 × 400 pixels | 1584 × 396 pixels (Banner) | N/A | 1200 × 627 pixels (Shared Image) | N/A | |
| YouTube | N/A | 2560 × 1440 pixels (Channel Art) | N/A | 1280 × 720 pixels (Thumbnail) | N/A |
| 165 × 165 pixels | 222 × 150 pixels (Board Cover) | N/A | 1000 × 1500 pixels (Pin Size) | N/A |
Changing image size is free, and you can use all of these specialized online software accessible on any website today. There is no need to download; you can just upload, process, and take the final output as quickly as possible. Share this information with anyone to let them know about this!

Our AI technology will automatically enhance the quality of your images, remove noise and fix blurry images online.
TRY NOW


