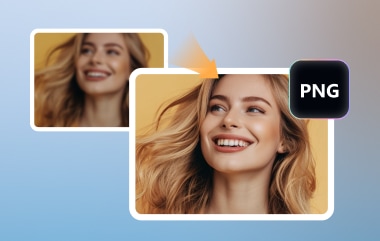
PNG는 로고, 아이콘, 투명도가 필요한 이미지에 일반적으로 사용됩니다. 만약 PNG 파일을 저장해 두었고, 이를 투명하게 만들고 싶다면, PNG 크기 조정 다양한 목적으로 PNG 크기를 조정하는 방법을 알고 싶다면 이 글을 읽어보세요. 이 가이드에서는 신뢰할 수 있는 PNG 크기 조정 도구를 소개하고, 화질 손실 없이 PNG 크기를 조정하는 방법을 알려드립니다.
준비됐나요? 그럼 시작해 볼까요!
파트 1: PNG 파일 크기 조정이 필요한 이유
웹사이트, 디자인 또는 디지털 프로젝트 작업을 하는 사람이라면 PNG 이미지를 올바르게 관리하는 것이 필수적입니다. 적절한 크기의 이미지는 성능을 향상시키고 모든 기기에서 보기 좋게 표시되며 저장 공간도 덜 차지합니다.
PNG 파일 크기를 조정해야 하는 주요 이유는 다음과 같습니다.
PNG 이미지 크기를 조정(축소)하는 이유는 무엇일까요?
- 페이지 로딩 속도 향상: 용량이 큰 PNG 파일은 페이지 로딩 속도를 저하시켜 사용자에게 불편함을 줄 수 있습니다.
- 대역폭 사용량 감소: 압축 파일은 사용자, 특히 모바일 기기 사용자의 데이터 사용량을 줄여줍니다.
- 저장 공간 절약: 이미지 크기가 작을수록 서버와 기기에서 차지하는 공간이 적습니다.
- 선명한 화면: 이미지를 레이아웃에 맞게 확대/축소하면 왜곡이나 흐릿함을 방지할 수 있습니다.
PNG 이미지 크기를 조정(확대)하는 이유는 무엇일까요?
- 인쇄 준비 완료: 이미지 크기가 클수록 선명하고 깨끗한 인쇄를 위한 충분한 픽셀 수를 확보할 수 있습니다.
- 고해상도 화면에서 표시: 더 커진 이미지가 흐릿해 보이지 않고 레티나 및 HD 모니터에 잘 맞습니다.
- 디자인 일관성: 작은 그래픽을 확대하면 아이콘과 일러스트레이션이 통일감 있고 전문적인 느낌을 유지합니다.
파트 2: PNG 크기 조절 도구 7가지 간략 소개
아래에서는 이미지를 더 작게, 더 선명하게, 또는 어떤 프로젝트에도 딱 맞는 크기로 만들 수 있는 유용한 PNG 크기 조정 도구 7가지를 간단히 소개합니다.
1. 이미지 리사이저

이 온라인 플랫폼을 사용하면 PNG 파일 크기 조정이 매우 간편해집니다. 픽셀, 백분율 또는 소셜 미디어 사전 설정으로 크기를 설정할 수 있으며, 크기 고정 기능도 제공합니다. 이미지 종횡비 또는 색상과 투명도를 추가하여 이미지 늘어짐을 방지할 수 있습니다. 모든 기기에서 작동하고 무료로 사용할 수 있으며 이미지를 선명하게 유지합니다.
혜택: 별도의 프로그램 없이 빠르게 크기를 조정하기에 완벽합니다.
한정: 무료 버전은 파일 크기에 제한이 있습니다.
2. 아이러브IMG

PNG 파일들을 일괄적으로 크기 조정하고 싶으신가요? iLoveIMG를 사용하면 컴퓨터, Google Drive 또는 Dropbox에서 이미지를 업로드할 수 있습니다. 픽셀 단위로 가로세로 크기를 변경하거나, 백분율로 축소하거나, 가로세로 비율을 유지할 수 있습니다. 자르기, 워터마크 추가, 변환과 같은 추가 도구도 제공하여 더욱 다양하게 활용할 수 있습니다. 또한, 여러 이미지 크기를 한 번에 조정하고 싶을 때도 유용하게 사용할 수 있습니다. JPG 크기 조정.
혜택: 이 프로그램은 이미지 일괄 처리를 손쉽게 수행합니다.
한정: 일부 추가 기능은 프리미엄 계정이 필요합니다.
3. 온라인 PNG 도구

온라인 PNG 도구는 매우 간단하지만 강력한 PNG 이미지 크기 조절 프로그램입니다. 너비와 높이를 설정하거나 비율을 유지할 수 있습니다. 미리보기 기능을 통해 원본 이미지와 수정된 이미지를 모두 확인할 수 있습니다. 또한 처리 속도가 빠르고 무료이며 모든 기기에서 작동합니다.
혜택: 크기가 조정된 이미지의 즉시 미리보기.
한정: NS 인터페이스는 기본적이고 단순합니다.
4. 어도비 익스프레스

Adobe Express를 사용하면 PNG 파일 크기를 온라인으로 조정하고 동시에 편집할 수 있습니다. Instagram, YouTube, Facebook에 맞는 사전 설정 크기를 선택할 수 있으며, 다운로드하기 전에 원본 크기와 수정된 크기를 모두 확인할 수 있습니다. 편집 기능에는 자르기, 배경 제거, 형식 변환 등이 포함됩니다.
혜택: 크기 조절 기능과 편집 도구를 결합한 프로그램입니다.
한정: NS 파일 크기 제한은 40메가바이트 미만입니다.
5. 워터마크

고품질 PNG 이미지 크기 조정을 위한 워터마크 제거 도구인 Watermarkly를 소개합니다. 원본 파일 이름과 메타데이터를 그대로 유지하며, 여러 파일을 한 번에 크기 조정할 수 있습니다. 용량이 큰 이미지도 매끄럽게 처리됩니다. 또한 워터마크가 추가되지 않아 파일 개인 정보 보호가 보장됩니다. 온라인에 파일을 유출할 위험 없이 선명한 결과물을 얻고 싶을 때 매우 유용합니다.
혜택: 명확성과 개인정보 보호를 그대로 유지합니다.
한정: 고품질 크기 조정에는 시간이 더 오래 걸릴 수 있습니다.
6. 간단한 이미지 크기 조절 도구

워터마클리(Watermarkly)처럼 심플 이미지 리사이저(Simple Image Resizer)는 안전하게 사용할 수 있는 PNG 사진 크기 조절 프로그램입니다. 이미지는 24시간 후 자동으로 삭제됩니다. 백분율 또는 픽셀 단위로 크기를 조절할 수 있으며, 프리미엄 플랜으로 업그레이드하면 광고 없이 최대 10개의 파일을 동시에 처리할 수 있습니다.
혜택: 매우 안전하고 사용하기 간편합니다.
한정: 무료 버전은 한 번에 하나의 이미지 크기만 조정할 수 있습니다.
7. PNG 크기 조정

RESIZEPNG를 사용하면 투명도나 화질 손실 없이 PNG 파일 크기를 조정할 수 있습니다. 너비, 높이를 설정할 수 있을 뿐 아니라 ZIP 파일로 다운로드하여 여러 이미지를 일괄적으로 크기 조정할 수도 있습니다. 이미지가 많은 대규모 프로젝트에 특히 유용합니다. 또한 파일을 JPEG, GIF 또는 PDF로 변환하여 다른 용도로 활용할 수도 있습니다.
혜택: 일괄 크기 조정 및 형식 지정 옵션이 유용합니다.
한정: 업로드된 모든 파일을 표시하는 것이 아니라, 단순히 파일 크기를 하나로 줄여서 보여줍니다.
파트 3: 화질 저하 없이 PNG 크기 조정하는 방법
PNG 이미지 크기를 조정할 때 화질이 저하되는 것을 원치 않으시죠? 그래서 이번 시간에는 AVAide 도구를 사용하여 화질 손실 없이 PNG 이미지 크기를 조정하는 방법을 알려드리겠습니다. 지금 바로 확인해 보세요!
1. AVAide 이미지 압축기
PNG 이미지 크기를 줄이면 페이지 로딩 속도, 소셜 미디어 게시, 이메일 전송 속도가 향상되고 저장 공간을 절약할 수 있습니다. 이러한 모든 이점을 누리려면 다음이 필요합니다. AVAide 이미지 압축기이 PNG 압축기는 무료이며 온라인에서 작동하고 단 한 번의 클릭으로 파일 크기를 줄일 수 있습니다. 하나씩 크기를 조정하는 대신 한꺼번에 모두 조정해 보세요. AVAide 이미지 압축기는 일괄 크기 조정을 지원하여 더욱 빠르고 간편하게 작업할 수 있도록 해줍니다.
그럼 이제 AVAide 이미지 압축기를 사용하여 PNG 파일 크기를 조정하는 방법을 알아보겠습니다.
1 단계먼저 브라우저를 열고 AVAide Image Compressor 웹사이트로 이동합니다. 페이지 중앙에 있는 버튼을 클릭합니다. 파일 선택 크기를 조정할 PNG 이미지를 선택하려면 버튼을 사용하세요. 파일을 직접 선택하여 페이지에 드롭할 수도 있습니다.
- 이 도구를 사용하면 최대 40개의 이미지를 한 번에 업로드할 수 있으며, 각 이미지의 최대 크기는 5MB입니다.

2 단계업로드 시작, 압축 진행, 완료 시점을 보여주는 진행률 표시줄이 나타납니다. 압축이 완료되면 AVAide Video Compressor는 원본 파일 크기, 압축 후 크기, 그리고 절약된 공간 비율을 표시합니다. 아래 사진의 경우, 1.97MB PNG 파일이 450.58KB로 압축되었습니다.

3단계지금 당신이 해야 할 일은 클릭하는 것뿐입니다. 모두 다운로드 크기를 조정한 PNG 이미지를 저장하는 버튼이 있습니다. 이제 웹사이트, 이메일, 소셜 미디어 또는 용량을 줄이면서 고품질 이미지가 필요한 모든 프로젝트에 이 이미지를 사용할 수 있습니다.

2. AVAide 이미지 업스케일러
대형 인쇄, 작은 이미지를 큰 화면에 맞추기, 또는 창의적인 디자인 작업을 위해 세부 사항을 개선하는 등 PNG 파일을 확대해야 할 필요가 있다면 주저하지 말고 사용하세요. AVAide 이미지 업스케일러이 플랫폼은 PNG 파일을 최대 8배까지 확대할 수 있습니다. 뿐만 아니라 노이즈와 흐림 현상을 자동으로 제거하고, 화질을 개선하며, 흐릿한 사진을 선명하게 만들어 줍니다. 따라서 고화질을 유지하면서 PNG 파일을 손쉽게 확대할 수 있습니다.
자, 이제 AVAide Image Upscaler를 사용하여 PNG 파일의 크기를 조정하는 방법을 알려드리겠습니다.
1 단계AVAide Image Upscaler를 사용하여 PNG 이미지 크기를 조정하려면 공식 웹사이트로 이동해야 합니다. 웹사이트에 접속하면 다음을 클릭하세요. 사진 선택 PNG 이미지를 업로드하려면 이 버튼을 클릭하세요.
- 여러 이미지를 동시에 확대하려면 클릭하세요. 일괄적으로 사진 업로드.

2 단계PNG 이미지 처리가 완료되면 이미지를 얼마나 확대할지 선택할 차례입니다. 기본 크기를 그대로 사용하셔도 됩니다. 2×또는 선택하세요 4×, 6×, 또는 8×숫자가 높을수록 이미지가 커집니다.

3단계결정되면 다음을 클릭하세요. 구하다 크기가 조정된 PNG 파일을 다운로드하려면 버튼을 클릭하세요. 이제 더 크고 고품질의 이미지가 필요한 프로젝트에 이미지를 사용할 수 있습니다.

너무나 많은 PNG 크기 조절 도구 이 게시물에 있는 다양한 도구 중에서 선택할 수 있어서 좋죠? 물론, 여러분이 마음에 드는 도구를 자유롭게 고르실 수 있도록 하고 싶습니다. 하지만 화질 손실 없이 PNG 이미지 크기를 조정하고 싶다면 AVAide 도구를 추천합니다. 이 도구를 사용하면 이미지를 선명하고 깨끗하게 유지하면서 빠르게 축소하거나 확대할 수 있어 어떤 프로젝트에도 바로 사용할 수 있습니다.