能力 写真を編集する 撮影した写真を洗練させたいプロにとっても、メディアで取り上げるために写真の質を高めたい一般ユーザーにとっても、写真編集はこれまで以上に重要になっています。写真を効果的に行う方法を知っていると、大きな違いが生まれます。強力なツールとアプリを活用すれば、普通の写真を特別なものに作り変えることができます。そのため、私たちは利用可能なツールを効果的に使用する方法を教えることにしました。
パート 1. 無料でオンラインで写真を編集する方法 - 有名なオンライン写真編集ツール 4 つ
1. アベイド
AVAide は、どのブラウザからでもアクセスできる最高の無料マルチメディア ソフトウェアの宝庫であり、ビデオ管理などのダウンロード可能なソフトウェアも提供しています。しかし今日は、この Web サイトが提供する、オンラインで写真を無料で編集する 4 つの方法について説明します。
1つ目の方法。画質を最高にアップスケールする方法
AVAideイメージアップスケーラー は、人工知能を統合して画像を最大 8 倍にアップスケールする場合に最も有力な候補です。他のアップスケーラーとは異なり、最終出力に透かしが残らず、さまざまな形式をサポートしています。以下の手順を使用して使用方法を学びます。
ステップ1認定ウェブサイトにアクセスしてチェックを入れてください 写真を選択してください ファイルフォルダを開き、拡大したい画像をアップロードします。
ステップ2読み込み後、ここで利用可能なオプションの中から設定したい拡大レベルを選択します。それをクリックすると、アプリは選択した拡大率を処理して画像に適用し、画面上でプレビューできます。
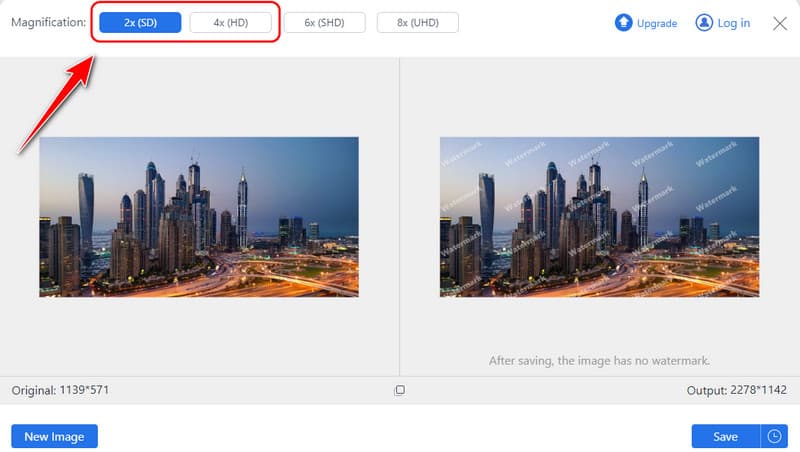
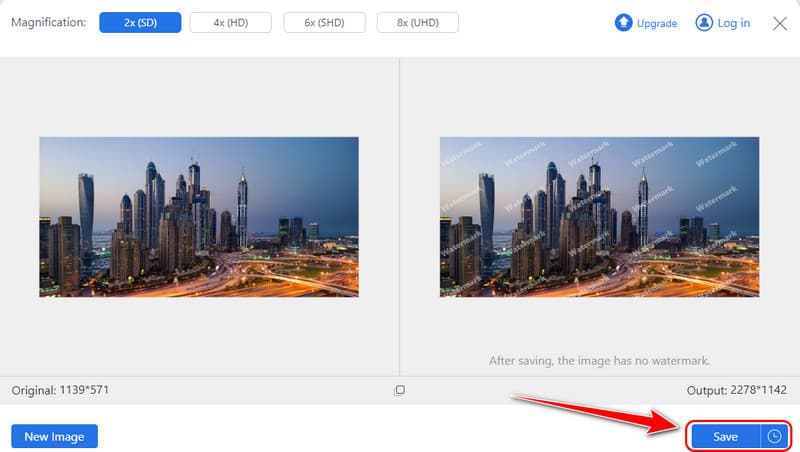
ステップ3最後に、をクリックします 保存する ボタンをクリックして、画像の拡大バージョンを取得します。
2番目の方法。画像に追加された透かしを削除する方法
AVAideウォーターマークリムーバー は、出力を汚すことなく画像に追加された透かしを削除するワンクリック AI ツールです。これを使用すると、透かしの入った画像を簡単に削除してプロフェッショナルな画像に変えることができます。操作方法を理解するには、以下の手順に従ってください。
ステップ1ブラウザを使用してAVAide Watermark Removerにアクセスし、クリックします 写真を選択してください 透かし入りの画像をここにアップロードします。
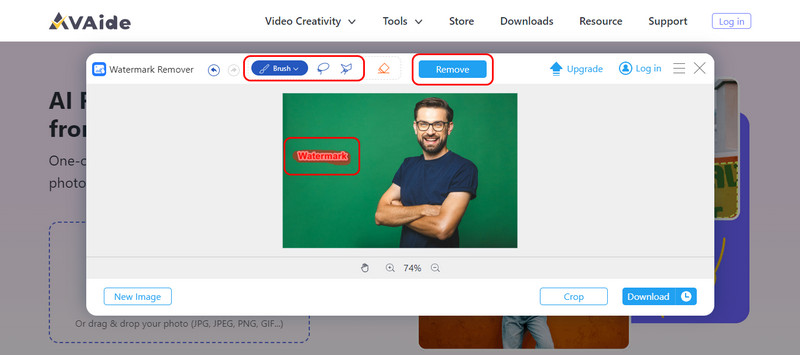
ステップ2あなたは みがきます また 投げ縄 アップロードした画像から削除したい透かしをハイライトします。透かしがハイライトされていることを確認してください。 削除する ボタン。
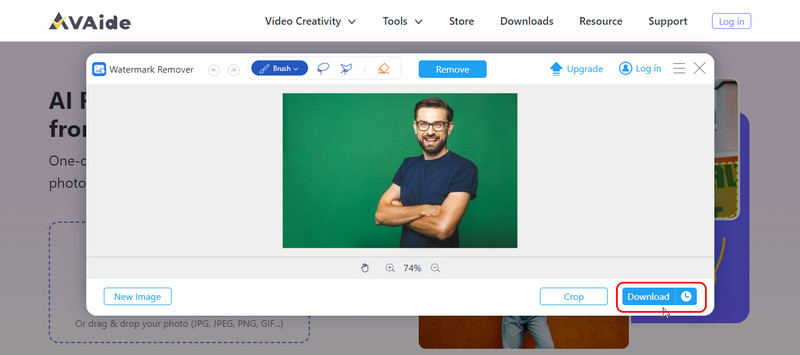
ステップ3結果に満足したら、 ダウンロード それを保存するボタン。
3番目の方法。写真の背景を削除する
AVAIde 背景消しゴム は、AI を使用して画像の背景を削除するタスクを完了する人気の Web ツールです。画像の背景を削除して透明にしたいすべての人に適しています。ここでの手順で、その仕組みを理解してください。
ステップ1新しいタブを開いたら、この背景消しゴムを検索して開きます。クリック 写真を選択してください 透かしを削除したい画像をアップロードします。
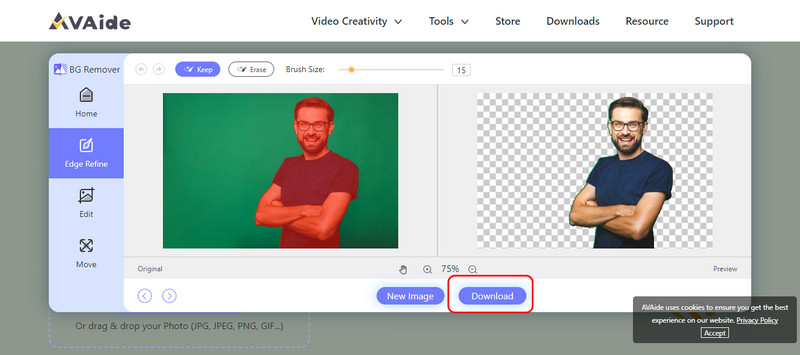
ステップ2処理を待ちます。 エッジリファインを使用すると、背景なしで編集した画像をすばやくプレビューできます。画像を微調整する必要がある場合は、「保持」または「消去」オプションを使用して調整します。
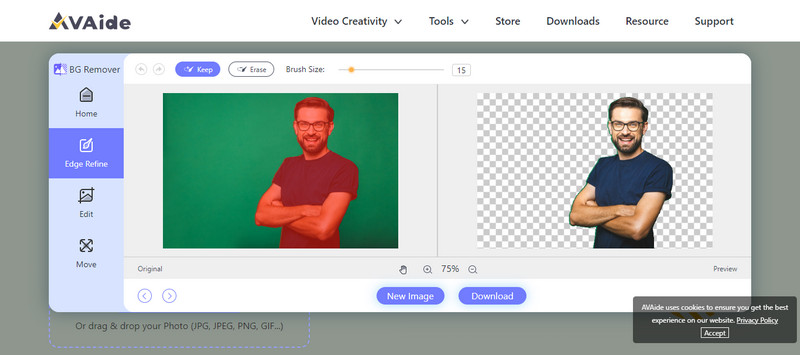
ステップ3画像の完成が終わったら、クリックします ダウンロードすると、背景が追加されていない画像が表示されます。
4番目の方法。画像のファイルサイズを縮小する方法
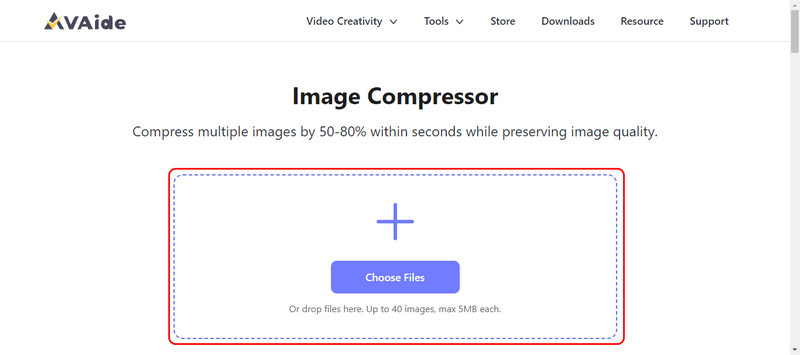
画像の見た目を編集するだけでなく、ファイルサイズにも注意する必要があります。 AVAide 画像圧縮器 がお役に立ちます。これは、元の画像の品質を維持しながら、画像のファイル サイズを全体の 50 パーセントまたは 80 パーセントに縮小する専用ツールです。ここでその仕組みを学びましょう。
ステップ1アプリにオンラインでアクセスできるように、公式ウェブページを検索してください。
ステップ2ここで、 ファイルを選択 ファイルサイズを圧縮したい画像をアップロードします。
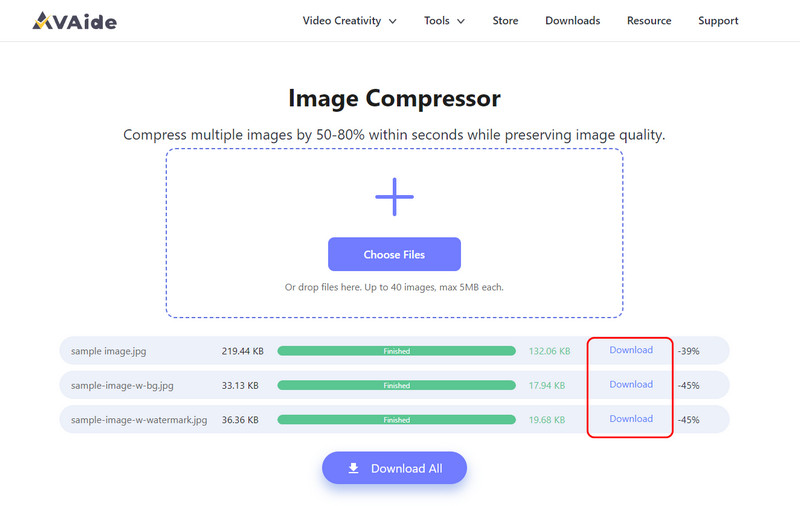
ステップ3完了すると、圧縮が完了したことを示す「完了」という通知が表示されます。クリックします。 ダウンロード また すべてダウンロード.
2.カンバ
最も有名な特徴は カンバ シンプルさと多様なデザインオプションが魅力です。しかし、グラフィックデザインに限定されず、完璧な写真編集オプションも提供しています。その確かな特徴により、インターネット上で無料で写真の補正が可能になります。明るさ、コントラスト、フィルター、効果の変更も問題ありません。特に、アイコンはごく普通のものなので、デザインの経験がまったくない人でもプログラムを操作して、まともなものを作成できます。
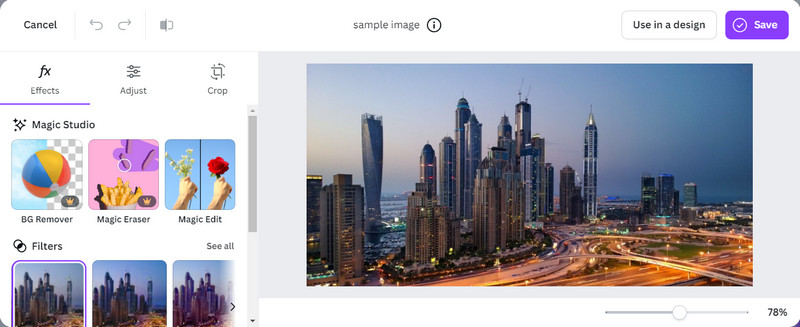
ステップ1無料のCanvaアカウントにサインアップするか、すでに作成している場合はログインしてください。 デザインを作成する プロジェクトのディメンションを選択するか、カスタマイズします。
ステップ2チェック アップロード と ファイルのアップロードをクリックし、このアプリで編集したい画像を選択します。
ステップ3ここでは、内蔵ツールを使って画像の明るさ、コントラスト、フィルター、効果を調整できます。満足したら、 シェア ボタンと ダウンロードここでは、 Canvaで透明な背景を作る ロゴやその他のもののために。
3. ピクセラ
ピクルス は、Adobe Photoshop のようにオンラインで写真を編集できる強力なソフトウェアです。そのため、あまり複雑にせずに、より細かい制御を行いたい方に最適です。Pixlr X は簡単な変更に、Pixlr E はプロレベルの調整に、あらゆるレベルのユーザー向けにも用意されています。ツールバーには、切り抜き、サイズ変更、色、フィルター、および迅速な変更のためのインスタント レタッチのオプションがあります。
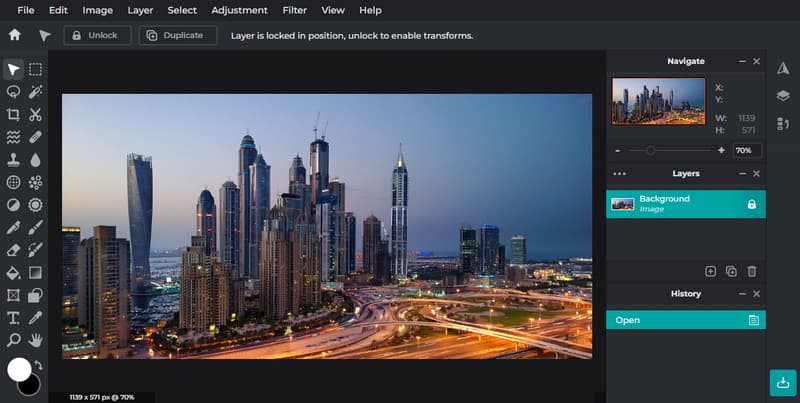
ステップ1ブラウザで検索してPixlrの公式サイトにアクセスします。 AIエディターを開く と選択します 画像を開く 編集したい写真の
ステップ2左側では、調整、切り抜き、フィルター、AI ツールなどの編集機能を使用できます。
ステップ3完了したら、 保存する ボタン。
4. フォトル
Fotor は、シンプルなインターフェースとワンクリックの改善で有名な、優れた AI 写真編集ツールです。シンプルな編集オプションが提供されており、明るさ、コントラスト、彩度を変更したり、テキストやエフェクトを追加したりすることもできます。これを使用すると、ユーザーは写真を簡単に強化でき、写真に個性を与えるさまざまなフィルターやエフェクトがあります。
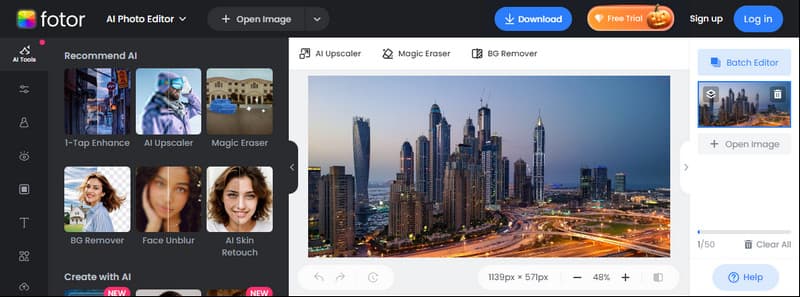
ステップ1新しいタブを開いてFotorを検索してアクセスします。次に、 写真を無料で編集 編集機能にアクセスするには、アカウントにログインして続行してください。
ステップ2チェック 画像を開く ここで編集したい画像ファイルをインポートします。その後、左側の推奨ツールを使用して編集できます。
ステップ3完了したら、 ダウンロード ボタン。
パート2. デフォルトのエディタを使用してiPhoneで画像を編集する方法
iPhone は、Android などの他のデバイスに比べて、高精度かつ詳細に、見たものの生の画像を撮影できるように作られています。これらの優れたレンズを使用すると、あらゆる瞬間を捉えてデバイスに直接保存できます。ここでの手順に従って、撮影後に iPhone で写真を編集する方法を学びます。
ステップ1カメラを開いて画像を撮影するか、 写真 編集したい画像にアクセスするにはアプリを使用します。
ステップ2ここで、 編集 ボタンをクリックして編集機能にアクセスします。このエディターが提供するすべての編集機能は下部からアクセスできます。試してみてください。サードパーティのオプションに比べてどれも使いやすいです。
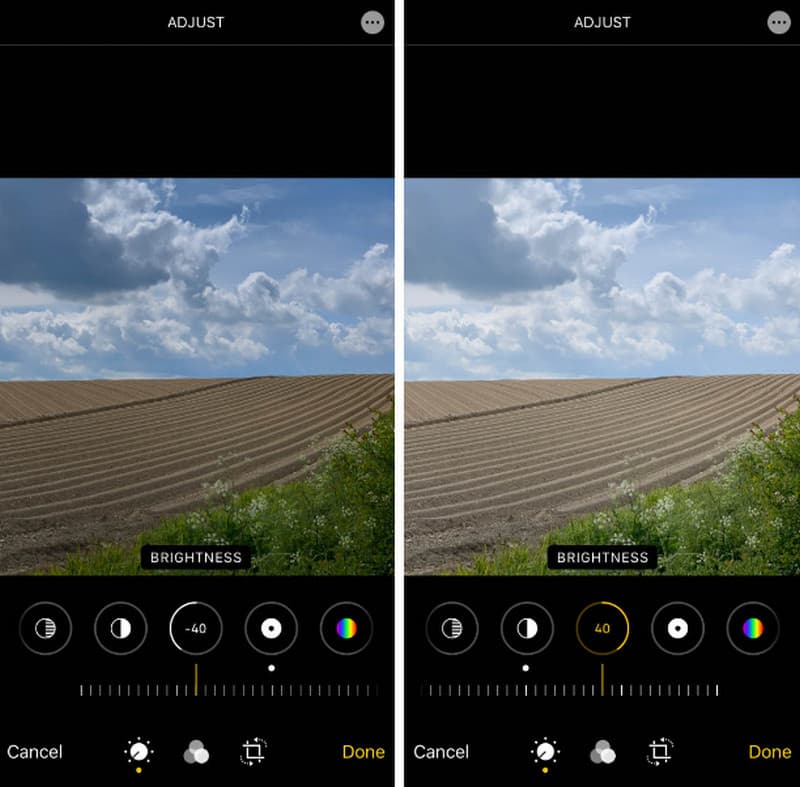
ステップ3編集後、 終わり ボタンをクリックして画像への変更を保存します。
パート3. デフォルトの画像エディタを使用してWindows / Macで写真を編集する方法
PC で簡単かつ迅速な編集を行うには、画像の切り抜き、トリミング、効果の追加などを迅速に行うことができる組み込みエディターを利用することが必須です。Windows 7 以降および macOS で写真を編集する方法を学びます。
Windowsの場合:
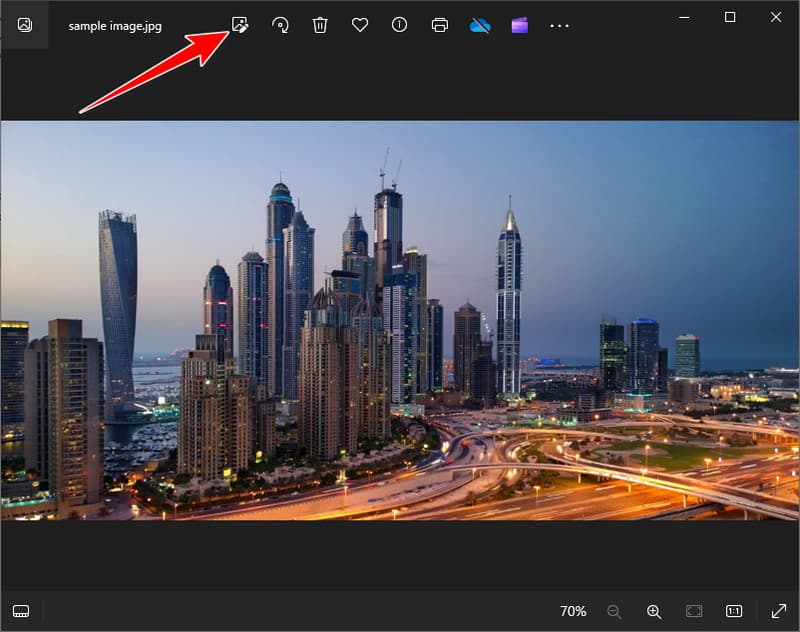
ステップ1Windowsで開きたい画像を見つけて、それを2回クリックして開き、 画像を編集 ボタンまたは単に押す Ctrl + E.
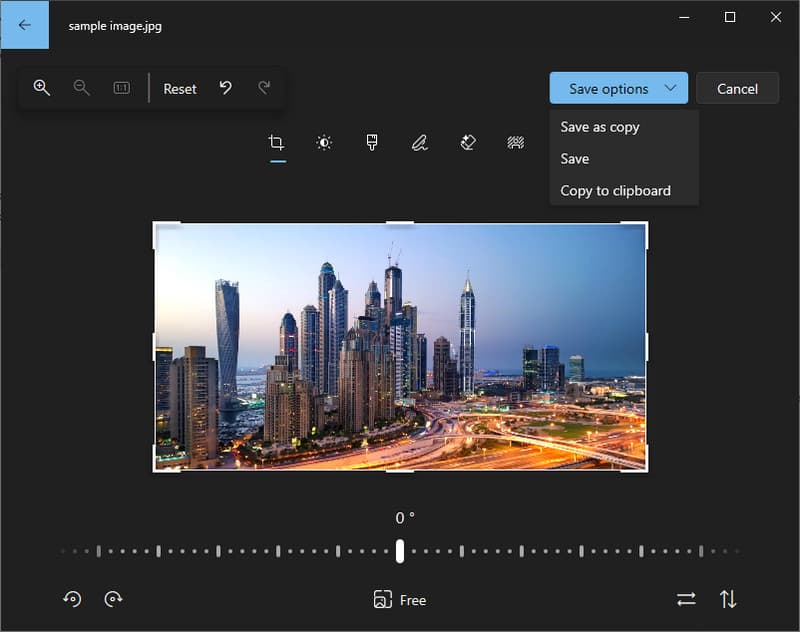
ステップ2サイズ変更、回転、光のバランス調整、強調など、ここで利用できるツールを使用します。 保存オプション と選択します 保存する また コピーとして保存.
Macの場合:
ステップ1を開きます 写真 Finderフォルダからアプリを検索して開きます。編集したい画像を見つけて2回クリックして開きます。開いたら、 編集.
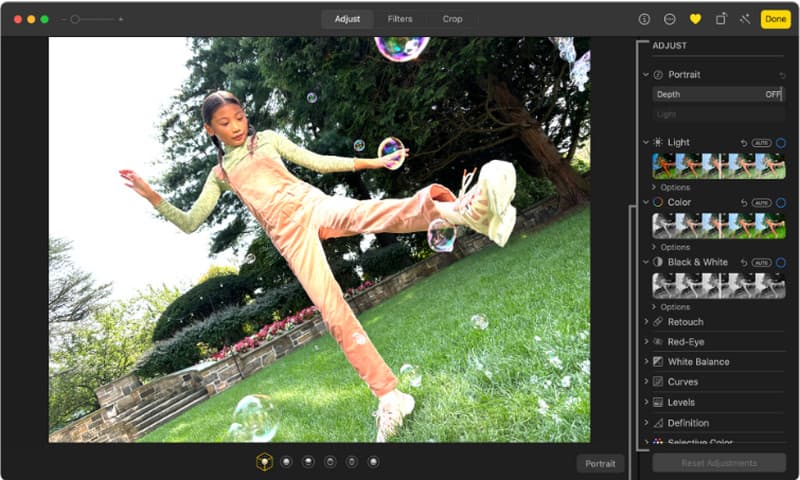
ステップ2次に、トリミング、フィルターの追加、露出の調整などを行って画像を調整します。完了したら、 終わり また 戻る.
ただし、これらのデフォルトのエディタは、 画像の背景を削除するフォトエディタなぜなら、それらはそのような広範な機能をサポートしていないからです。
ご覧の通り、多くの方法があります 画像を編集するデフォルトのエディタを使用しても、写真の可能性を最大限に引き出したい場合は、ここで紹介するサードパーティのオンライン エディタを使用してください。


