Kako bi se vaša fotografija doista istaknula, važno je poboljšati kvalitetu slike koristeći suvremeni softver i tehnike za uređivanje prikazane u ovom članku. Kao fotograf ili amaterski fotograf, znanje kako prilagoditi postavke za oštrinu, osvjetljenje i živost može pretvoriti RAW slike u remek-djelo. Dakle, ako ste spremni urediti svoju savršenu snimku, ove informacije su za vas da pročitate.
Dio 1. Koje vrste tehnika mogu poboljšati kvalitetu slike
Što se tiče posebnih metoda koje se koriste za poboljšanje fotografija, može se koristiti nekoliko općih trikova kako bi se fotografije pretvorile u one koje dobro izgledaju. Ove prilagodbe imaju zajedničku svrhu poboljšanja kvalitete slike; vaše slike postaju jasnije, svjetlije i realističnije ili, kako bi to profesionalci željeli reći, vaše slike izgledaju uglađenije. Istražimo neke od najučinkovitijih tehnika:
1. Promjena svjetline i kontrasta
Najosnovnija, iako vrlo učinkovita, strategija za poboljšanje kvalitete slike je promjena postavki svjetline i kontrasta. Svjetlina znači u kojoj mjeri se slike mogu osvijetliti ili staviti u mrak, dok kontrast ispred, najviše, znači kontrast između lica i pozadine. Veći kontrast čini slike živopisnijima, a podešavanje svjetline donosi detalje u sjenovitim i jako osvijetljenim područjima slike na svjetlo.
2. Povećanje intenziteta
Općenito, intenziviranje fotografije povećava razinu oštrine jer ova značajka izoštrava rubove, poboljšavajući objekte i detalje na slici. Ovo je posebno važno za poboljšanje ili otkrivanje detalja na slikama kao što su one u prirodi ili slike ljudi. Međutim, najoštriji će samo pogoršati stvari, stavljajući neprijateljske aureole oko subjekta i uklanjajući fizičku strukturu fotografije.
3. Balansiranje boje i zasićenja
Slike koje snimamo moraju imati dobar balans boja da bi se smatralo da imaju pravu zasićenost. Balansiranje boja je fino podešavanje temperature slike kako bi bila topla ili hladna i nijansiranje kako bi se slika prebacila u zelenu ili magentu. Kako se razina zasićenosti povećava, boje postaju svjetlije i življe, a kako padaju, proizvode umjetnički, dosadan pogled, kao što se može vidjeti. Suptilne i umjerene boje sprječavaju da vaša slika ispadne previše blijeda ili previše neonska u kontrastu, što bi trebalo stvoriti prilično udoban i ugodan pogled.
4. Korekcija balansa bijele boje
Ravnoteža bijele je izraz koji se koristi za opisivanje tona ili temperature boje slike. Ovo djeluje suprotno od onoga kako bi vaša slika trebala izgledati; ako je ravnoteža bijele boje isključena, izgledat će previše toplo žuto ili narančasto tamo gdje bi trebalo biti hladno ili previše hladno plavo gdje bi trebalo biti toplo. Balans bijele boje pomaže da boja na vašoj slici bude onakva kakva bi trebala biti, posebno u pogledu prirodne nijanse kože ili proizvoda na fotografiji proizvoda. Ove promjene daju vašim fotografijama prirodan, profesionalno dotaknut izgled, što ih čini tehnikom za poboljšanje vaše slike.
5. Smanjenje buke
Sastoji se od digitalnog šuma, koji se pojavljuje kao zrnatost na fotografiji, obično u uvjetima slabog osvjetljenja. Ova smanjenja šuma, ako se primjenjuju, smanjuju ovu zrnatost, čineći sliku urednijom i profesionalnijom. Međutim, pažljivo koristite ovu tehniku jer pretjerano smanjenje šuma uništava detalje, čineći sliku neprirodnom. Održavanje ravnoteže između toga gdje generalizirati i gdje kopati dublje najvažniji je čimbenik u održavanju niske razine buke.
6. Obrezivanje i ravnanje
Izrezivanje također može poboljšati kvalitetu slike tako da nema sekundarnih objekata sa strane. Rasporedite horizont ili druge linije na slici za bolji izgled i ozbiljnije uspone za uočljiviju snimku. Ove promjene poboljšavaju izgled i dojam vaših fotografija i čine ih mnogo estetski privlačnijim.
7. Efekt vinjete
Ispravno radi kada se koristi za povećanje ili smanjenje ukupnog osvjetljenja slike kako bi se ljudi više usredotočili na središnju figuru. Ova tehnika se obično koristi u portretima i fotografijama proizvoda i daje konačnoj snimci posebnu privlačnost. Kada se primijeni, vinjeta može učiniti sliku zanimljivijom ljudima i poboljšati ugođaj cijele fotografije.
8. HDR ili visoki dinamički raspon
Obrada HDR-a je metoda pri kojoj se različite ekspozicije hvataju u više slika kako bi se proizvela fotografija s više detalja koja je moćna za svjetlinu ili tamu. Ovo je neophodno za scene s visokim kontrastom, na primjer, pri zalasku sunca ili bilo koji krajolik s izvorom svjetla iza objekta. HDR može znatno poboljšati kvalitetu slike prikupljanjem dodatnih informacija iz svjetlijih i tamnijih dijelova slike, dajući puno bogatiji prikaz.
Dio 2. Kako poboljšati fotografiju na bilo kojoj platformi [Vodič korak po korak za slijediti]
1. AVAide Image Upscaler
Kada vam je potrebna AI tehnologija za poboljšanje vaše slike, oslonite se na AVAide Image Upscaler. Ova aplikacija nudi način poboljšanja rezolucije i jasnoće s nekoliko klikova i bez podešavanja. To je savršen alat za besplatno poboljšanje kvalitete fotografija na mreži, a to možete učiniti slijedeći korake ovdje.
Korak 1Otvorite svoj preglednik i upišite naziv ovog web alata da biste mu pristupili.
Korak 2Označite Odaberite fotografiju da biste pristupili svojoj mapi i pronašli sliku koju želite poboljšati na najbolju kvalitetu.
Korak 3Nakon učitavanja odaberite razinu povećanja koju želite automatski primijeniti na učitanu sliku. Isprobajte ih sve i vidite koji je bolji jer se prije izvoza pojavljuje zaslon za pregled.
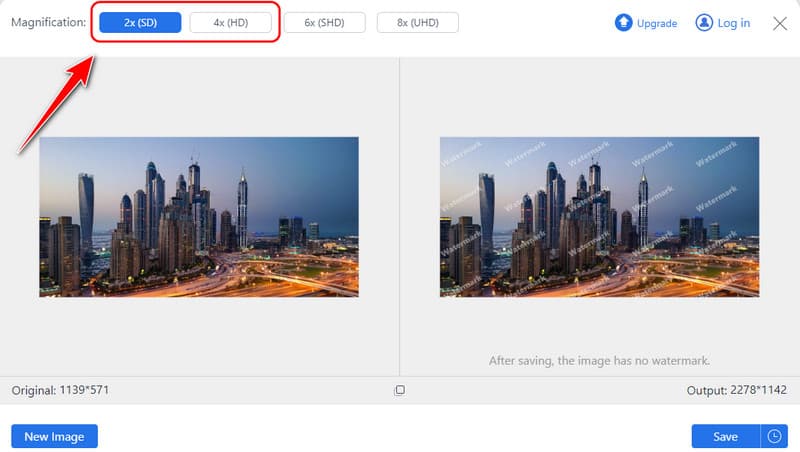
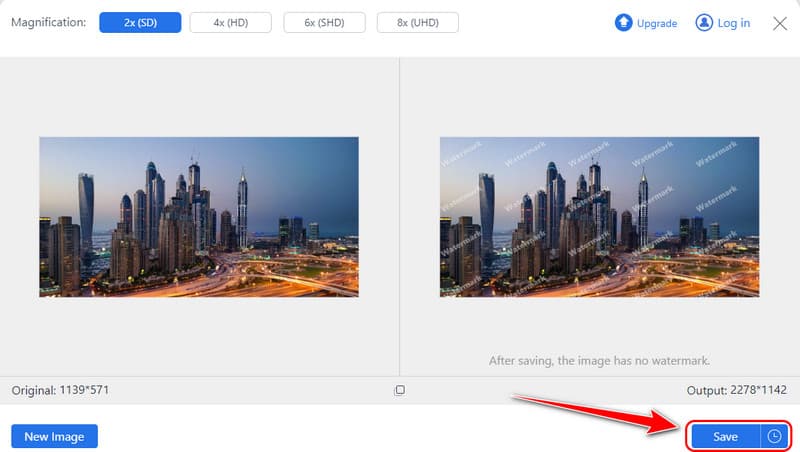
4. korakKada završite, označite Uštedjeti gumb za preuzimanje poboljšane verzije vaše učitane slike i vidjet ćete razliku.
2. Adobe Photoshop
Adobe Photoshop je najkorišteniji alat za uređivanje fotografija u profesionalnom svijetu. Kao što biste očekivali, dolazi sa sofisticiranim kontrolama za precizno uređivanje intenziteta svjetla, oštrine i kontrasta te ravnoteže boja.
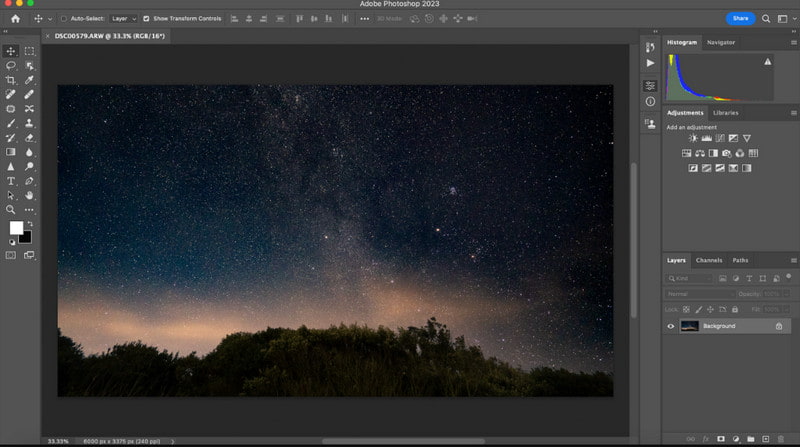
Korak 1Otvorite Photoshop, idite na Datoteka, i kliknite Otvorena za učitavanje slike.
Korak 2Ići Poboljšati, onda Super rezolucija.
Korak 3Označite Poboljšati ponovno za povećanje razlučivosti slike u Photoshopu. Uz to, možete čak smanjiti slike u Photoshopu bez korištenja kvalitete budući da se radi o softveru industrijskog standarda.
3. Canva
Canva je alat za grafički dizajn koji, čak i za obične ljude, ima osnovne značajke za uređivanje svjetline i kontrasta slike i primjenu filtara. Dizajnirana za početnike, Canva je izvrsna za popravljanje jednostavnih grafika i njihovo objavljivanje na društvenim mrežama. Ako želite poboljšati rezoluciju fotografije, slijedite korake ovdje.
Korak 1Idite na Canvu i kliknite Napravi dizajn, Učitavanja, i Odaberite datoteku za uvoz slike. Nakon uvoza kliknite Uredi sliku.
Korak 2Ovdje možete koristiti Filteri, Učinci, i Prilagodite opcije za poboljšanje slike na temelju vaših zahtjeva.

Korak 3Nakon što to učinite, kliknite na Uštedjeti dugme. Ostalo uređivanje, kao npr promjena veličine slika u Canvi, također je podržan.
4. Unaprijedimo
Unaprijedimo je AI alat koji se može koristiti online za povećanje kvalitete slika uz povećanje kvalitete i pročišćavanje tekstura. To je najbolji alat za oživljavanje starih fotografija ili poboljšanje fotografija niske kvalitete bez puno truda.
Korak 1Otvorite AI Photo Enhancer programa Let's Enhance i povucite željenu sliku na njegovo glavno sučelje.
Korak 2Nakon učitavanja odaberite vrstu povećanja veličine koju želite koristiti i kliknite Započnite obradu.

Korak 3Kada je gotovo, a preuzimanje datoteka gumb će se pojaviti za višu verziju.
5. Aplikacija za fotografije
Zadani iOS Aplikacija za fotografije ima filtre, izrezuje i prilagođava ekspoziciju. Ova je aplikacija izvrsna za najpoželjnije korekcije fotografija specifične za vaš uređaj. Da biste isprobali ovo besplatno poboljšanje fotografija na iOS-u, slijedite naše korake ovdje.
Korak 1Otvorite aplikaciju Fotografije na svom iOS-u, odaberite sliku koju želite urediti i dodirnite Uredi dugme.
Korak 2Ići Prilagodite za pristup svim značajkama koje možete koristiti za poboljšanje slike.

Korak 3Zatim kliknite Gotovo da biste spremili promjene.
6. Remini
Remini popravlja kvalitetu slike pružajući način da nefokusirane slike budu jasne i skenira čak i stare fotografije. Posebno je neprocjenjiv za poboljšanje oštrine ljudskih lica i obnavljanje starih ili mutnih fotografija u nekoliko minuta.
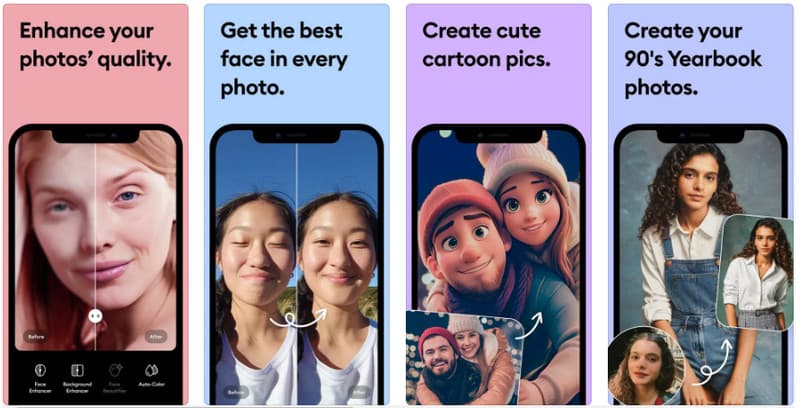
Korak 1Preuzmite aplikaciju Remini, pokrenite je, dodirnite Poboljšati i odaberite sliku koju želite urediti.
Korak 2Nakon učitavanja JPG fotografije, automatski će poboljšati sliku i dati vam dva rezultata između kojih možete birati.
Korak 3Kada završite, kliknite na preuzimanje datoteka gumb u gornjem desnom kutu zaslona.
7. Izrez.Pro
Cutout.Pro pruža dodatne značajke u sferi poboljšanja slike, kao što je uklanjanje pozadine temeljeno na umjetnoj inteligenciji i poboljšanje fotografije. Ovo je idealno, posebno za korisnike koji žele poboljšati kvalitetu slike i istovremeno uređivati pozadinu. Kako poboljšati fotografiju? Slijedite vodič ovdje.
Korak 1Idite na njegovu službenu web stranicu i kliknite Učitaj sliku za dodavanje slike.
Korak 2Nakon učitavanja odaberite željeni, npr Restauracija, Kvaliteta, ili Vjernost.
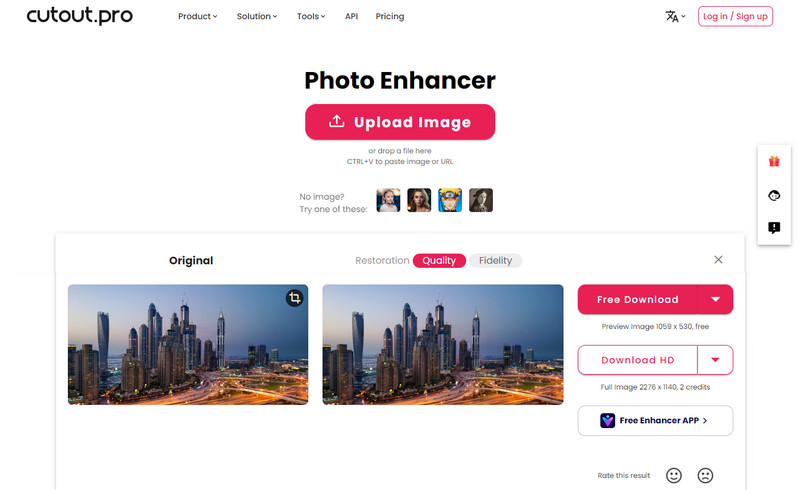
Korak 3Preuzmite konačni rezultat klikom na gumb prikazan u njemu.
Kako poboljšati fotografiju? Ovaj je članak odgovorio na to pitanje, a sada smo shvatili snagu sedam pojačivača dostupnih na vašem uređaju. Podijelite ove informacije s drugima kako bi znali kako poboljšati kvalitetu fotografija koje su snimili.

Naša AI tehnologija automatski će poboljšati kvalitetu vaših slika, ukloniti šum i popraviti mutne slike na mreži.
POKUŠAJTE SADA


