Si quieres saber Cómo exportar DaVinci Resolve como MP4Esta guía es especialmente para ti, ya que te dará varias opciones y te guiará paso a paso. DaVinci Resolve es una aplicación muy útil para la edición de vídeo, pero no siempre es fácil exportar en determinados formatos, como MP4. Este artículo te mostrará cómo exportar tu proyecto como un archivo de vídeo mp4, te ofrecerá una buena alternativa y solucionará los problemas de exportación que puedas tener.
Parte 1. Cómo exportar DaVinci Resolve como MP4 (paso a paso)
DaVinci Resolve es un software de edición de vídeo que utilizan tanto los editores de vídeo profesionales como los principiantes. A pesar de sus numerosas ventajas en el modo de edición, tareas como exportar el proyecto como GIF a MP4 u otros formatos suelen requerir mucho esfuerzo. Pero con la práctica, resulta fácil. En cada una de las secciones siguientes, este documento le preparará para cada procedimiento necesario para ayudarle a exportar fácilmente su proyecto de DaVinci Resolve terminado en formato MP4.
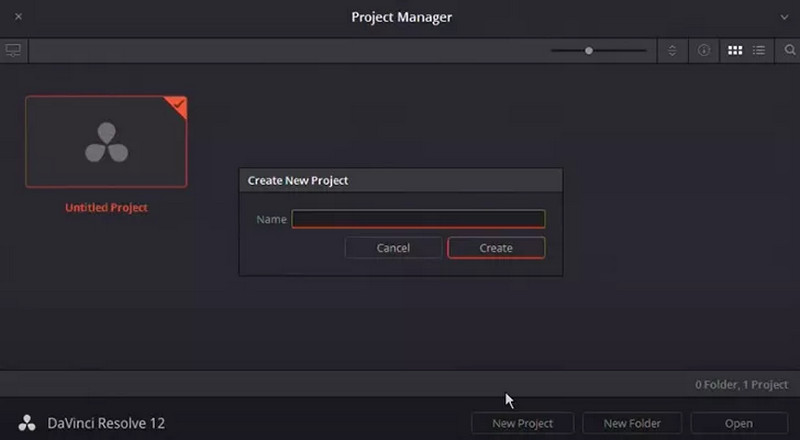
Paso 1Primero, vaya a su computadora e inicie DaVinci Resolve. Haga clic Nuevo proyecto, escriba el nombre del proyecto y haga clic Crear nuevo proyecto.
Paso 2Verás/deberías ver un espacio de trabajo cuando ingreses a tu proyecto. Ajusta los distintos paneles y pestañas como creas conveniente para la edición de video.
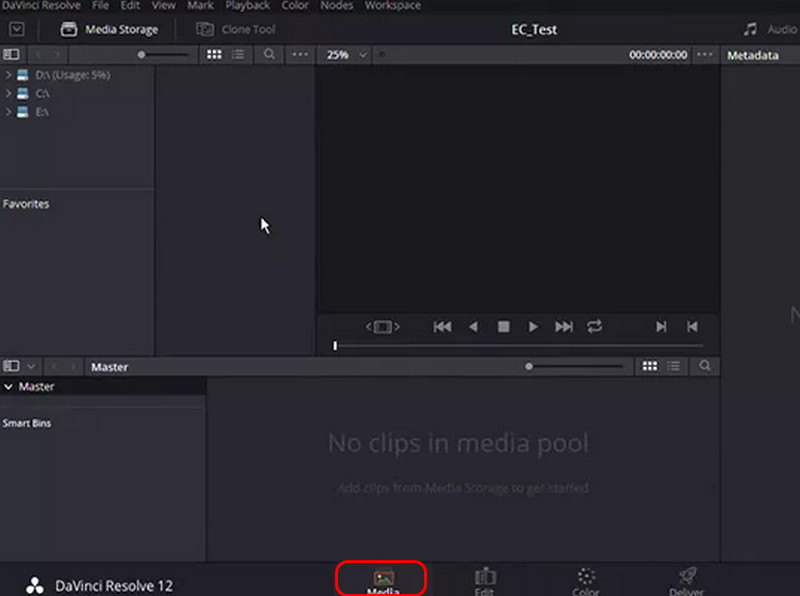
Paso 3En la parte inferior, haga clic en el Medios de comunicación pestaña. Importar el Medios de comunicación Botón o arrastre y suelte su archivo de video en el grupo de medios.
Etapa 4Cuando hayas importado un archivo, haz clic derecho en el archivo y crea una nueva línea de tiempo para poder organizar los clips que se editarán.
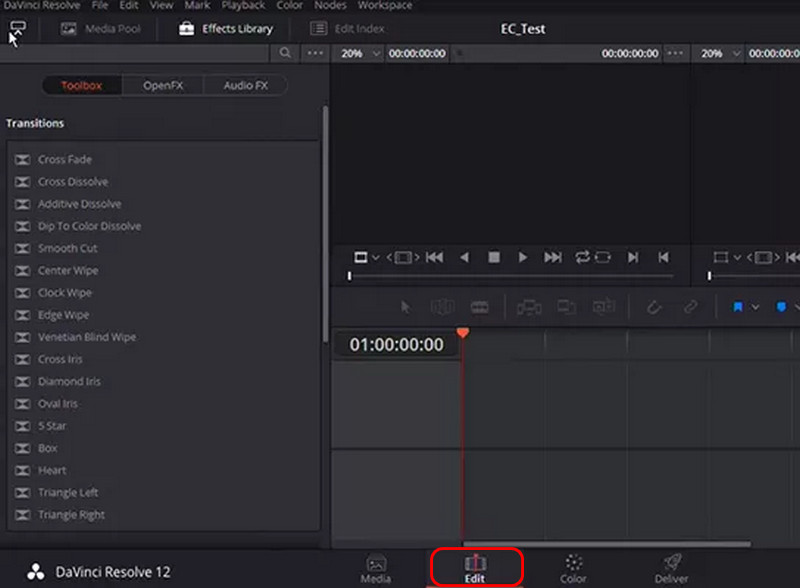
Paso 5Ve a la Editar Pestaña. Puede cortar, agregar efectos y cortar clips para organizar el video final de su proyecto.
Paso 6Después de editar su trabajo, haga clic en el Entregar Pestaña en la parte inferior de la pantalla para mostrarle las opciones para exportar su trabajo.

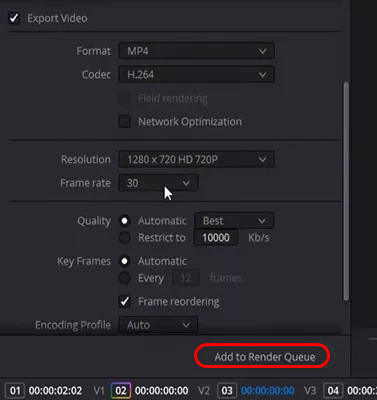
Paso 7En la esquina superior izquierda, vaya a los ajustes preestablecidos y seleccione PersonalizadoAhora marca la casilla para Exportar video para habilitar las opciones de exportación.
Paso 8Ahora haga clic en la flecha debajo de Formato opción y seleccione MP4 para que el archivo se pueda reproducir en diferentes dispositivos sin problemas.
Paso 9Bajo la Códec sección, elija H.264, lo que reducirá el tamaño del gráfico sin mucha pérdida de calidad.
Paso 10 Después de modificar otros parámetros, incluida la resolución, agregue a Cola de renderizado y Renderizar todo También debe hacer clic en Exportar para exportar la secuencia. Su video se reproducirá en un archivo MP4 y estará listo para cargar y compartir.
Parte 2. La mejor alternativa para exportar DaVinci Resolve como MP4
Si desea una forma relativamente rápida, sencilla y eficiente de exportar su proyecto de DaVinci Resolve en forma de archivo MP4, Convertidor de video AVAide es el software ideal. Con esta herramienta, puede convertir videos sin perder calidad y se proporcionan opciones adicionales para mejorar el contenido multimedia. Ya sean videos 4K u 8K, o simplemente necesite un cambiador de formato fácil de usar, AVAide ayuda a completar la tarea de manera efectiva.
Cómo utilizar:
Paso 1Descargue e instale el programa en su PC. Luego, ejecútelo después de la instalación.

PRUÉBALO GRATIS Para Windows 7 o posterior
 Descarga segura
PRUÉBALO GRATIS Para Mac OS X 10.13 o posterior
 Descarga segura
Paso 2Después de terminar su proyecto en cualquier herramienta que utilice, intente exportarlo en MOV u otros formatos compatibles con AVAIDE y ábralo en el software para hacer clic. Agregar archivo.
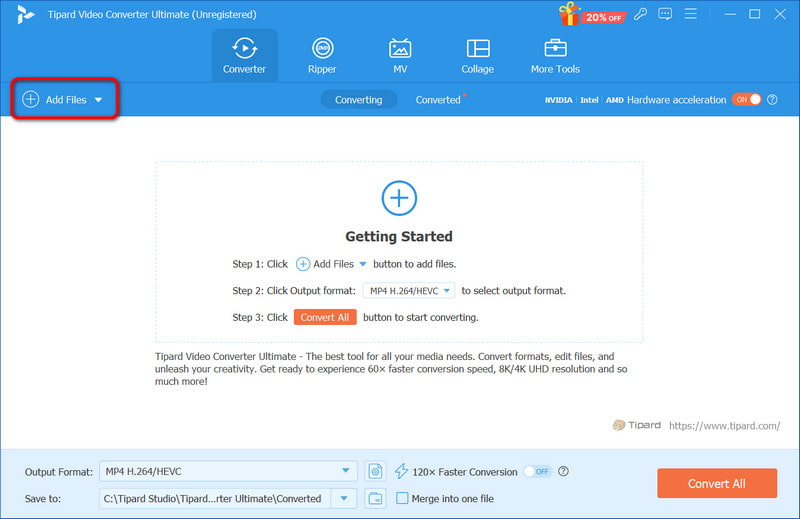
Paso 3En el marco de opciones de salida, obtenga MP4 formato en el Video cuadro desplegable de opciones. Puede cambiar los perfiles del dispositivo si lo desea.
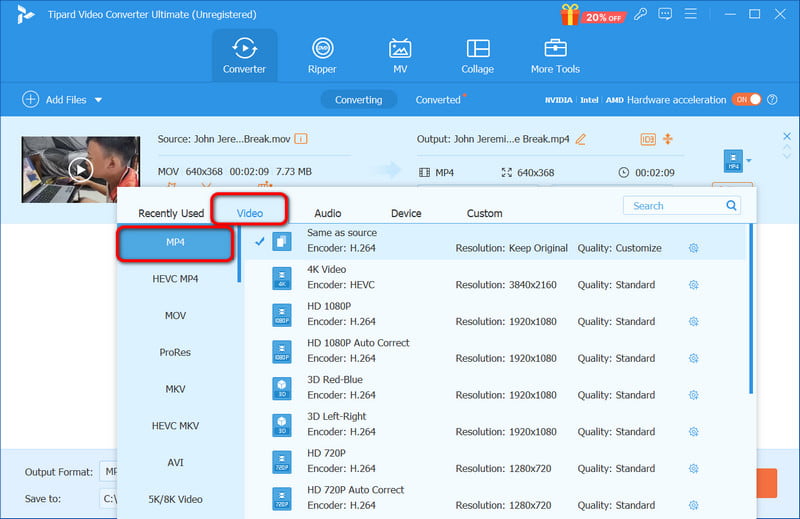
Etapa 4Seleccione la resolución de video, el códec, la velocidad de bits y la velocidad de cuadros óptimos si desea preparar su video para la conversión.
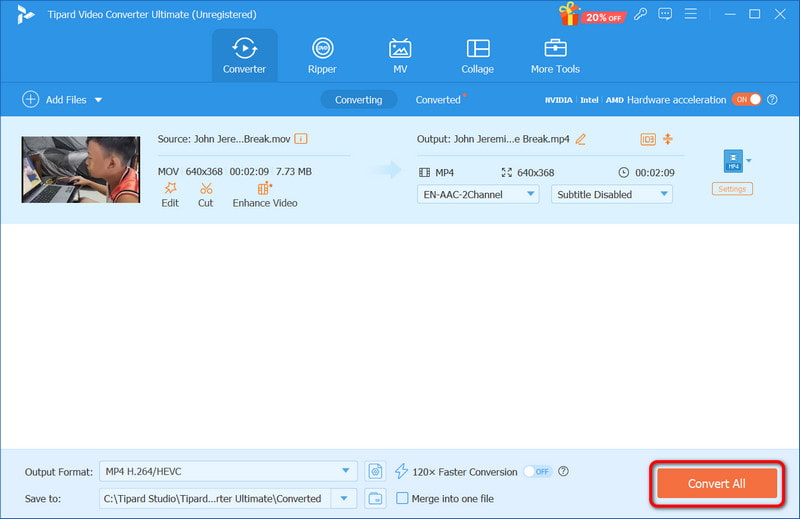
Paso 5Por último, presione el Convertir todo Botón para continuar con la conversión a MP4. Luego, estará disponible automáticamente para compartir y cargar una vez que finalice el proceso en el lugar donde lo guardó.
Parte 3. Cómo solucionar el problema cuando DaVinci Resolve no puede exportar archivos MP4
Exportar archivos MP4 desde DaVinci Resolve puede ser un dolor de cabeza y uno no puede evitar enfadarse después de haber dedicado tanto esfuerzo al proyecto. Esto puede ocurrir por diversas razones, incluidas configuraciones incorrectas o fallas del sistema. En esta sección, abordaremos soluciones prácticas que pueden ayudar a resolver problemas de exportación con DaVinci Resolve para que los usuarios no vuelvan a tener problemas para exportar archivos MP4.
1. Verificar la configuración de exportación
Asegúrese de que todas las configuraciones de exportación necesarias se completen correctamente en DaVinci Resolve.
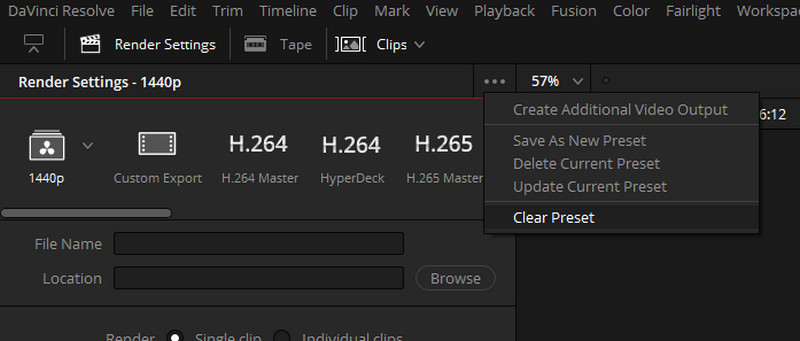
Paso 1Haga clic en la pestaña Entregar en la parte inferior de DaVinci Resolve.
Paso 2En el Formato menú desplegable, seleccionar MP4; en el Código pestaña, elige H.264.
Paso 3Si MP4 no está disponible allí, puede hacer clic en el ícono de tres puntos en Configuración de renderizado y hacer clic en Crear salida adicional para agregar MP4 como formato de exportación.
2. Actualizar DaVinci Resolve
La actualización de DaVinci Resolve puede funcionar bien al exportar errores inducidos por daff.
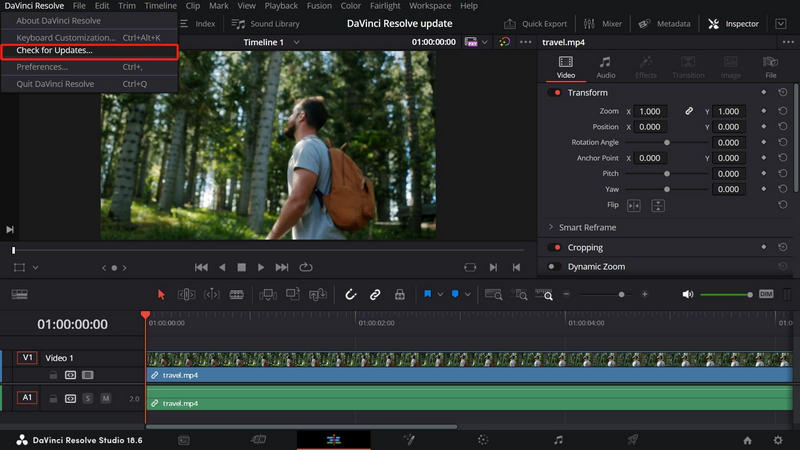
Paso 1Abra su navegador y vaya a la página web oficial, DaVinci Resolve.
Paso 2Obtenga la última versión de DaVinci Resolve, que sea compatible con su sistema operativo.
Paso 3Instale la nueva versión del software y reinícielo. Luego, intente exportar el proyecto nuevamente.
3. Verificar el espacio en disco
De manera similar, si es necesario aumentar el espacio en disco, pueden surgir problemas al exportar vídeos.
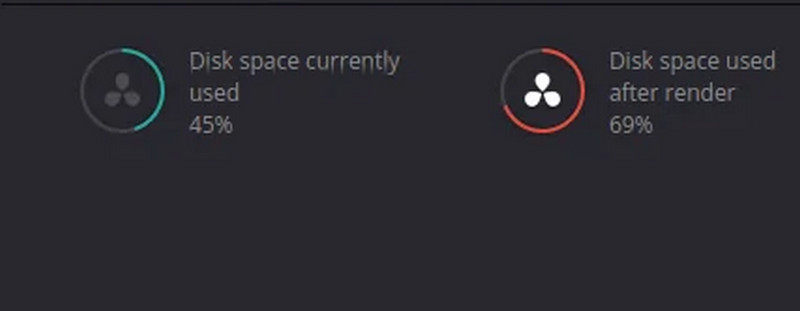
Paso 1Haga clic derecho en la unidad y seleccione Propiedades, donde desea exportar su video.
Paso 2Asegúrese de tener suficiente espacio libre en disco para el archivo de vídeo que va a exportar.
Paso 3En caso de limitaciones de espacio, cree algo de espacio libre o seleccione otra unidad con más espacio libre.
En resumen, hay algunas cosas que necesitas saber sobre cómo exportar DaVinci Resolve como MP4 ya que es una etapa importante del proceso de edición. Puede exportar fácilmente sus proyectos en formato MP4 siguiendo los pasos descritos. Además, si enfrenta alguno de estos problemas, ahora tendrá consejos para solucionarlos y una excelente alternativa a AVAide Video Converter para facilitar la exportación fluida de MP4. Esto garantiza que esté listo para subir videos en línea en todas las plataformas.
Su caja de herramientas de video completa que admite más de 350 formatos para conversión en calidad sin pérdidas.


