We all know that video capturing needs proper training and practice to perfect how you shoot and capture memories and events. However, as an average person who does not undergo proper training and experience, some of the videos captured on our mobile devices are shaky. Adobe Premiere Pro is our helping hand when it comes to these types of situations. This application can stabilize shaky videos. If you are new to this application and need to know which components you should access with this app, we will help you. Please read this entire article as we unravel the best method on how to stabilize a shaky video in Premiere Pro.
Part 1. How to Stabilize Video in Premiere
Premiere Pro offers several features to stabilize a shaky video, including the Warp Stabilizer effect, which can be found in the Effects panel. The Warp Stabilizer effect is a robust tool that automatically stabilizes shaky footage by analyzing the clip's motion and adjusting the footage's position, rotation, and scale. Once the effect is applied, Premiere Pro will examine the footage and provide options for adjusting the amount of stabilization in the Effect Controls panel. In addition to the Warp Stabilizer effect, Premiere Pro offers additional features for stabilizing footage, including the Rolling Shutter Repair effect, which can help fix footage distorted due to the camera's rolling shutter. Please check the guide below on how to apply this effect to your video.
Step 1Make sure that you have the Adobe Premiere Pro on your device. If you don't, you can download the app by accessing its interface on your web browser. Launch the tool and access its main interface. Make sure that you have downloaded the correct version of the app.
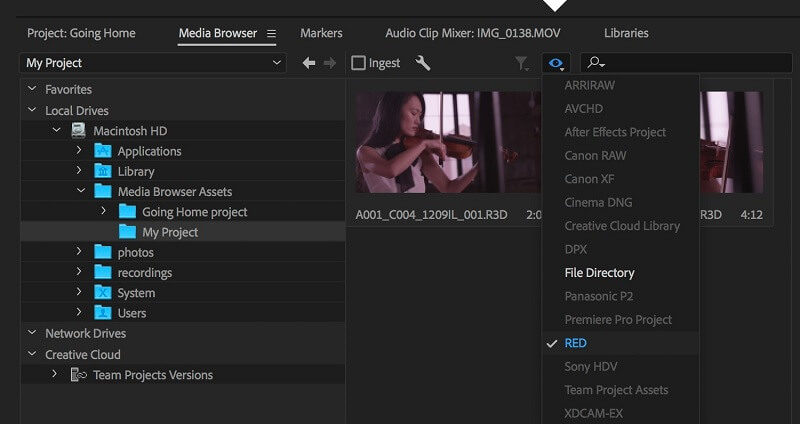
Step 2Import your shaky footage into Premiere Pro by clicking the Media Browser and dragging it to the timeline. Select the clip you want to stabilize and navigate to the Effects panel. Please search for the Warp Stabilizer effect and drag it onto your clip.
Step 3At this point, Premiere Pro will analyze your footage to determine the best way to stabilize it. This process can take some time, depending on the length and complexity of your clip.
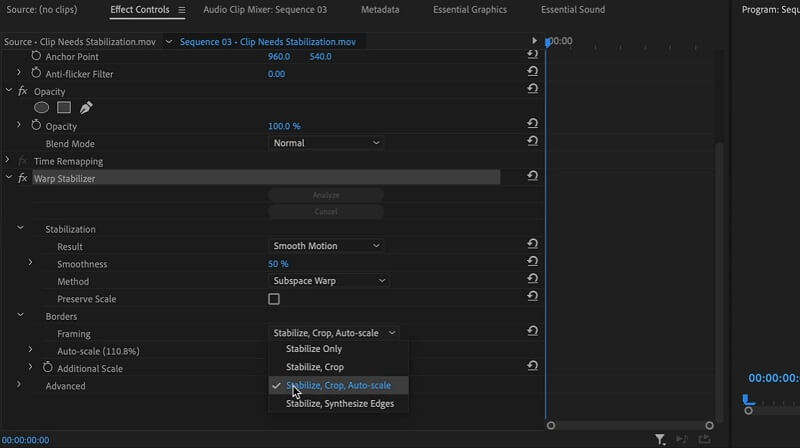
Step 4Once the analysis is complete, you can adjust the amount of stabilization in the Effect Controls panel using the Smoothness slider. The higher the value, the more stabilization will be applied to your footage. You can also adjust the Crop settings in the same panel to remove unwanted edges that might appear after stabilization.
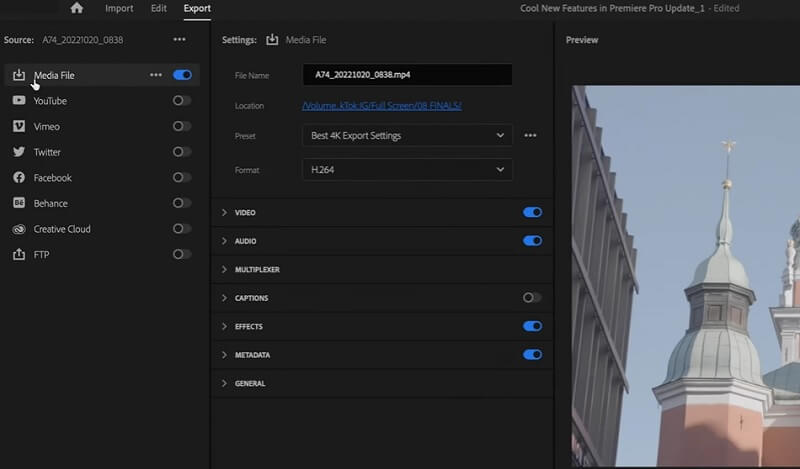
Step 5You can preview and check the applied effect on its built-in media player. If it suits your preference, prepare the file for exporting. Hit the Export button to render and save your stabilized video.
Part 2. Easy Way to Stabilize a Video on PC
When it comes to stabilizing videos aside from Premiere Pro, AVAide Video Converter is a must-have tool you should seek. This application contains different features and functions to stabilize your video. It comes with the Video Enhancer option, automatically stabilizes videos, and enhances overall quality in a snap of your finger. If you are pretty overwhelmed by the process of Premiere Pro, this application is suitable for you as it automatically enhances the video. You only need a few clicks and ticks to access the video stabilization feature. The main selling point of this application is its ability to preview the project video to see the changes applied to the file even without finalizing the process. Check the detailed guide below on how to use this application.
Step 1Download AVAide Video Converter
Begin downloading the app on your device by ticking any of the download buttons below. This app offers versions for Windows and Mac computers.

FREE DOWNLOAD For Windows 7 or later
 Secure Download
FREE DOWNLOAD For Mac OS X 10.13 or later
Secure DownloadStep 2Access the Toolbox
Launch the application and navigate to its Toolbox button, which holds the entire advanced feature of this app.

Step 3Import Video
Next, scroll down on the Toolbox option and locate the Video Enhancer option. A new page will appear, permitting you to import your video. Hit the + button and select the video you need to stabilize. While it is analyzing the video, a new set of features will appear on your screen.

Step 4Stabilize Your Video
Lastly, select the Reduce Video Shaking option from the four menus on your screen. You can click the Preview menu to check the changes made to the video file. If satisfied with the result, hit the Enhance option to save the file directly on your computer.


Part 3. Faqs About Stabilizing Videos on Premiere Pro
How can I tell if my footage is shaky?
You can tell if your footage is shaky by watching it and looking for any unwanted movement or instability in the image. Various factors, such as handheld camera movement, wind, or unstable surfaces, can cause shaky footage. It can also be caused by a lack of image stabilization in the camera or lens.
What other features are available in Premiere Pro for stabilizing footage?
In addition to the Warp Stabilizer effect, Premiere Pro offers the Rolling Shutter Repair effect, which can help fix footage distorted due to the camera's rolling shutter. The Rolling Shutter Repair effect is a tool in Premiere Pro that can help fix footage distorted due to the camera's rolling shutter. Also, you can manually stabilize shaky footage in Premiere Pro by using the Transform effect, which allows you to modify the position, rotation, and scale of the footage frame by frame.
Is it okay to stabilize the video?
It is safe to stabilize video using Premiere Pro's built-in tools, such as the Warp Stabilizer effect or the Rolling Shutter Repair effect. These tools are designed to automatically analyze the clip's motion and adjust the footage's position, rotation, and scale to stabilize it. When used accurately, these tools can help improve the overall quality of your footage and make it look more professional. However, it's important to remember that stabilizing video can also have some drawbacks, such as a loss of resolution or image quality, so it's essential to use these tools judiciously and apply them only when necessary.
In conclusion, stabilizing video footage is vital in creating high-quality videos. Adobe Premiere Pro offers a powerful and easy-to-use Warp Stabilizer effect that can help improve the stability of your footage. By following the steps on how to stabilize video in Premiere, you can apply this effect to your clips and adjust the settings to achieve the desired level of stability. We also added the best alternative tool for Premiere Pro with its easiest method to stabilize a video file.
Your complete video toolbox that supports 350+ formats for conversion in lossless quality.