Learning how to resize an image effectively cannot be overstated. The need to change or alter visually appealing content comes with different activities and platforms. Be it resizing pictures for a particular webpage, making some improvements on eye-popping images for social media, or even placing them inside the pages of a presentation, there are skills that one needs to understand. This article will give you an insight into different tools and techniques you can employ to resize images while maintaining the sharpness of the visuals so that every picture you use is clear and eye-catching, regardless of the size.
Part 1. Reasons to Resize Images
1. Enhancing Website Speed:
Bigger pictures make the pages load slowly, which irks users. When users resize images, they offer short slide times; hence, the website performs at its best and improves its ranking on the search engines.
2. Reducing Image Size to Optimize Internal Space:
Larger, higher-resolution images take up a lot of memory in devices and clouds. Because of the resizing of these images, memory capacity is relieved, enabling the organization and backing up of data without compromising the quality too much.
3. Conforming To Sites Specifications:
Websites, blogs, and social media platforms quite frequently have restrictions regarding the size of a photo or image. Coupling this guideline with image resizing ensures your content is viewed as it should, improving your online credibility and professionalism.
4. Increase Attention Through the Use of Words And Images:
Besides the size of their images, resizing images may improve their attention and even detail, especially when dealing with digital use images like thumbnails, profile pictures and various banner images in the most appropriate sizes.
Part 2. How to Resize an Image (Step-by-Step Guide)
Resizing an image is necessary for a variety of reasons. Ans emphasizes image quality enhancement for print. Below are some of the best tools available online, through software or mobile apps, to help you resize images effectively.
1. AVAide Image Upscaler (Online)
With AVAide Image Upscaler, one does not have to worry about pixelation occurring since it is an AI-based upscaling tool. Everyone can enlarge their images by hitting the enlarge button, which allows the images to grow up to 8× even with a single click.
Features:
• Within the AVAide tool, users have 2×, 4×, and even 6× options, an 8×, or any resizing that may be needed.
• It supports different file types, such as JPG, JPEG, and BMP, ensuring it can be used on as many platforms as possible.
• AVAide brings smart tools improve image quality by removing fuzziness.
• Such final images are assured to be watermarked free, enabling users to make proper use of them.
- Pros
- The best thing about this application is its simplicity; everyone can use it, even if they have never done any editing.
- There is an explanation for such images, as they have no company branding for enhancement.
- The enhancement imaging service is fast, providing an outturn within any minute.
- Cons
- Because it is a web-based application, it may be troublesome in remote regions with low connectivity as it depends on a constant internet supply.
Procedure:
Step 1Go to the AVAide Image Upscaler page. Now select the button that says Choose a Photo. Then, upload any acceptable picture from your device in formats such as JPG, JPEG, or BMP.
Step 2You now choose a preferred Magnification factor between 2×, 4×, 6×, and 8×. The AI will go on its own to optimize and resize the picture, raising its quality without your further intervention.
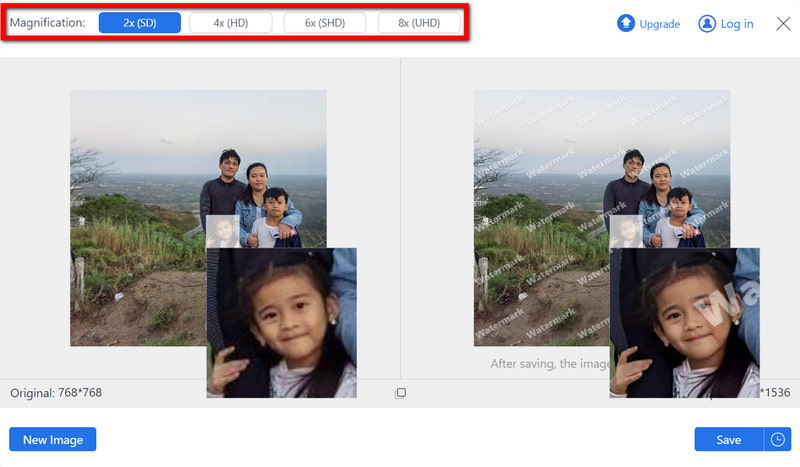
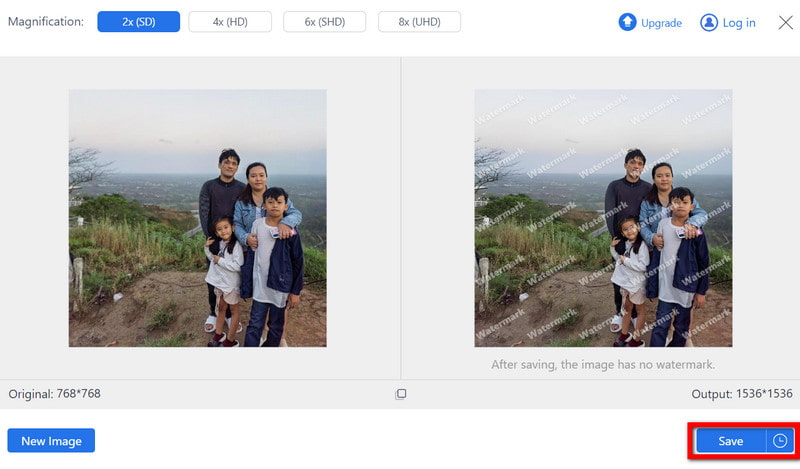
Step 3After the enhancement is done, you can preview the output image. Finally, download the resized photo by pressing the Save button within any ready program with no watermarks.
2. ResizePixel (Online)
ResizePixel is a rather straightforward yet quite effective photo enhancer and online utility meant for changing the size of targeted images in pixels or by their percentage increase or reduction. It even has minimal editing capabilities, such as cropping and image filing.
Features:
• Image dimensions can be sized to specific pixels or percentages in pixels, so one resizes according to the different criteria.
• ResizePixel accepts JPG, PNG, GIF, BMP, TIFF, and WebP formats.
• Cropping and image compression are included, making it easier to achieve some simple changes.
- Pros
- The interface is simple.
- Being an online tool, there is no need for any software installations.
- Cons
- It does not have elaborate editing tools for more complicated tasks.
Procedure:
Step 1Go to the ResizePixel main page and click the Upload Image button to import the sample picture.
Step 2Then, specify the width and height in pixels or percent according to the resizing requirement.
Step 3Finally, after you resize and save an image, you can easily download the image by just hitting the Download option on the screen.
3. Fotor (Online)
Fotor is one of the high-end online editing tools, great in its resizing capability, among other photo editing features that include but are not limited to filtering, cropping, or enhancing images.
Features:
• It supports various formats, such as JPG, PNG, BMP, and others, and can work on any image.
• Fotor is also a popular picture enhancer in filters and photo enlargers, which is good for users who would love to edit their pictures more.
- Pros
- Fotor has a simple user interface, so the level of accessibility for users who are new to it and those who do not have much experience editing is high.
- Fotor offers basic and advanced options for editing; therefore, it caters to wide audience requirements.
- Cons
- Most tools are free and no-cost; however, higher-end tools require a full-paid subscription to access membership.
Procedure:
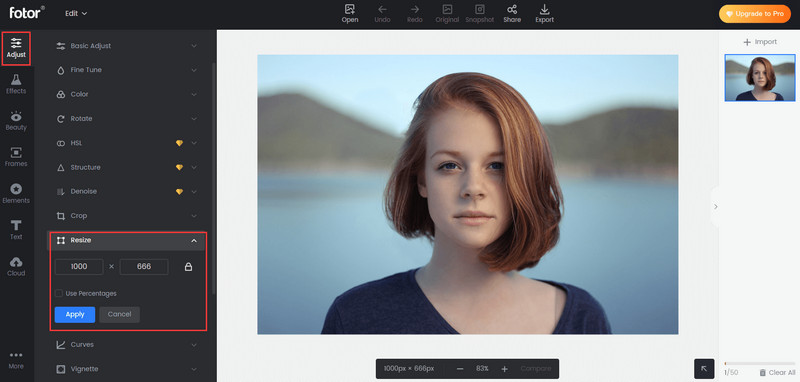
Step 1First, go to Fotor and hit the Edit a Photo button. Choose the picture from your computer that you wish to upload.
Step 2Afterward, go to the left side menu and click the Resize option. Change the size by typing in the exact amount of pixels or scale the photo by a certain percentage.
Step 3After you finish the process of resizing, press the Download button at the upper right side of the display. If asked, pick the type of file you would like to download, and the resized image will be stored on your computer.
4. Adobe Photoshop (Software)
Photoshop is one of the applications most preferred by those who want 100% accuracy in image resizing. Such tools, along with other refinement techniques, are also present.
Features:
• This program provides the image requirement from an image, which allows one to resize and scale the image.
• This application caters to all reasonable and conventional image file formats, making it possible to do unlimited projects.
• Among the resolution controls are DPI and PPI, which users can adjust according to their needs and for specific output.
- Pros
- Graphics designers and photographers opt for Photoshop, one of the best programs for image editing. It is known for editing high-quality images.
- It is permissible to alter the programs concerning image parameters.
- Cons
- Using Photoshop requires one to buy a monthly membership, which is inappropriate for an occasional user or even a person with restrictions on money.
Procedure:
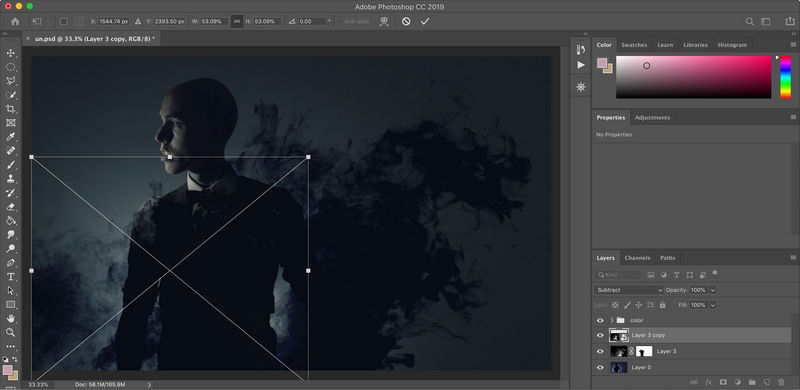
Step 1Run Photoshop and open the picture you would like to work with by clicking on File Open and selecting the file you want from your device.
Step 2Then, go to Image > Image Size. Resize the portrait by entering the resolution needed for your specific picture.
Step 3After you have gotten used to the new size, go to File Save Image As to save the image, choose the format of your choice and the destination where you want to save the file
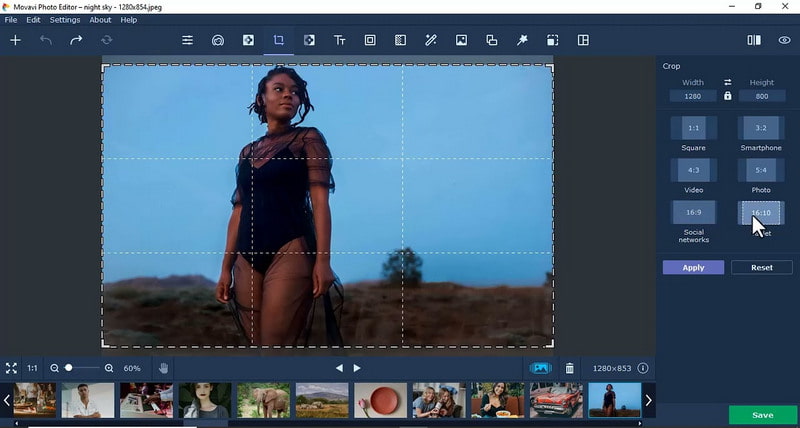
5. Movavi Photo Editor (Software)
An image editor that is interesting to work with and allows resizing of images if necessary. It is very simple and great for newbies, and it has more features like cuts, filters, and image cleanness.
Features:
• Movavi Photo Editor offers instant sizing modification and fast image editing, enabling easy and hassle-free image modification without requiring the purchase of the app.
• Support various commonly used files for image import and export, including JPG, PNG, BMP, RAW, and others.
• Movavi also offers auxiliary tools such as retouching, cropping and enhancers, which offer more editing capabilities to the clients.
- Pros
- It is one of the most elaborate tools, and it contains a visual interface that is very user-friendly.
- Movavi Photo Editor supports resizing photos in bulk; users can resize several photos simultaneously, saving time.
- Cons
- Some advanced editing features are paid, which may be unfavorable for those seeking free options.
Procedure:
Step 1Launch the Movavi Photo Editor and select the Open File option to bring up the picture to be edited.
Step 2The next step will be to choose Resize from the sidebar after uploading the image. A vertical and horizontal box will allow you to manually enter the image dimensions or select any preset to size the image.
Step 3Once you resize your image to the length you are pleased with, click Export to save the edited image file at your desired location on your computer.
6. GIMP (Software)
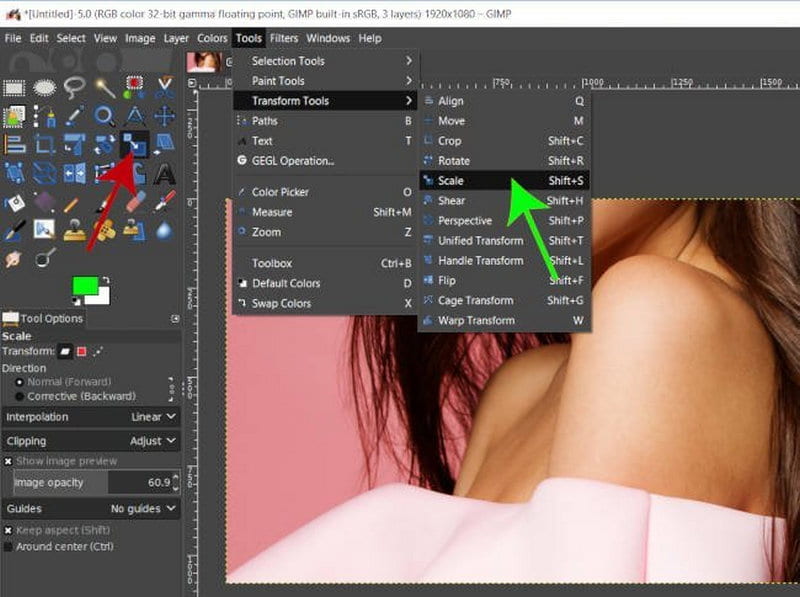
GIMP is a free, open-source image manipulation program that provides you with all the power of resizing and editing that Photoshop offers. It is ideal for upper-level users who want more power than basic free apps can provide without financial constraints.
Features:
• GIMP offers users tools that enable them to resize images, like making images bigger, cropping or rotating them, hence incorporating an extensive range of basic editing activities.
• This program can work with various extensions, including JPG, PNG, GIF, and TIFF, making it possible for users to deal with various images.
• GIMP application also comprises additional attributes such as filters and layers, which are helpful in advanced editing as well as increasing pixels.
- Pros
- GIMP can be downloaded and used free of charge since it is software that offers an open-source boon to the users.
- GIMP is also efficient and can be expanded with the help of other plugins that can be integrated into GIMP as per the needs of the users.
- Cons
- Most users will agree that most of the simpler photo editing tools have a learning curve.
Procedure:
Step 1Start GIMP, go to File in the upper left corner and select Open. Load the image that you will edit.
Step 2When the image is opened, go to Image and select Scale Image. At this point, you can resize your image by inputting the preferred new dimensions.
Step 3After resizing the image, go to File Export As and export your edited image in the format and location you prefer on your device.
7. Snapseed (Mobile)
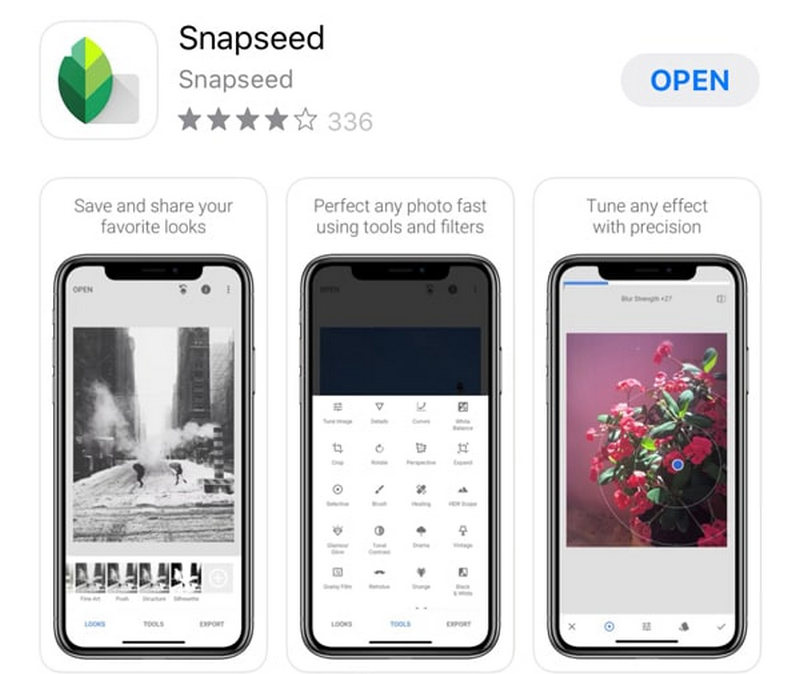
Snapseed is a mobile app for editing photos. It can be used in either iOS or Android operating systems. The users can resize their photos with effects and increase brightness and contrast, among other modifications.
Features:
• Snapseed is a phone application that presents easy access to image editing and resizing; it is quite comprehensive. Even better-it's free.
• Like other application-based photography software, Snapseed has specific controls to treat the images and enables cropping, rotating, and size-changing images to attain the required effects.
- Pros
- The application is easy to handle, with a basic interface designed to enable quick on-the-go edits for mobile phone users.
- An integrated full editing suite with various tools and filters allows users to work on their photos efficiently.
- Cons
- Only mobile snaps need a desktop, which might be limiting for users who like to play around with images on a computer.
Procedure:
Step 1To begin with, open Snapseed and load the image to be edited by tapping the + button on the main page.
Step 2After the image has been uploaded, direct your attention to Tools and choose either Crop or Tune Image to modify the size as required.
Step 3Finally, after your edits, hit Export to keep the resized image in your gadget.
8. Adobe Lightroom (Mobile)
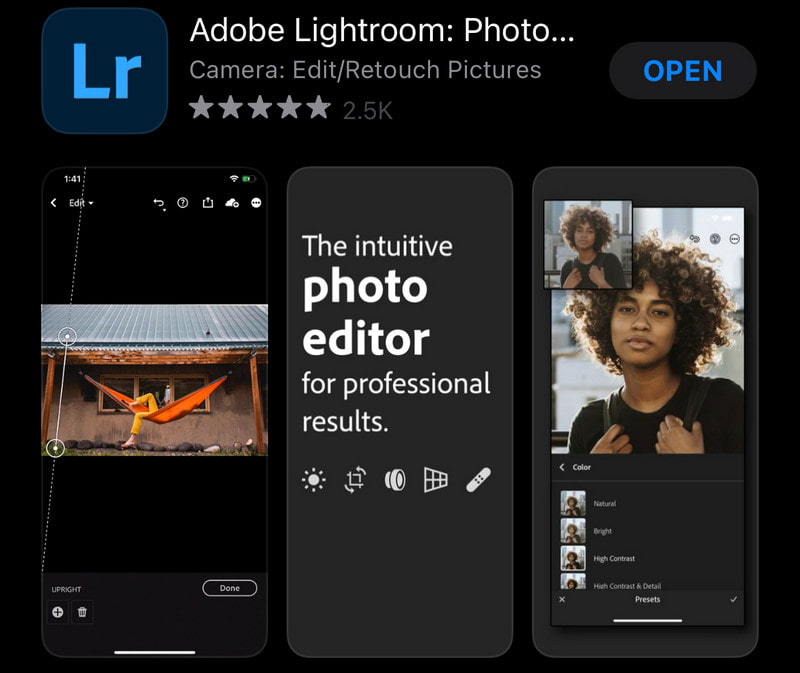
Lightroom Mobile is an advanced-level application for professional photographers that can resize and change the resolution of pictures with no loss of quality.
Features:
• Lightroom Mobile is unique in that it permits resizing and changes to the resolution of an image from your smartphone.
• The application can support all high-resolution formats, allowing editors to deal easily with good-quality images.
• Lightroom Mobile features editing tools that permit changes in exposure, contrast, and saturation, among others, for very effective image enhancement.
- Pros
- It is very user-friendly and can be downloaded for free, with subscriptions for those seeking more advanced benefits.
- The application also allows for RAW images, which will greatly help professionals who edit high-definition images.
- Cons
- Even though the application is very powerful, a layperson may have some difficulties using it because of the many features that can be intimidating for a short period.
Procedure:
Step 1First, launch the Lightroom Mobile app, then open up a photo by clicking Add Photos from the home page.
Step 2Afterward, proceed to the Crop tool or Export Settings, where you can change the image resolution or dimensions if required.
Step 3Finally, export the picture that has been reduced in size by clicking Export under the settings and clicking Save on your phone.
9. PicsArt (Mobile)
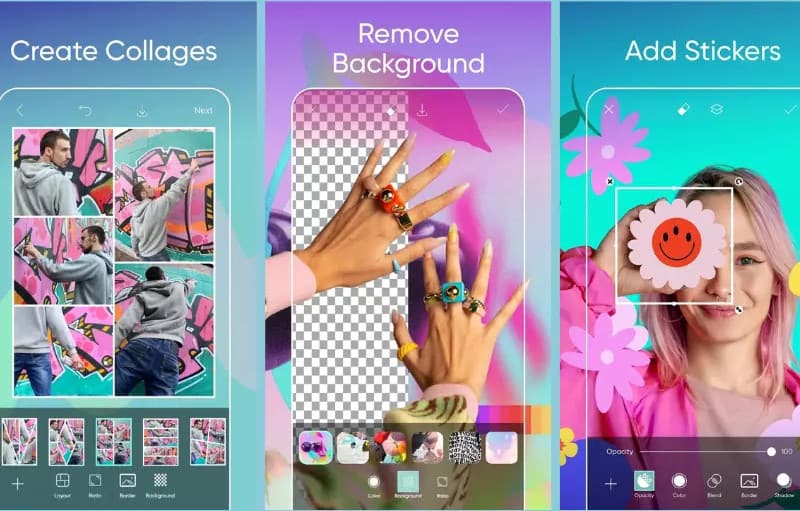
PicsArt is another catchy and profound mobile application employed mostly for picture editing, as it offers to resize pictures and apply effects and stickers. It is usable on iPhone, android and other mobile devices.
Features:
• There are a variety of resizing options available. They can be resized either in terms of pixels or in percentage from the original size.
• You can find many other advanced editing features like filters, more than 1000 sticker packs, text addition to the pictures, etc., allowing users to edit the pictures on their way to the limit.
• All the images are provided in orange format, either as a JPG or PNG file, thus ensuring there are some files that nobody will use with images of some other files.
- Pros
- This being a free application, more people are able to download and make use of it. However, the developers carved out some features, and that also came with the idea of micropayments.
- Users are able to digest one-of-a-kind features like stickers and overlays since they enable beautiful user image edit features.
- Cons
- Most users of the application complain that the free version of PicsArt makes them look stupid in that they are embarrassed by the ads they have in the application.
Procedure:
Step 1The first step is to install the application and run it. In the application, click the + button to bring any image stored within the device.
Step 2Now go to Tools, hit Resize and then you can set the height and the width to change the dimensions of your image.
Step 3To finalize any further alteration of the photograph, hit Download, Save, or similar options offered by the application so as to conserve the modified photo on your device.
Part 3. Tips and Tricks for Image Resizing
1. Maintain Image Quality: When resizing an image, particularly increasing it, quality-enhancing tools, such as AVAide Image upscaler, should be utilized to avoid pixelation. For enlarging, for instance, to bring out sharpness and clarity, always choose lossless resizing techniques.
2. Keep the Aspect Ratio Consistent: Always enable the aspect ratio to avoid any stretch in the image. For example, there are standard photographs that are 4:3 and part of widescreen images, which are 16:9. Many editing applications have a provision of an automatic aspect ratio lock.
3. Choose the Right File Format:
• JPEG: It is suitable for web images because of its smaller file sizes, but this compresses the images and alters the quality with many edits.
• PNG: It is even nice for high-quality pictures and images that need transparency since it comes in bigger, lossless images than jpegs.
• WebP: Perfect for online images, offering better quality with a smaller file size than JPEG and PNG, resulting in faster loading time for the web page.
4. Balance File Size and Quality: Compressing images can result in smaller file sizes without losing quality. Such tools include Tuna sets and ImageOptim.
5. Understand Resolution (PPI/DPI): Resolution Should Be Clear, PPI Or DPI: Where print images are concerned, anything less than 300 DPI for images is inadequate sharpness-wise. Using 72 PPI to save on file sizes for web images is common practice.
| Techniques for Image Resizing | Recommended Sizes/Resolutions |
| Resizing for Instagram | -Square posts: 1080×1080 px -Portrait posts: 1080×1350 px -Stories: 1080×1920 px |
| Resizing for Websites | -Width: Limit to around 1200 px for fast loading -Compressing: Use tools like TinyJPG or Squoosh to keep quality and fast page loading. |
| Resizing for Facebook | -Profile picture: 170×170 px -Cover photo: 820×312 px -Shared image posts: 1200×630 px |
| Resizing for Print | Resize images to at least 300 DPI for print clarity. Use vector formats like SVG for logos to ensure no loss in quality when scaling. |
| Resizing for Thumbnails | YouTube thumbnails: 1280×720 px for the best clarity across devices. |
Choose the right tools and techniques tailored to your needs to resize images without losing quality. Following the methods outlined in this article, you can ensure your images maintain clarity and vibrancy, making your visual content more effective and engaging.

Our AI technology will automatically enhance the quality of your images, remove noise and fix blurry images online.
TRY NOW


