What if you need to change the DPI of an image for a specific task, like preparing it for a print project or uploading it to a website? Adjusting the DPI of an image is essential for ensuring the right balance between image quality and file size. In this guide, we will explore how to change the DPI of an image using AVAide Image Upscaler to increase DPI and Adobe Photoshop to reduce it, helping you achieve the perfect resolution for any purpose.
Part 1. How to Check the DPI of an Image
DPI relates to the printer's resolution and is essential to the overall quality of printed images. Therefore, for you to achieve high-quality images that will print well, it is important that you check DPI. There are three methods to check the DPI of an image: Photoshop, Windows, and Mac.
Method 1: Check DPI in Photoshop
Checking the DPI in Photoshop is quick and easy to ensure your image has the correct resolution for high-quality output or printing. Follow these steps:
Step 1Launch the Photoshop application on your computer.
Step 2Go to File > Open Image and choose the file you want to open.
Step 3After the image is in the workspace, click Image > Image Size.
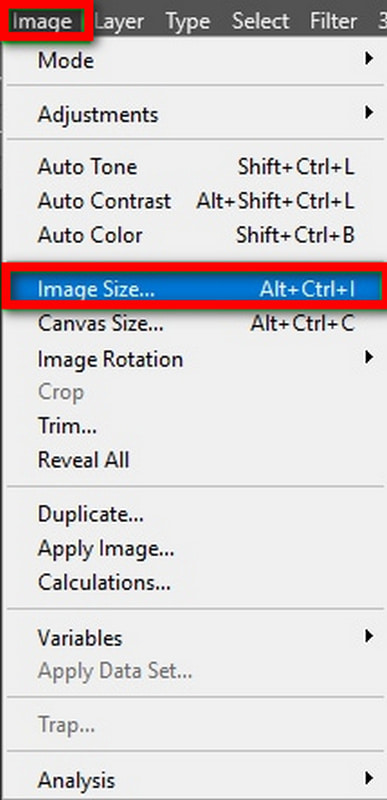
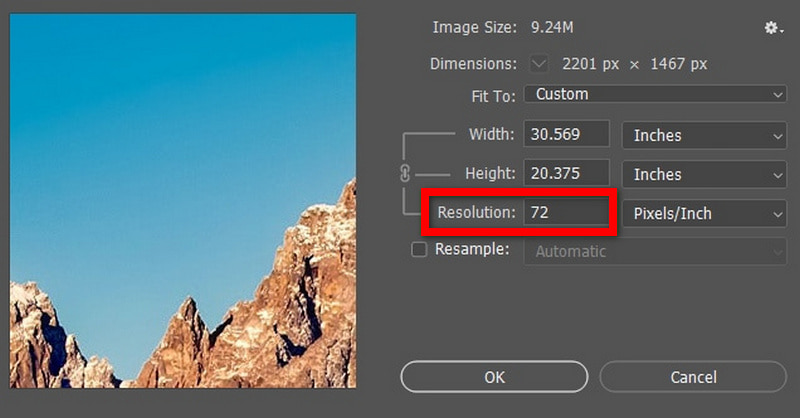
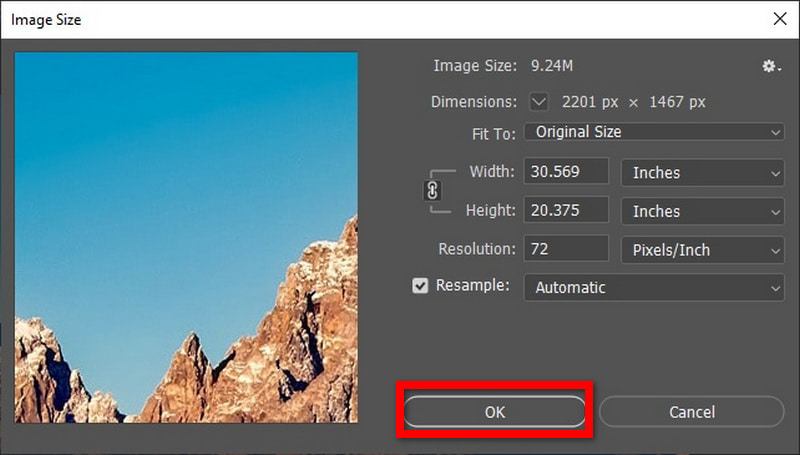
Step 4In that dialog box labeled Image Size, you will see the DPI under Resolution Pixels/Inch.
Method 2: Checking DPI on Windows
For Windows users, check the dpi of an image directly using the file properties. This method is fast and simple, allowing the operation without extra supporting programs.
Detailed Procedure:
Step 1Go to the File and open the image file.
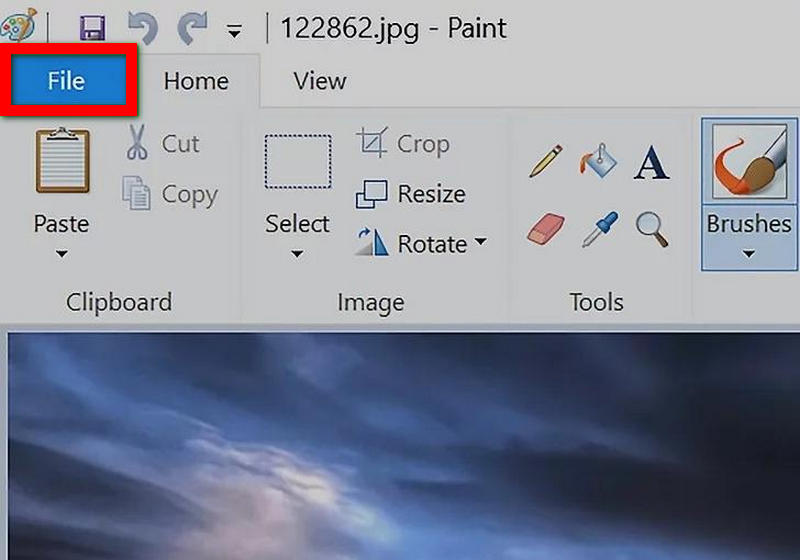
Step 2Right-click on the image and click on Properties.
Step 3In the Properties window, click on the Details tab.

Step 4These changes in resolution will be found under the resolution section, where the DPI will be mentioned as horizontal and vertical resolutions.
Method 3: Check DPI on Mac
Mac users can use the Preview app to check the dpi of an image, and it works flawlessly. This gives you a quick way to see the Resolution of the picture so you know it will print or be used in high quality.
Detailed Procedure:
Step 1Locate where the image file is stored in the finder.
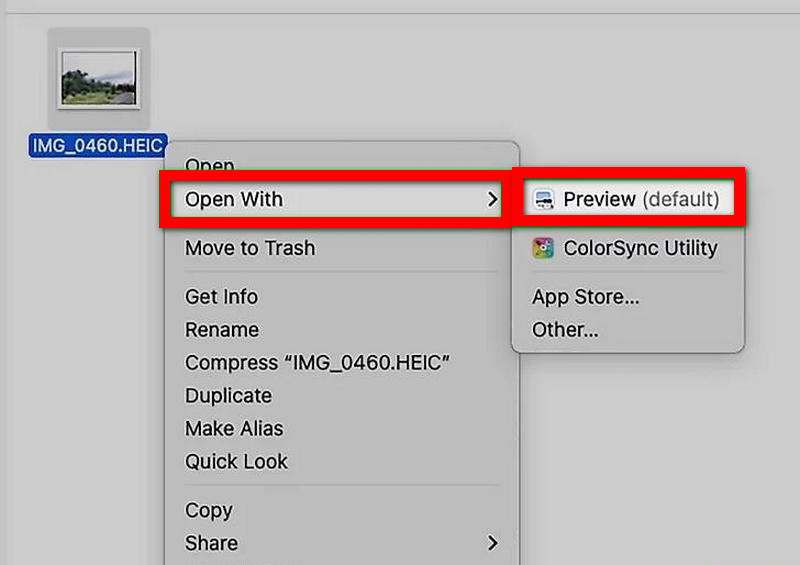
Step 2Click or Control-click on the image and then Open With > Preview.
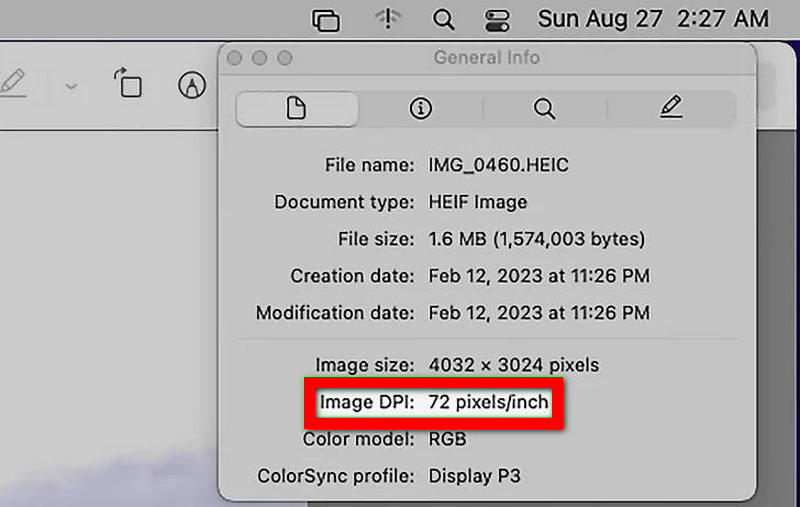
Step 3Go to Tools > Show Inspector to display the preview.
Step 4Move to the Inspector window and click General Info. The general resolution will be displayed there.
Part 2. How to Change the DPI of an Image
What if you have to alter the DPI of an image because the requirements of the project in question demand it? Alterations done on the DPI may aim to improve the image quality for printing purposes or reduce image sizes for usage across the web. If you increase the DPI, there will be finer details than if the value is lower; similarly, decreasing the DPI will help compress the image size for use on the digital facility. Below are the practical steps on how you can raise or reduce the DPI of your images.
1. Increase Image DPI
There are scenarios where you are required to increase the DPI of an image. Fortunately, AVAide Image Upscaler comes to the rescue. Besides, whose only mission is to improve image quality and increase the sizes and perfections of the surtout images, this AI-powered tool also comes in handy in raising the DPI when needed for high-quality prints or resolutions.
Detailed Procedure:
Step 1Go to AVAide Image Upscaler and select the Choose a Photo feature to upload the image that needs enhancement.
Step 2After uploading, choose the level of upscaling from 2×, 4×, 6×, or 8×, which will either change the image size or the DPI.

Step 3AVAide has an AI technology where image quality is optimized, blurriness is removed, and details are sharpened as you select the upscale value.
Step 4After upscaling, click Save to download your newly enhanced, high-DPI image to your computer.
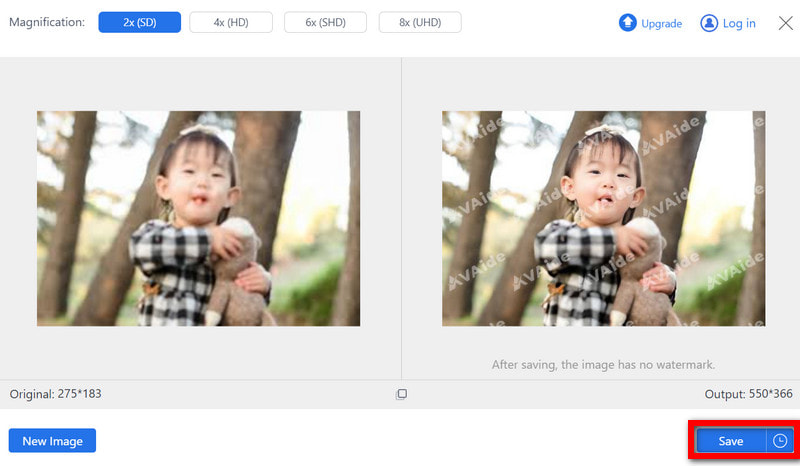
- It easily improves image quality while upscaling up to 8× is enhanced, making it ideal for a high increase of DPI.
- It supports JPG, BMP, and JPEG formats, allowing various types of images to be worked on.
- The results are clean and do not have any watermarks, which makes it ideal for commercial application.
- It is a free and safe tool that can be accessed on any internet browser without further charges.
Advantages of Increasing Image DPI:
• Improved Print Quality: Arising from high DPI, printed images will always be sharp and well-detailed, bearing the requisite professional quality, especially for large prints.
• Better Clarity: It can be assertively stated that the resolution of the images is greatly improved with a nod to the fact that as the DPI increases, so does the image.
• Preservation of Details: With a higher DPI, the small elements are preserved, which is fundamental in photography and design, so nothing important gets lost.
• Enhanced Viewing Experience: To display on high-resolution digital screens, the impressions of images are further enhanced where the DPI is increased, eliminating pixelation.
• Professional Standards: Many sectors, for instance, publishing and advertising, require high DPI images for professional standards, which leave your work market ready.
2. Decrease Image DPI
Decreasing the DPI image is useful when you need lower image quality, smaller file sizes, or images for web use where high print quality is not required. Adobe Photoshop allows for an easy way to reduce an image's DPI without affecting its dimensions or clarity for digital viewing.
Detailed Procedure:
Step 1Launch Adobe Photoshop, then take the picture by going to >. Go to the top menu and click on Image Size.

Step 2To decrease DPI without changing the pixel dimensions, ensure the Resample checkbox is unchecked.
Step 3If it is required to change both the DPI and the size, see images of smaller sizes. You will check the Resample box and resize it in widths and heights.
Step 4After the appropriate DPI is reduced, click the OK tab, after which go to File Save As and save the edited image.
Advantages of Lowering Image DPI:
• Managing a Picture's Size Effectively: First and foremost, Maiya reduces the dpi, and the file size is lesser; hence, it is more suitable for internet usage or sending to other people.
• Lesser Resolution and DPI: Send an image that has a different dpi for television and magazines but retains the quality of the picture on the screen.
• Non-destructive Editing: Editing pictures in Photoshop reduces the dewy and thus when only, say, 72 dpi is used. This means that when optimizing an image for transmission, the transmission and finer details, such as clipping masks, will not make the image blur or pixelated areas.
In conclusion, the ability to check the DPI of an image and make changes to it is very important if the optimum quality of an image is to be put to either print or web. In both cases, the users can find simple and efficient means, whether one needs to use AVAide Image Upscaler to increase the DPI or reduce it using Adobe Photoshop. Increasing the DPI of an image results in clearer and more detailed images, while decreasing it allows one to reduce the file size with no loss of digital quality. When you have control over such skills, it is possible to present images that fit any requirements.

Our AI technology will automatically enhance the quality of your images, remove noise and fix blurry images online.
TRY NOW


