What if you could enhance your photos effortlessly using Google Photo Editor, a built-in tool that offers both basic and advanced editing features right at your fingertips? Whether it is adjusting contrast or adding creative filters, this flexible editor is available on many devices. In this review, we will describe what Google Photo Editor can do and how to use it, and also do some comparisons with other popular editing software on the market.
Part 1. Exploring Google Photo Editor
Google Image Editor is a comprehensive tool available in Google Photos. It includes features for editing photos on computers and mobile devices, including Android and iOS. The following breakdown presents its main aspects.
1. Basic Edits: These include crop, rotate, brightness, contrast, and saturation.
2. Advanced Tools: Portrait light, Blur, Sky adjustment, and Colour pop.
3. Filters: Filters of a particular strength can be added/subtracted.
4. Adjustments: Everything exists, from the basics of adjustments to the adjustments of color temperature, mid-tones, etc.
5. Supported Formats:
The editor supports input; however, only standard image formats such as JPG and PNG are relevant. Images uploaded to Google Photos have no such issues.
• Web: This can be accessed from almost any computer by visiting photos.google.com.
• Mobile: The Google Photos application is available for smartphones on Android and iOS. Some functions can be limited in the web version and can be best reached using the application.
6. User Interface & Ease of Use:
The interface is clean and logical, particularly in relation to the edits that a user wants to make about any tools and editing features. The mobile application provides fluid usability for editing based on a touch interface, while the desktop offers basic functionality control and accessibility to various operations.
7. Performance:
Performance-wise, everything runs smoothly. However, for well-optimized performance, especially when using advanced features such as Portrait light or HDR effect, a device with at least 4GB RAM is required.
8. Pricing:
Google Photo Editor is free to use, with no additional costs for accessing the editing tools. However, storage limitations might apply if users exceed their free Google Photos storage quota.
Part 2. How to Use Google Photo Editor
Using the Google Photo Editor is simple regardless of the device used, be it a computer, Android or iOS. Here is a guide showing how you can fully utilize its features:
1. Accessing Google Photo Editor
Computer:
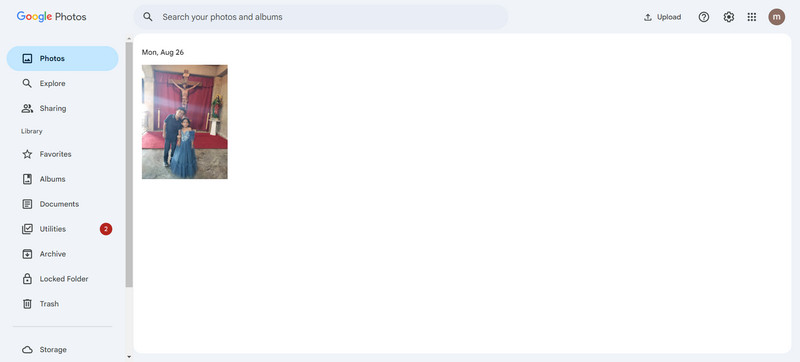
Step 1Visit photos.google.com and sign in to your account.
Step 2Find and click on the photo you would like to edit.
Step 3Click the Edit button at the top the button has a slider icon.
Mobile (Android/iOS):
Step 1Start the Google Photos app.
Step 2Click on the photo that you wish to modify.
Step 3Click the Edit icon at the bottom of the display.
2. Basic Edits
Crop or Rotate:
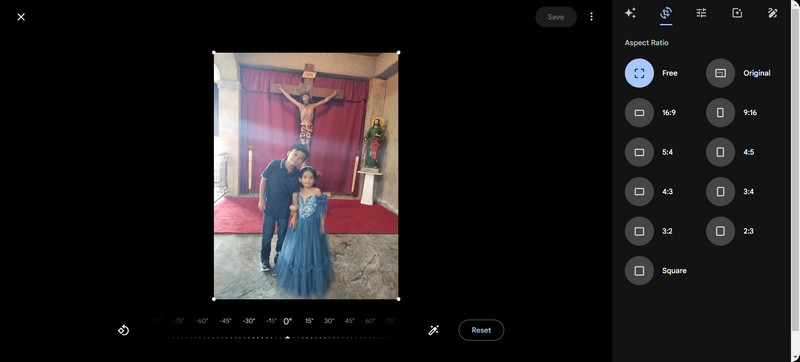
Step 1Click on the Crop & Rotate option.
Step 2Drag the edges to crop or tap Rotate to change orientation.
Step 3Click Save to save the modifications done.
Adjustments:
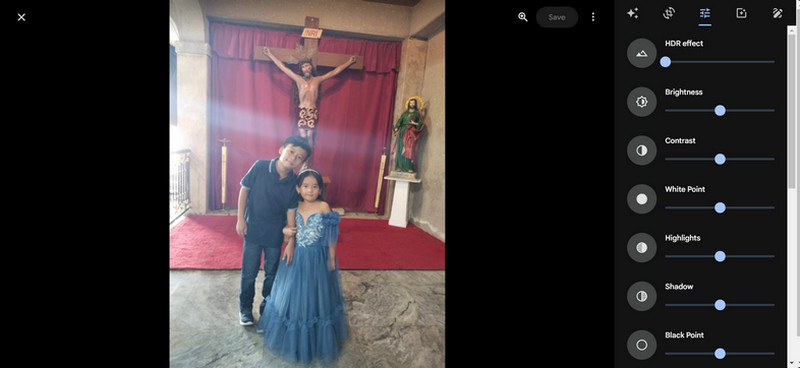
Step 1Click on Adjust and select one of the options: Brightness, Contrast, and Saturation.
Step 2Use the slider to regulate the amount of adjustment done.
Step 3Click Save to retain the corrections made.
3. Advanced Tools Usage
Portrait Light:
Step 1Use this option for light adjustments in portrait photographs.
Step 2Modify the position of light and its level whenever it is needed.
Step 3Click Save to preserve the light settings.
Blur:
Step 1This option applies where background blur adjustment is done on photos with depth information.
Step 2Adjust the level of blur and click Save.
Color Pop:
Step 1This tool removes color from the picture background and leaves the subject in color.
Step 2Apply the image to the tool and fine-tune the strength before saving the changes.
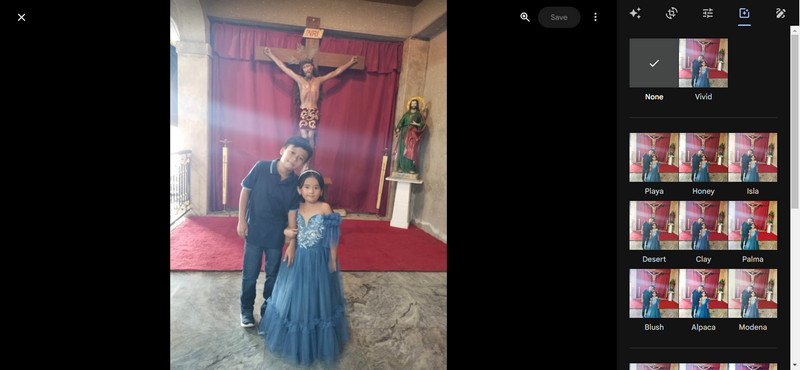
4. Filters
Step 1Click on the option called Filters from the editing options.
Step 2All the available filters will be scrolled, and a finger will be tapped onto a filter to apply it.
Step 3Use the slider to decrease or increase the amount of filter that has been applied.
Step 4Click or tap on Save to proceed with your confirmation.
Part 3. Comparison with Other Editing Tools
In this portion, rest assured, we are going to examine the performance of Google Photo Editor against the performance and key aspects of other editing tools on the market so that you can better understand them.
AVAide Image Upscaler (Recommended)
AVAide Image Upscaler is the best image-enhancing software, especially when it comes to editing low-quality images. With the help of efficient AI, AVAide can turn even the most pixelated images into extremely high-quality ones. Easy User Interface, Batch processing and many more of these software features are made for non-specialized feels to professionals who wish to work better.
Features:
• It enhances images using state-of-the-art upscaling AI technology.
• Prominent images are generated even from highly compressed or pixelated images.
• Images can be enhanced in bulk at the same time.
• Minor features and textures of the object can be retained during enhancements.
• Universal simple controls have been provided for all types of users.
How to Use:
Step 1First of all, go to the AVAide Image Upscaler page. Then click on the Choose a Photo button in order to upload an image from your computer.
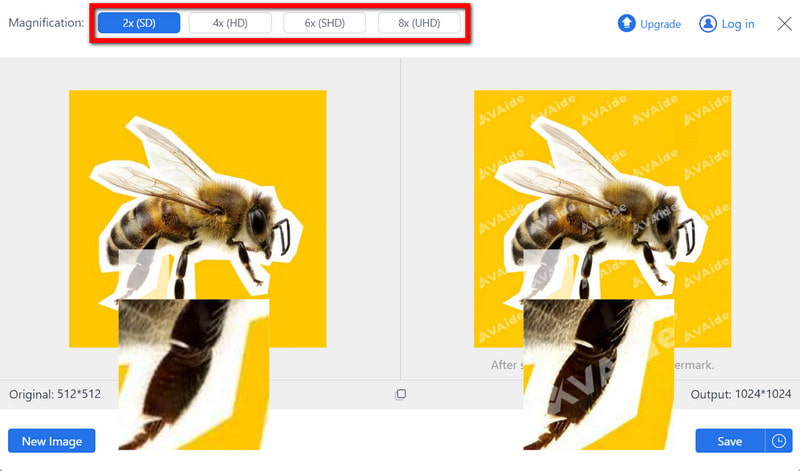
Step 2After the image is uploaded, it will be automatically enhanced and made sharper using the latest enhancement technologies. You will have the option to specify the Magnification factor for 2×, 4×, 6×, or 8× upscaling.
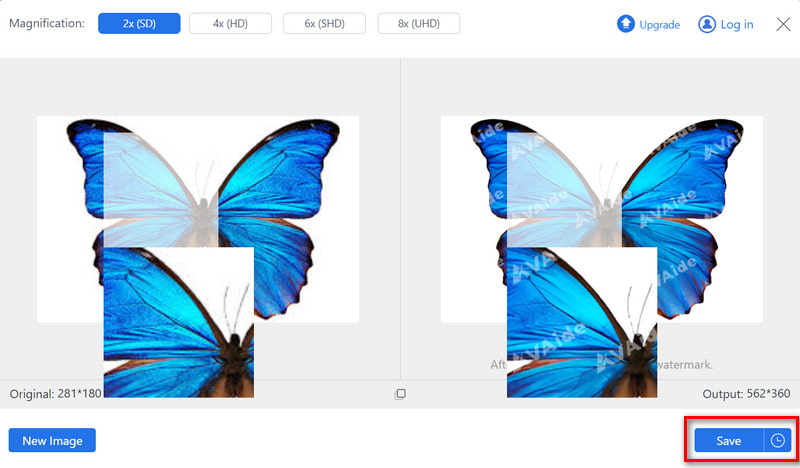
Step 3Once the image is improved, you can press Save to save the clear image on your computer.
Topaz Gigapixel AI
Although Topaz Gigapixel AI is known to be dull for most photographers, graphic designers often love this product's quality. This tool effectively uses various advanced artificial intelligence techniques to obtain clean-upscaled reproductions of images. It also works well with other Topaz products, enhancing its value as part of the overall editing process.
Features:
• The latest algorithms allow agents to sharpen images online without losing quality.
• Any unwanted sound or image disturbance is well taken care of.
• Available in batch mode.
Performance: It has been noted for giving the best-quality images upon resizing, especially to experts in the field.
Pricing: This product is available separately or as bundles with other Topaz products at reasonable rates.
RealSR
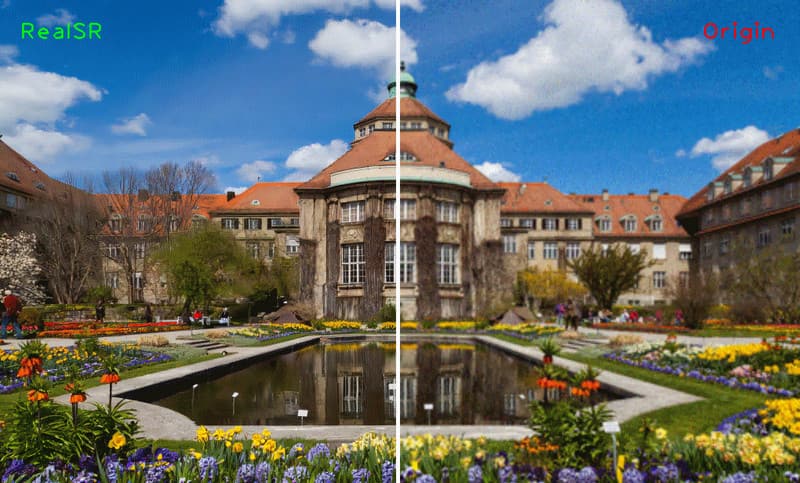
RealSR is an open-to-the-public image upscaling tool with equally good features. Its framework supports different deep learning models, which means it is adaptable. This feature helps RealSR remove all the noise and pushes most of the blurriness, which makes it ideal for people looking for some quality without having to pay much.
Features:
• You can apply deep learning models in a more controlled manner.
• Great for making images more focused and unpixelate image.
Batch Processing: Ability to apply effects to separate still images quickly.
Performance: This rot-free provides reliable quality images that are efficient and satisfactory at all times.
Comparison Table
| Feature | Google Photos Editor | AVAide Image Upscaler | Topaz Gigapixel AI | RealSR |
| Upscaling Quality | Good | Superior | Excellent | Good |
| AI Technology | Basic | Advanced | Advanced | Advanced |
| Batch Processing | Limited | Faster | Fast | Fast |
| Detail Preservation | Good | Exceptional | Superior | Good |
| User Interface | Intuitive | Intuitive | Intuitive | Moderate |
| Pricing | Free (within Google Photos) | Affordable | Competitive | Free |
To conclude, the effectiveness of Google Picture Editor cannot be exaggerated since it is useful in all possible aspects of photo editing, from basic to more complicated levels. It is accessible to all in a way that requires no skills. Whereas other tools like AVAide are more advanced, Google Picture Editor is practical for reasonably enhanced editing on all devices at anyone's disposal.

Our AI technology will automatically enhance the quality of your images, remove noise and fix blurry images online.
TRY NOW


