In this article, we will tackle the best ways to remove a watermark using Pixlr watermark remover. A tutorial on how to make a watermark using the same tool will be included to help users how to manage and create their watermarks. The steps given below will help you achieve the goal that you are imagining with the help of their powerful AI engines. Users can utilize AI features such as autofill, which helps them ease their workload. Learn how to use the tools included by reading the steps given below.
Part 1. How to Remove Watermark from Photo in Pixlr
Pixlr is an online tool that equips users with powerful image editing tools. This online tool has powerful features enabling users to experience AI tools' power, such as generative fill and AI face detectors. These features become handy when removing a watermark from a photo. With a neat and intuitive user interface, this tool is refreshing, moving away from standard photo editing interface layouts. Learn how to remove watermarks with Pixlr by following the instructions below.
Step 1The first step is to access the site; considering that you are already reading this article, you have already opened your browser. Create a new tab and input the site on the search bar or search Pixlr. You will be automatically redirected to the site.
Step 2After being redirected to the site, you will see the main interface and the Open AI Photo Editor and AI Image Generator buttons. Click the Open AI Photo Editor, and you will be redirected to another page where you edit your file.

Step 3After being redirected, it is time to import your image. Click the Open Image button. This will open the documents window where you can search through your files. Select and import your photo.
Step 4After importing your photos, you can start editing them. Click the AI Tools and select Generative Fill. Select a part you want to remove using the lasso tool and click Generate. After you have removed unnecessary watermarks, you can now click on Save to download your file.

Part 2. Best Alternative to Pixlr to Remove Watermark from Photo
AVAide Watermark Remover is also an online tool accessible from any device. It is built with a neat feature that lets users use a lasso free-handed or a shape to maximize efficiency. Users can also batch process with this application by editing another image after they finish the first photo. With such features, this app is very suitable for people who edit a lot or just any ordinary user, as it offers efficiency and consistency. Learn how to use the online tool by following the given steps below.
Step 1Access Site
The first step is to access the site by opening a new tab on your browser and searching for AVAide Watermark Remover. After searching, click on the first result, and you will be redirected to the site.
Step 2Import Files
After you have made it into the main interface, you can now start importing your files. To import your files, click on the Choose a Photo button. Clicking it will open a document window where you can search for the files you want to import. Select and import your files.
Step 3Edit Files
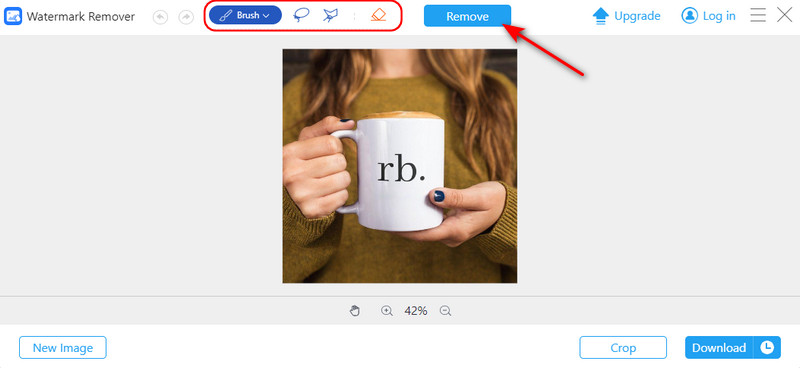
To edit the files, just highlight the logo you want to remove using the brush tool or the available lasso tools. After you have highlighted the logo, click on Remove to start the editing process. You will see the output of the removed logo after processing.

Step 4Save Files
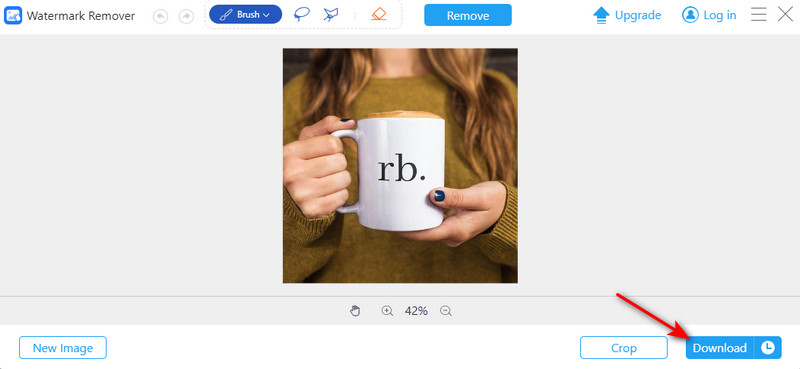
The last step after editing your files is to save them. Click on the Download button to save your file on your device. Your file will be saved in your download folder.

Part 3. How to Make a Watermark in Pixlr
Step 1Considering that you have already accessed the site. Click on Open AI Photo Editor. You will be redirected to another page where you can start importing your files.
Step 2 After being redirected, import your files by clicking the Open Image button. Clicking this button will open your document folder, where you can select and import your file.
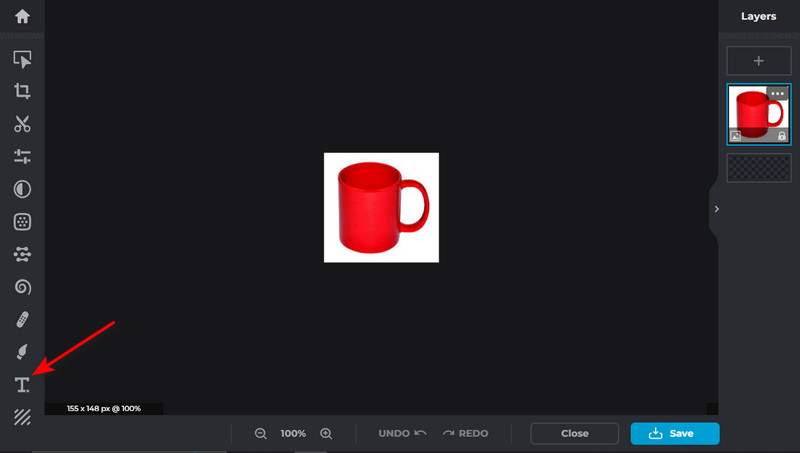
Step 3After importing the photo you want to edit with a watermark, you can start making a watermark. Just click on the Text button and make your watermark.

Step 4Save your file by clicking the Save button on the bottom-right corner of the tool interface. Your downloaded file will be saved in your download folder. With this powerful online tool, you can also remove an Instagram watermark and another more complicated object on your photo.

Part 4. FAQs about Removing Watermark with Pixlr
How can I remove a watermark from a picture?
To remove a watermark from a picture, you can use photo editing softwares such as Clone Stamp or Healing Brush tools and Content-Aware Fill in Adobe Photoshop, and you can also blur or use smudge tools to crop the image.
How do I make the background transparent in Pixlr?
To make the background transparent in Pixlr, you may use the Magic Wand Tool to select your background, delete it, and then save the image as a PNG file. You may also experiment using different selection tools there for optimal results.
Does Pixlr have a watermark?
No, Pixlr does not have a watermark on edited photos in its free version, but using its exclusive features from the paid version or Pixlr Pro may result in having a watermark or a small logo of Pixlr appearing in the corner of the edited image.
Does Pixlr support different file formats?
Yes, Pixlr does support different file formats such as PNG, JPEG, BMP, TIFF, and PSD. This versatility allows users to work with varieties or different types of images according to their wants or preferences and needs.
Is there a limit to the number of photos I can edit with Pixlr?
No, there is no limit to the number of photos you can edit with Pixlr. You can edit as many photos as you want or desire. Pixlr provides flexibility for users with various or different editing needs and projects.
After processing all of the information you have read, we hope that you have learned something new. If you have any queries regarding Pixlr, we recommend you redo all the steps so you will not have to search how to make a watermark in Pixlr.

Easily get rid of annoying watermarks and unwanted objects from your photos without quality loss.
TRY NOW


